I wanted to think outside of the box and do something different for Mood. I decided to create a simple, straight forward men’s casual t-shirt tutorial. There are a variety of women’s blogs on here, but I’m proud to introduce the first men’s tutorial. For this project I used a jersey knit fabric to insure stretchability and comfort. To add a little spunk to this simple t-shirt I added an optional pocket to place on the front of the shirt.

Items Needed:
Men’s t-shirt (for pattern)
2 yds. fabric
Matching thread
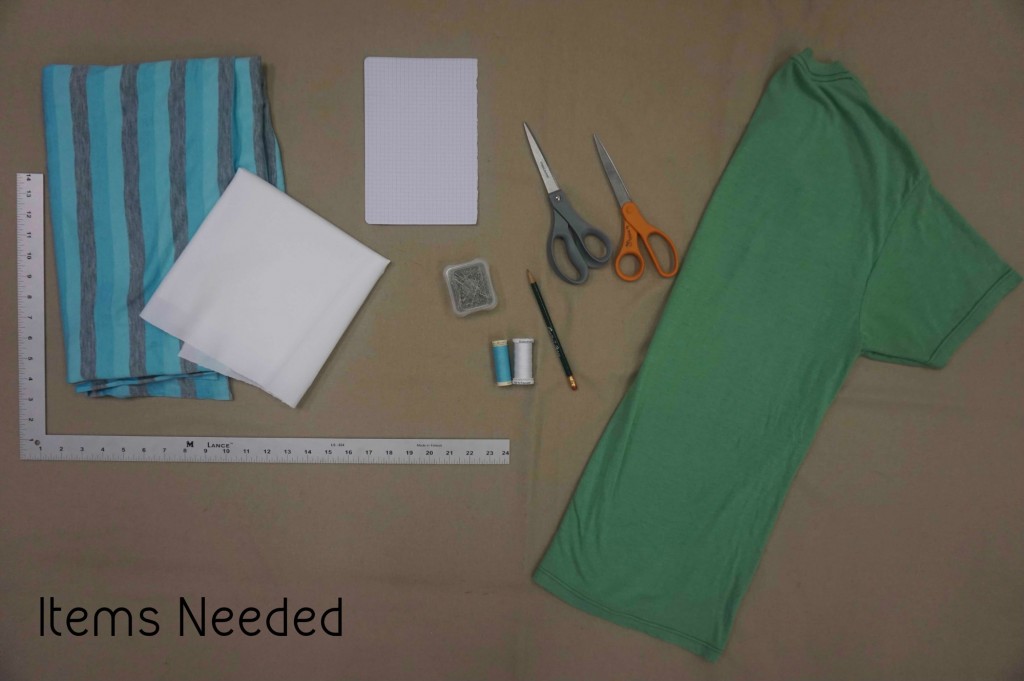
Pocket (Optional)
¼ yd. fabric
Matching thread
Paper
Scissors
Iron
Let’s Begin!
Fold 2 yards of fabric flat and lay the T-shirt you wish to trace on the fold of your fabric. Add 1” seam allowance to your pattern by measuring and pining where you want to cut. After you have cut this piece out, lay your cut piece on top of your folded fabric again and cut out another piece. You should now have 2 identical shirt sides (front & back).


Lay your 2 pieces right sides together and pin. Sew from the bottom of the sides up sewing continuously through the armpit stopping at the bottom of the sleeves.

Sew from the top of the sleeve to the top of the shoulder stopping at the neckline point.


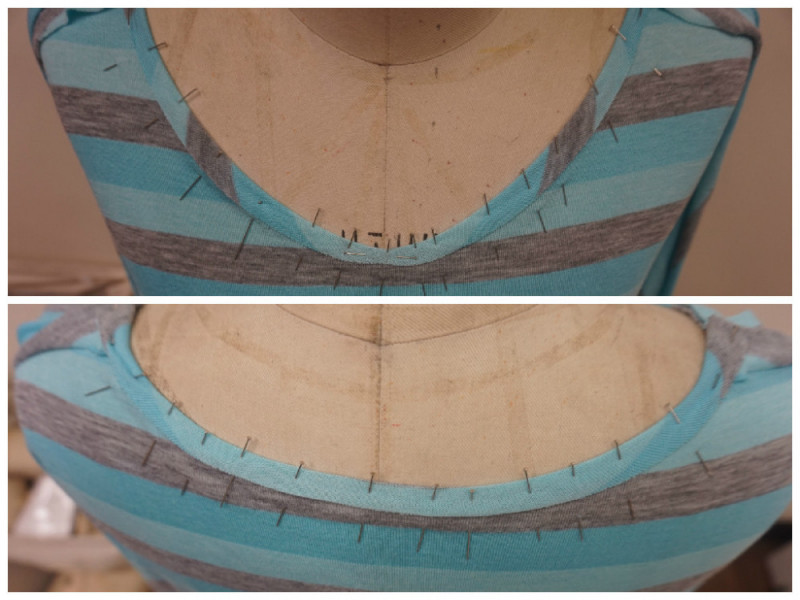
To create the neckline I folded my shirt in half to find the mid point. Mark that point and keep the shirt folded. Use a French curve ruler to create a neck curve. You can cut both layers because this is going to be the back of the shirt curve.

To create the front neckline, I decided to make mine a scoop neck, you can choose between a scoop neck or V-neck. Keep the mid point marked and begin to draw a scoop neck on each side. You can use the French ruler curve as a guide. Remember you need seam allowance on your neckline.

After you cut your front and back neckline create a ¼” seam allowance matching up the shoulders to your best ability. It is important to match the shoulder seams up with the neckline seams to insure a clean crisp look and to make sure the shirt lays flat.
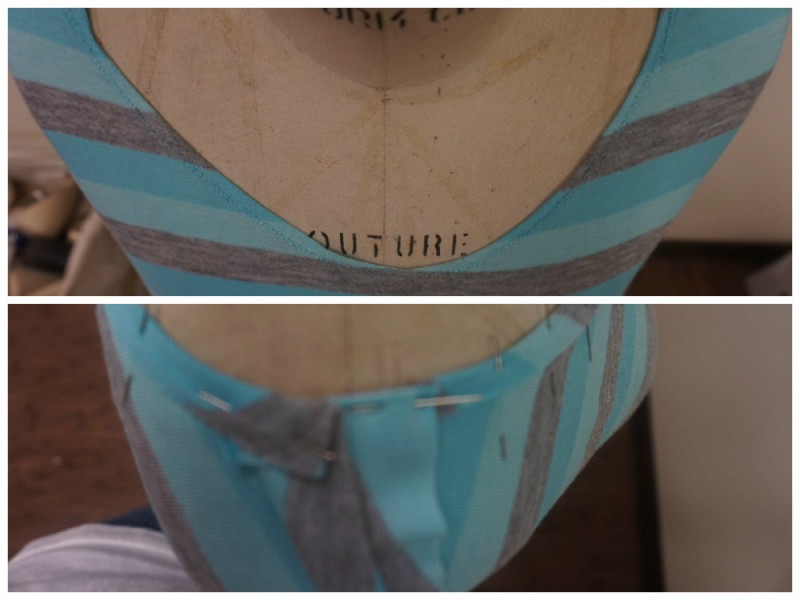
Hem the arm seams with a 1” seam allowance along with the bottom of the shirt.


Optional Pocket!
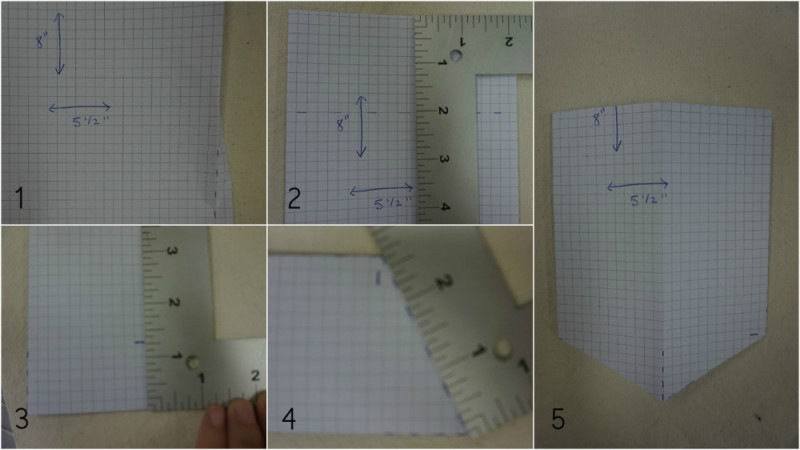
1) Measure out a piece of paper to be 8 inches long and 5 ½” wide.
- Measure ¼” on each side and fold them in.
2) Measure 2 inches down and fold on the 2” mark.
3) Fold the whole piece of paper in half to find the mid point for the V shape pocket.
4) Measure from the bottom up 1 1/8th ” (This will be where your V point meets)
- Cut from the mid point to the 1 1/8th mark with paper still folded.
Measure ¼” on the v shape for seam allowance.
5) You have now made the pattern for your pocket.
Unfold the paper and lay this on your fabric for the pocket. Trace with a pencil and cut.

1) Fold the 2” fold down and iron. Sew a straight line across where the fold meets the pocket.
2) Fold the ¼” edges in and iron, sew these as well.
3) Fold the ¼” V shape edges iron and sew. Make sure the side seams match up with the V seam to make it neat.

Pin the pocket where you would like it on the shirt. Sew from the sides leading down to the V. Leave the top open for a functional pocket or sew it shut.

This design is very versatile and can be altered to fit any size men or women’s ! Enjoy!

1 comment
I love this! Thanks for making it sew easy. I’m excited about not having to make a separate sleeve piece : )