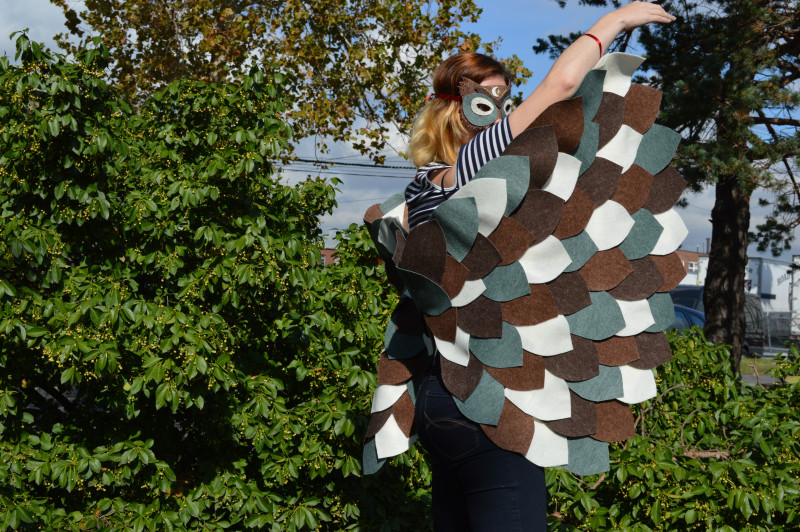
Want a cool and quick costume for you or a loved one? Ever thought of making an owl costume, dressed with a full set of wings that can be custom fit to any size for the wearer? Then look no further! This costume is great, because it really is so simple to make, and the final product comes out amazing. And probably my favorite part of this project is that you can use any colors, so you can make wings like these for other costumes, too!
This project uses felt wools to create a sturdy wingspan for your costume and mask. Wool felts are soft, have a solid look, and keep their shape, so they’re perfect for being made into shapes for costumes. And since they’re a thicker type of fabric, they hold hand stitches well, which means you don’t need a sewing machine for this project! For the best and most secure results, we went with embroidery floss. You can also use the embroidery floss to embellish your costume wings, too, but we mostly used it for the mask which we found an awesome tutorial for here!

Like what you see? Then let’s get started!
Here’s a list of what you’ll need:
Fabric
- 1 1/3 Yards Ivory Acrylic Felt
- 1/2 Yard Heathered Jungle Green Felted Wool Blend
- 1/2 Yard Heathered Brown Felted Wool Blend
- 1/2 Yard Heathered Dark Earth Brown Felted Wool Blend
Notions
- Dritz Size 5/10 Sharp Needles
- 3-Pack DMC Size 6 Embroidery Floss #814 Dark Garnet
- 3-Pack DMC Size 6 Embroidery Floss #745 Popcorn
- 1 Yard 3/8″ Wine Double Face French Satin Ribbon
- 1/2 Yard Elastic Cord
- Dritz Tailor’s Chalk
- Hem Tape
- A Sheet of Printer Paper
- Pencil
- 8″ Fiskars All-Purpose Scissors
- Iron
The first thing you’ll need to do is prep your fabrics for the wings. Take half (1/2) a yard of each of your felts and your printer paper, a pencil, tailor’s chalk, and scissors.
Fold the printer paper in half long-ways and draw out the shape you want your feathers to be. For ours, we made a 3″x5″ rectangle and trimmed one edge’s corners towards the center. Cut the template into the printer paper when it’s folded in order to keep it symmetrical. You only need one of these!
After you have your feather template made, start tracing the shape onto each of your 1/2 yards of felt. You need as many as you can cut out, so make sure to trace everything out first before you cut to ensure you’re using the space as well as possible. It’s best to keep the cuts close, like this:

You can also fold the piece of felt in half to speed up the cutting process!
After you’ve cut out all your pieces, put them to the side. Take the remaining amount of ivory felt you have and fold it so that the selvages are lined up together. Measure down the length of your arms from the center of your back and figure out how long you want your wings to be, (the ivory felt has a max width of 29″ when folded), and then down from the base of your neck to figure out how tall you want your wings to be. Once you know what size you want your wings to be (we went with 28″ for the wingspan width and 20″ for the height!), measure the height of your wings down the folded side of the fabric and mark where you need it to end. Do the same for the windspan length along the adjacent edge of the fabric. Mark where it should end. Now, from the mark for your wings’ height, draw a curved line to the mark you put for the wingspan’s length. Make sure the shape is to your liking before moving on!
Now it’s time to cut the wing bases out! This shape you just drew will be the base for your wings. Double-check that the fabric is lined up evenly before starting to cut. I first cut down the fold and then cut the curve I drew for the base. Trim anything you think you might need to to keep the shapes symmetrical.

After you cut this out, take them apart and lay them both out next to each other. Grab the feather pieces you cut out before and your hem tape. Lay out the colors of the feathers in an alternating pattern (or whatever you choose!) so you know how you want to organize your design. Next, cut out pieces of hem tape (about 2″ long each) and apply the first step of the hem tape onto the backs of the feather pieces. Each feather only needs one piece of hem tape.

After you’ve applied the first step for the hem tape, take off the paper from the other side of the hem tape and get to work on laying out your first row of pieces (like in the picture above) along the rounded edge of the wingspan. You need to start your first row on the curve in order for the feathers to overlap like a real wing’s feathers would! Remember the hem tap should be down against the wing base. Using your iron on a medium setting, press the iron down flat over where the hem tape is to melt the tape and attach the feathers to the wing base. You don’t need to leave the iron there long, but make sure to let the pieces and hem tape cool before moving them again! If you move them too early, the hem tape won’t adhere to the pieces.
Continuing working with these steps for each row, making sure to lay the next row over the one you finish before it. Once you’ve attached everything, the final product will look like this:

The wings are almost done! Now we need to attach the elastic and ribbon pieces which will help hold it onto your shoulders and wrists, respectively. Take this time to figure out where on your wings you want your elastic and ribbon straps to sit so they look both naturally fitting on your frame. For ours, we lined up the elastic with our model’s shoulder blades and the ribbon at the wrists.
You may need more or less elastic for your straps, so measure around the part of your shoulder where it connects to your torso–take that measurement and add 1″ to get the length you need for ONE of your elastic straps. Double this to get the amount you need total.
An important note: make sure when you sew these pieces on that they don’t show through the feathers! Try to work beneath them, or add these in before ironing down your feathers.
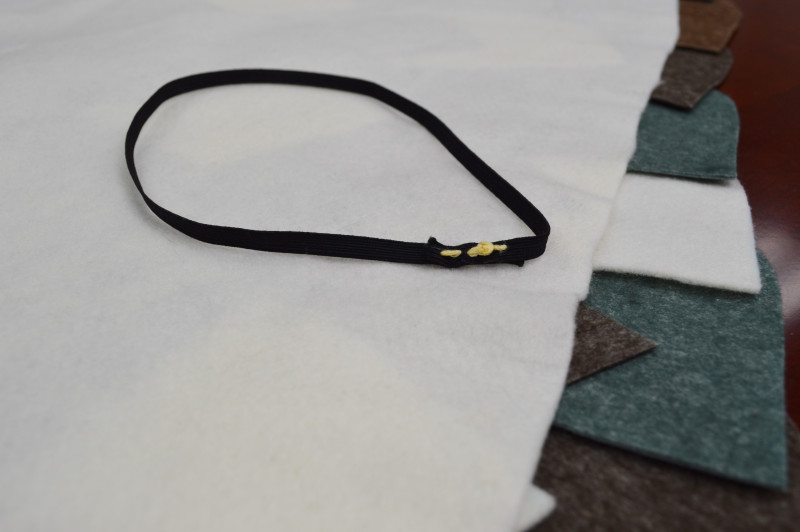
Once you’ve done this, take your elastic and cut it in half so you have one piece for each arm. For each piece, overlap the raw edges by one inch, so it makes a loop. Then, using your hand needle and yellow embroidery floss, sew the elastic onto the wing just along this overlapped inch. You don’t need more than that. Do the same on the other wing.

Next is the ribbon. The ribbon will be applied in a similar way but towards the other end of the wing. Measure the widest part of your hand instead of your wrist to see how much ribbon you need. You want to be able to slide your hand through the loop once it’s sewn on, after all! Once you have your ribbon, cut it in half like you did the elastic. Overlap the 1/2-1″ for the ribbon to make the loop and sew it down with the red embroidery floss.

The last thing needed for the wings is to sew a small part of them together at the middle. Lay the top corners of the wings over each other (where they would sit over the middle of your back, and use the yellow embroidery floss to sew a clean square where they overlap. You want this to be secure, but not too tight or it’ll look pinched. It’s okay if the thread shows here so long as you sew it through nicely!

And there you go! You have a pair of owl wings for your costume! Easy right? Could you use wings like these for other projects or costumes, too? What color schemes might look great for a design like this?