
With so many different types of zippers out there, it can be tricky figuring out which will work best for your project. But not to worry, you’ll be an expert in no time! Read on to learn everything you’ll need to know about zippers — from choosing the right material and length, to altering and inserting them into garments!
Types of Zippers:
Coil
- Lightweight
- Heat-resistant
- Rust-proof
- Nylon or polyester
Metal
- Aluminum, nickel, or brass
- Commonly found on jeans, purses, and pockets
Plastic
- Cheaper alternative to metal zippers
- Often seen on parkas and kids’ clothing
Invisible
- Similar to coil zippers
- Typically found on dresses and skirts
Inserting a Non-Invisible Zipper:
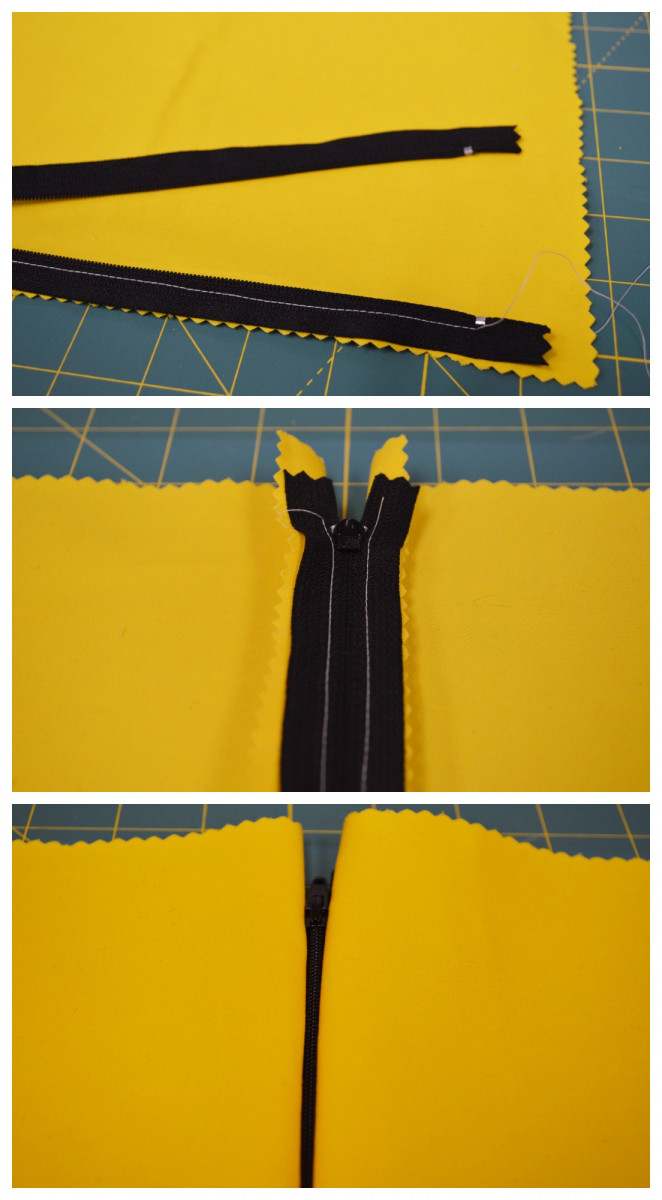
1. Lay the right edge of your zipper tape against the left raw edge of your fabric with right sides together. Straight-stitch.
2. Repeat with the opposite side.
3. Flip your fabric right-side up and iron.
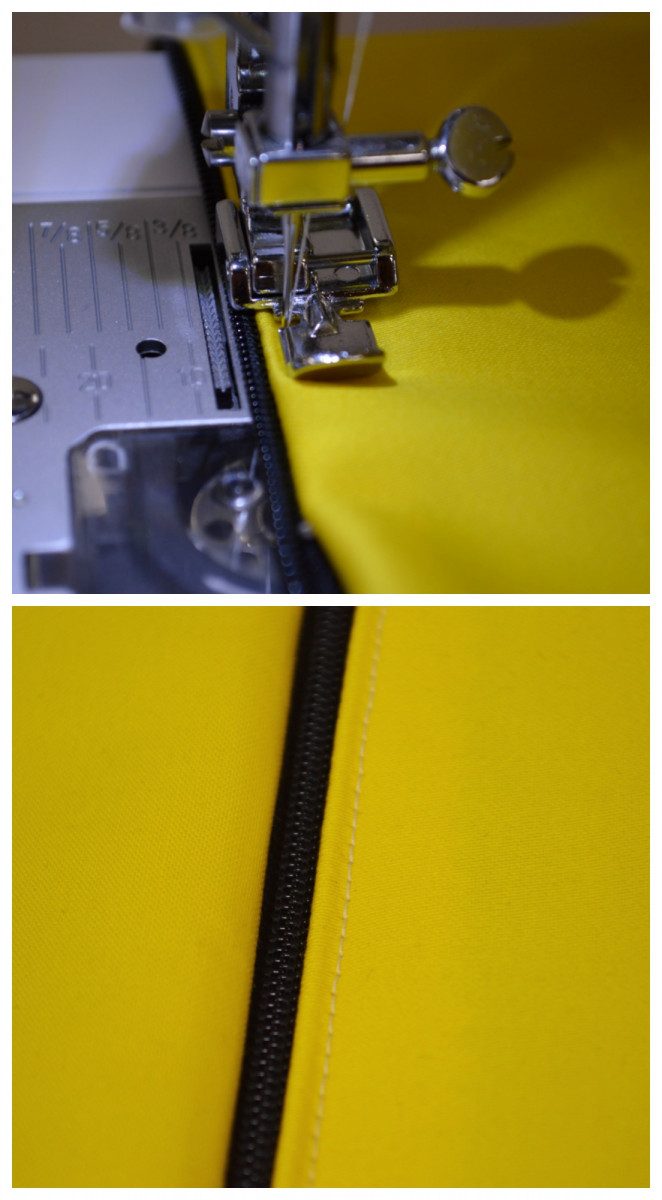
4. Use a zipper foot to top-stitch about a 1/4″ from the zipper teeth, like you see on the right side above. Without this top-stitching, the fabric can pull and rip.
Shortening a Zipper

Zippers come in all sorts of lengths and widths, but there will be times when you need to alter a zipper’s length. This is way less intimidating than it sounds!
The metal bar that keeps a zipper pull from going further down the tape is called a ‘stop.’ So if you’re making a zipper shorter, all you need to do it create your own stop by stitching around the teeth several times. Cut the tape about an inch below your new stop — any regular scissors should do the trick!
Oftentimes, having zipper tape against your skin can be pretty irritating. To remedy this, sew a couple inches of scrap fabric to the end of your zipper before adding it to your garment!
Inserting an Invisible Zipper
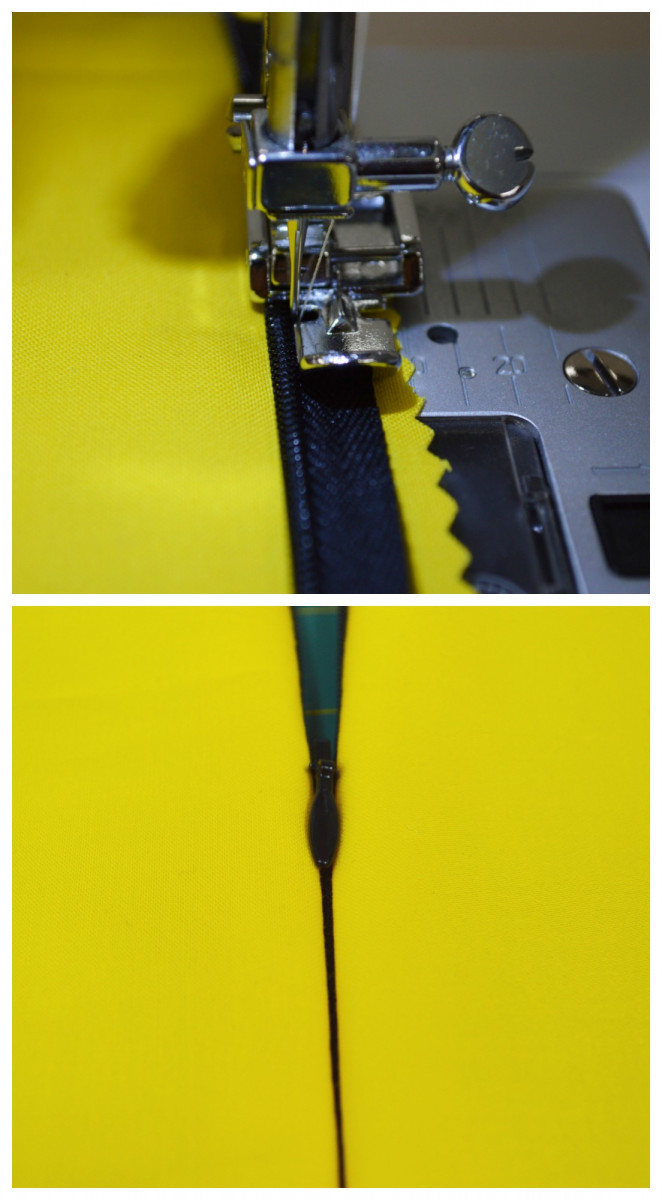
1. Locate your machines invisible zipper foot and attach it per your machine’s instructions.
2. Open your zipper and lie it face-down on the right side of your fabric, with the top stop about 3/4″ from the raw edge of your garment.
3. With the coil along the seam line, stitch close to the teeth until you reach the zipper pull, making sure to keep the coil within the groove of your zipper foot.
4. Repeat with opposite side of zipper.
5. Move the zipper pull upwards and out of the way to finish stitching toward the bottom of your invisible zipper.
6. Switch to a regular sewing foot, and finish seam. Sew less than an inch of tape at the bottom of your zipper into the seam.
9 comments
Can you please do a post on replacing a zipper pull and other zipper repairs? Thanks!
That’s a great idea! I’ll try to plan a follow-up. 🙂
[…] everything else was done, all I had to do was add in a zipper and it was good to […]
[…] adding the base, I attached the two panels to the zipper. Since I used a fairly long one, I shortened it about three inches from the vinyl and sewed a little cotton tag on the end so it wouldn’t […]
[…] Then, take your 9” invisible zipper and unzip it. With the skirt inside-out, pin the zipper to the opening we’ve been working around, right sides together. If you’re unfamiliar with sewing invisible zippers or zippers in general (like I was before this project!), follow this link here to our post about Zippers! […]
[…] hemming the top, install your zipper. If you don’t know how to install a zipper, click here to read our tutorial on how! Remember to line the very top of the zipper—not the teeth, the extra flaps—up with the top of […]
[…] You’ll have to trim the zipper a couple of inches, but if you work slowly and carefully, it’ll look great! (Don’t know how to install a zipper? Click here for our tutorial!) […]
[…] final step was to add a zipper (I had to shorten mine a bit), and top-stitch around the perimeter of the jacket, like you can see […]
[…] I just needed to insert my zipper. Really, I think making my jacket reversible was easier than making it normal. There were no […]