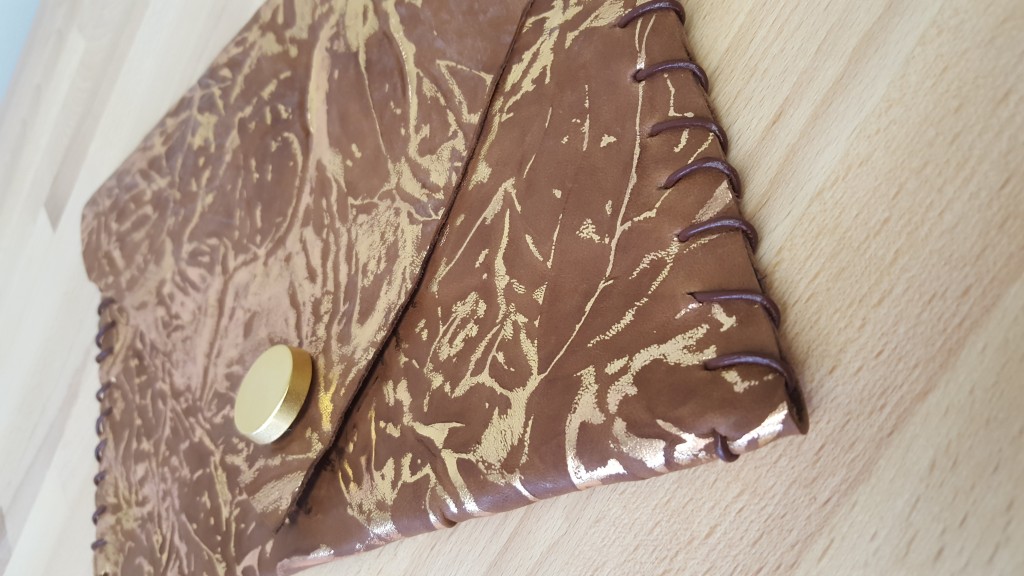
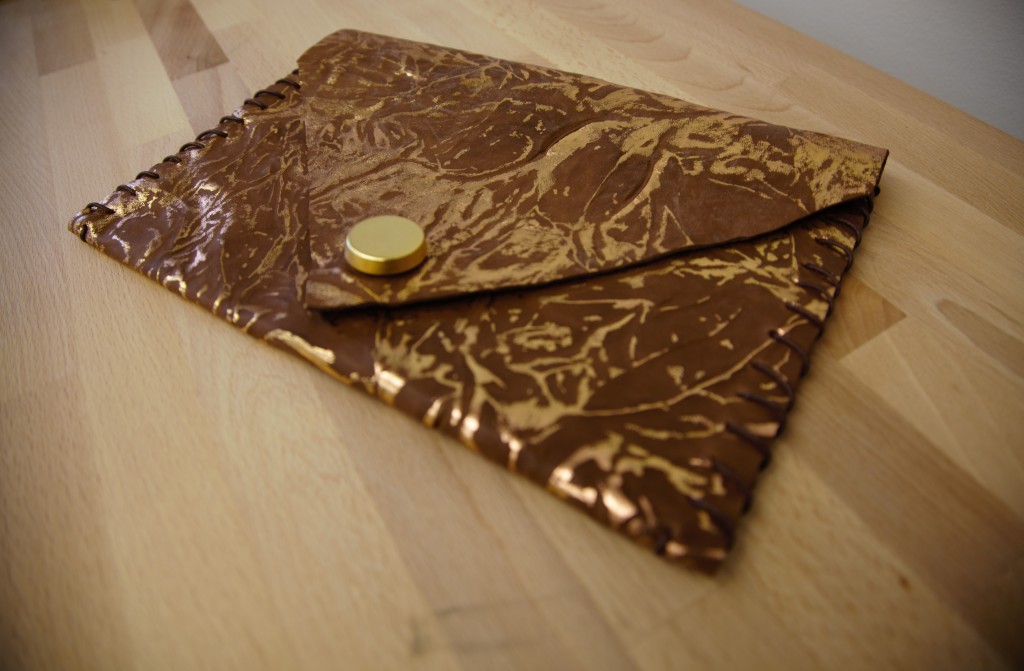
How often have you put together the perfect outfit, but totally hit a wall when none of your bags matched? With this 20-minute DIY project, you could have a unique clutch for every day of the week in less than 3 hours!
Items used:
- 1 Hide of Rose Gold Metallic Coated Goat Leather, Product #307774
- ¾” Gold Metallic Snap, Product #310797
- 2 yards of Brown Leather Cording, Product #309576
- 44L/28mm Gold Metal Coat Button, Product #15000
Miscellaneous materials:
- One sheet of printer paper
- Measuring tape or ruler
- Marking tool or pen
- Scissors
- Awl for puncturing leather

Steps:
- Lay your piece of leather, right side down.
- One the wrong side, trace your printer paper along three sides, leaving one long side open.
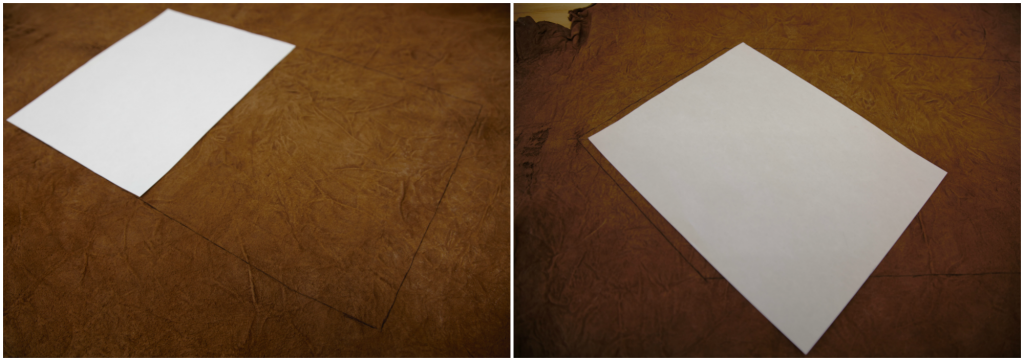
- Flip the paper along the long side and continue tracing the short sides. You should have the beginnings of a 17”x11” rectangle.
- At the open end of your rectangle, trace the corner of your printer paper, keeping the point centered. This will be the front flap or your clutch.
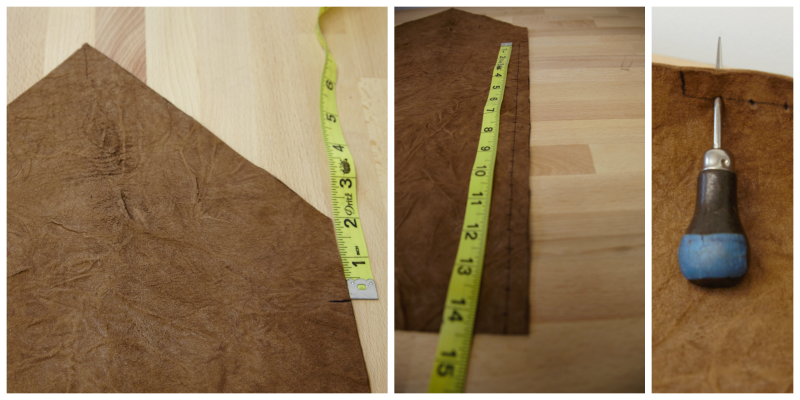
- Still on the wrong side, mark about 2” down from the front flap.
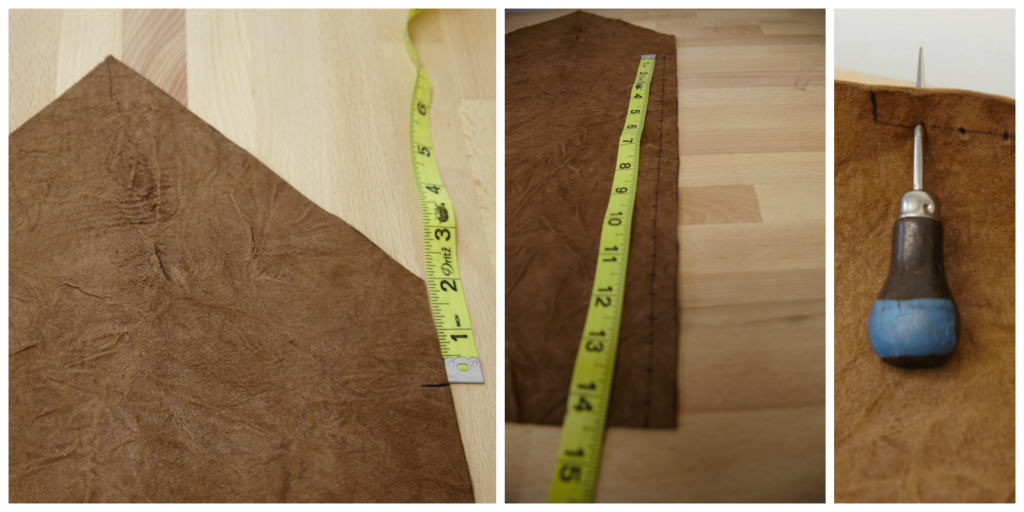
- Below that, mark every half inch down to the bottom, about a half inch from the edge of the leather.
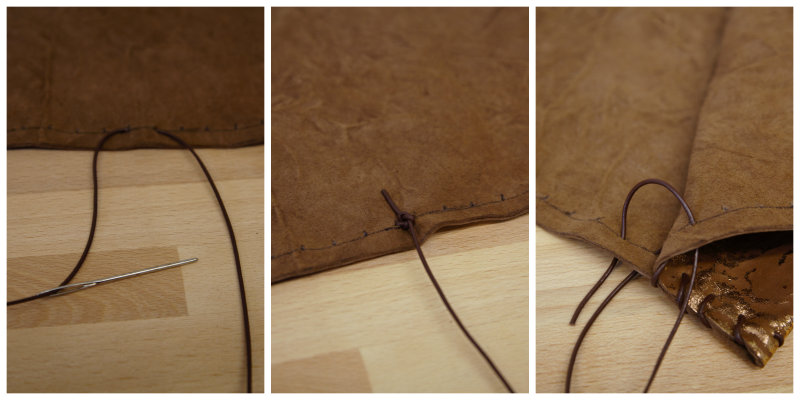
- Puncture the leather at these marking with your awl.
- Begin lacing up the sides and tie off the top.

- Repeat steps 5-8 on both sides.
- Attach your magnetic clasp to the front flap and front facing of clutch, being sure to line them up properly.
- Cover clasp with a button and show off your new, handmade clutch!

1 comment
Very cool DIY wallet