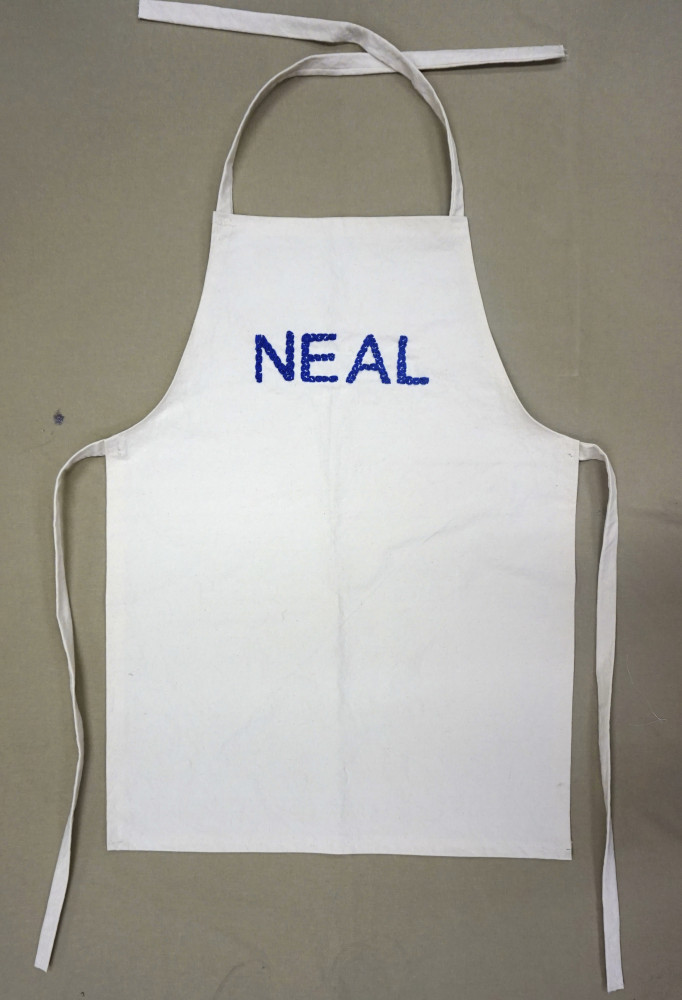
I can’t say this is true for all the other fathers out there, but my own dad considers himself a master in the art of grilling. He doesn’t discriminate either… Whether it is burgers, steak, chicken, you name it, he can cook it to perfection. With Father’s Day fast approaching, this gave me the fool proof idea to make him his own specialized grilling apron. Making an apron not only gives you the ability to customize it how you like, but makes the gift more meaningful in the end. Completing this project was the first time I have sewn something start to finish, so believe me when I say if you follow these simple steps, anyone can do this!
The grilling apron does not require many items to make, which makes it an incredibly affordable gift! For the fabric, I chose a medium-weight canvas that would be light enough to work with on a machine, but would still hold up to a lot of use. For the apron, I cut a yard and a half just to be safe and to ensure I would have enough fabric for the straps. I also chose a matching thread and a dark blue embroidery thread that was used to monogram the apron. I like the clean look of the egg-shell canvas, but don’t be afraid to change it up if your dad likes color! Other items I used for the project were scissors, pins, a tape measure, L square and ring buckles. A sewing machine is necessary to hem the fabric and to create and attach the straps. This is the first time I have made an apron, so although I did my research before starting, I discovered that I needed a few more things along the way. Not pictured here, I used a loop turner, embroidery needle, and french curve.

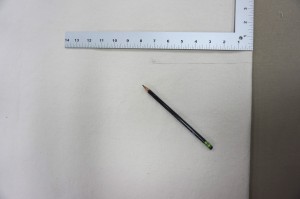
Step 1: Now it is time to start the project! The first step is to measure out your fabric for cutting. For measurements, I did 13″ for the top width, 24″ for the bottom width, 33″ for the length, and 23″ from the side to the bottom. Depending on the size of your dad, gauge the measurements to his best fit! The easiest way to cut the apron precisely is by folding it in half parallel to the selvage like the picture below. To mark the fabric properly, add two inches to every length so that it has an inch on each side for sewing. Once that is done, measure out half the measurements as the fabric is doubled over. My final markings were, 7.5″, 26″, 35″ and 25″.
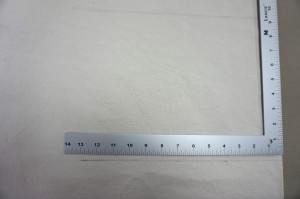
Here you can see both of my widths marked with the L square.

Here you can see the lengths measured out.
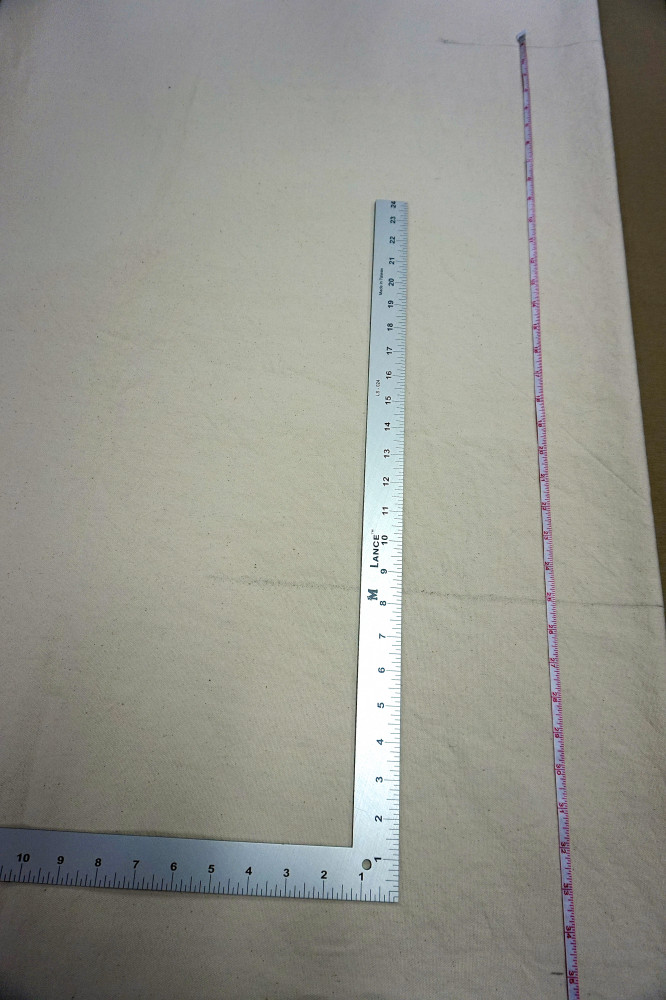
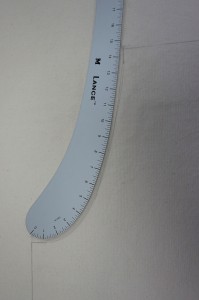
The hardest line will be the curved one that goes under the arm. I used a french curve that will make it very easy. As you can see in the picture, draw one inch in from both ends and the place the round side of ther ruler at the deeper part of the arm hole, matching up with the one inch lines.

Step 2: Once your lines are marked,it is time to start cutting! If you do not have a pair of sharp fabric scissors, I would recommend investing in a pair. With this thicker fabric, you will want very clean lines which will be hard to achieve with regular household scissors. Being a woven, your fabric might fray some but do not stress about it because it will be hemmed. To make sure that the canvas pieces do not move apart from each other, place pins throughout to keep them together.


The finished cut piece!
Step 3: Next open up your cut piece and iron it so that any creases are taken out. You will want to keep an iron handy throughout the project! It is time to pin your edges for sewing. Measure one inch around all of the straight edges and pin the fabric in. The canvas is thick, so I would definitely use an iron on your edges to make them stick. It will make your sewing cleaner and easier!


Step 4: Now the fun part….sewing! If you are anything like me this was more intimidating than fun, but it turned out to be much easier than expected! Sewing is all about the prep work so as long as your fabric is well ironed and your bobbin and thread are properly wound, it is simple! I also used a zig zag stitch to add a little more detail!


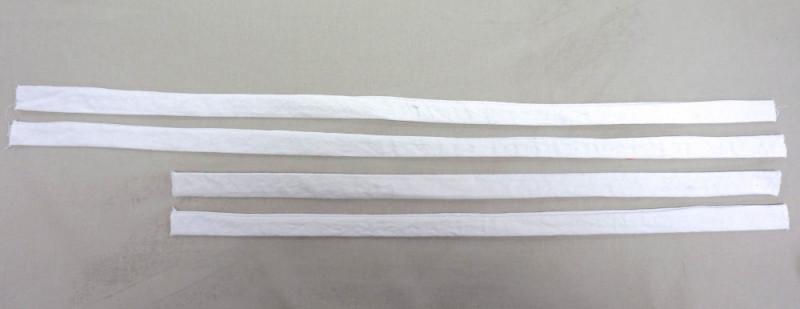
Step 5: Creating straps for the apron is the next step. I cut out four pieces of fabric in 24″ and 30″ that will be used for the neck and waist. On my apron I did not attach the buckle rings, but if you have time I think it will look even nicer! To create straps with no lines, cut your pieces 2.5″ wide and sew them in half with a quarter inch stitch. Trim the extra fabric on the other side of the stitch and you’re left with two sides 1″ wide. Once this is done, use the loop pull the turn the strap inside out. Iron the straps flat for a clean look and it is time to attach them! I placed them on the corners with a simple X stitch. Do not worry if your canvas frays like mine did, all of the extra strings will be in the inside of the straps at the end!

The straps before sewing.

With a quarter inch stitch.
Trimmed and turned inside out.

The loop pull.
Step 6:The final step is to decorate your grilling apron. Depending on your age, there are a ton of different options. I used embroidery thread and a stencil made from printing paper to embroider my dad’s name onto his apron. The thread will be on the website soon and was very easy to do! It is time consuming but ended up with more character than if it was just monogrammed. If you are helping your small children make this, now is the time where they can get involved! I love the idea of using their hand prints across the chest of the apron and writing dad’s name in them.


Of course there are many different ways to customize your grilling apron. I would recommend finding a blue stripe or patterned twill that could be added to the bottom for pockets to hold grilling spices or tongs. You could even make the straps striped to really add a lot of detail.
Goodluck with your own apron and please comment with pictures of your finished product so we can see all of your great gifts! I found my own dad’s look alike in New York and had him model the finished product. Of course Tom was a good sport about it! Don’t forget Father’s Day is Sunday, June 21st!!


Sincerely,
Sarah McConnico