
Mood DIY: How to Make a Giant Bow
The big holidays and celebrations are coming up soon and fast, and you know what that means! It’s time for bows and ribbons! I love decorating for seasons, and learning new ways to work with ribbon has made me even more enthusiastic for the cause. One of my favorite bows to see are those big, gathered, looping bows that they always show in car commercials. They’re a great decorative choice since they always look so full and grand. You can make them any size.
And what’s great is that, even though this type of bow seems complicated, it actually takes little time to put together. Here’s what you’ll need:
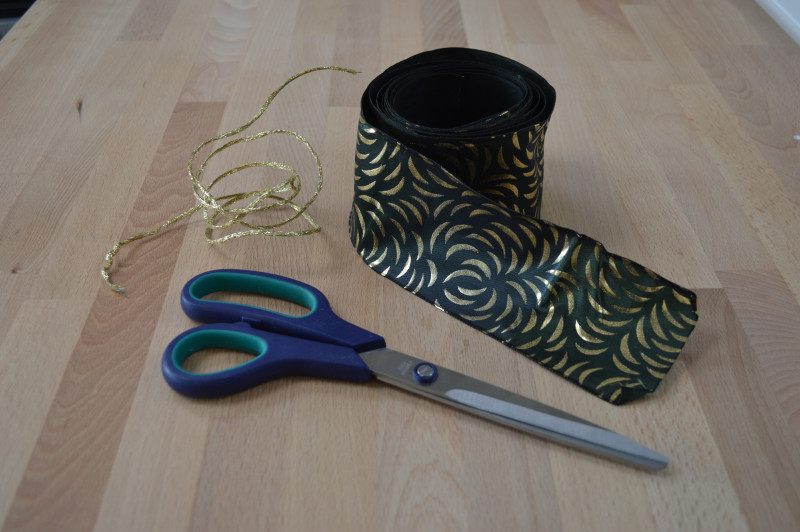
Materials
Wide Ribbon | 2.75” French Green Metallic Gold Wired Edge Ribbon—3 yards (Item #311945)
Ribbon or Floral Wire | Gold Metallic Wire Cord—1 yard (Item #17778)
Scissors
For this bow, I used wired ribbon, but you don’t need to use wired ribbon. However, the bigger the bow, the wider the width you’ll want to work with.
Tutorial Starts Here!

To begin, hold your ribbon with the wrong side facing towards you and curl the edge of the ribbon towards you. Tuck the edge underneath this loop. This loop is going to be the center of the bow.

From here, fold and twist the ribbon underneath the loop so that the right side of the ribbon faces towards you. Make sure to hide the twist underneath the first loop.

Next, fold the ribbon below the first loop to start the second layer. From the picture above, the center loop will rest on that fold, so that it looks like this:

You will have to twist and fold the ribbon again to make the right side stay visible for the other half of this second layer. It should look like this when you have a full layer completed:
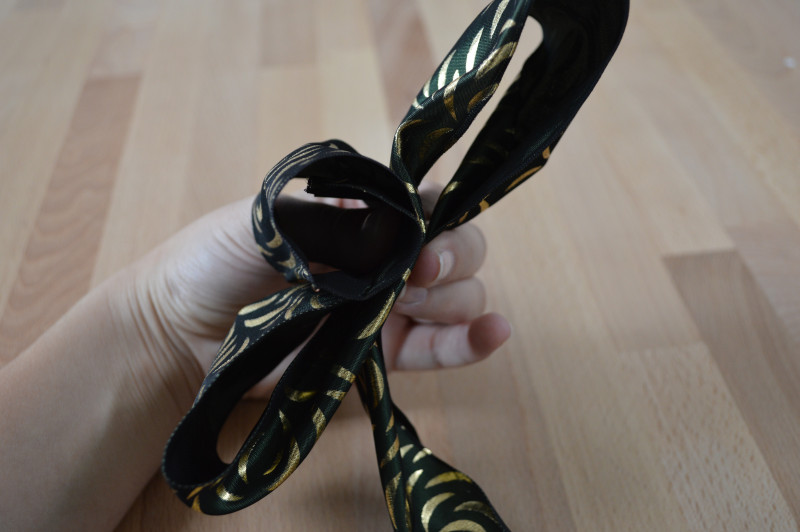
Using these steps, repeat until you have 3-5 layers of loops. To ensure that your loops are equal in length, you can hook your finger into each of the loops (on a layer) and press your fingers together. If one is longer or shorter than the other, pull the loops gently until they’re even. Make sure not to make the loops too big, though.

I went with three layers for mine.

Your bow will be a “straight line” of loops once you have as many layers as you’d like
It’s important that you do not use the entire 3 yards of fabric to make loops for your bow! Leave about a yard of your ribbon hanging from your loops. We will be using this as the two tails for the ribbon, but not right now.

From here, you’ll need to take your ribbon or floral wire and feed it through the center loop. Fold it towards the back, but don’t twist it closed just yet.

Flip your bow over, still pinching the middle to keep the pieces and wire together, and turn and fold the tail end of your bow so that it’s perpendicular to your loop layers and the right side of the fabric faces front with the rest of the bow.

Now you can go ahead and twist the wire closed, but do not trim it yet!
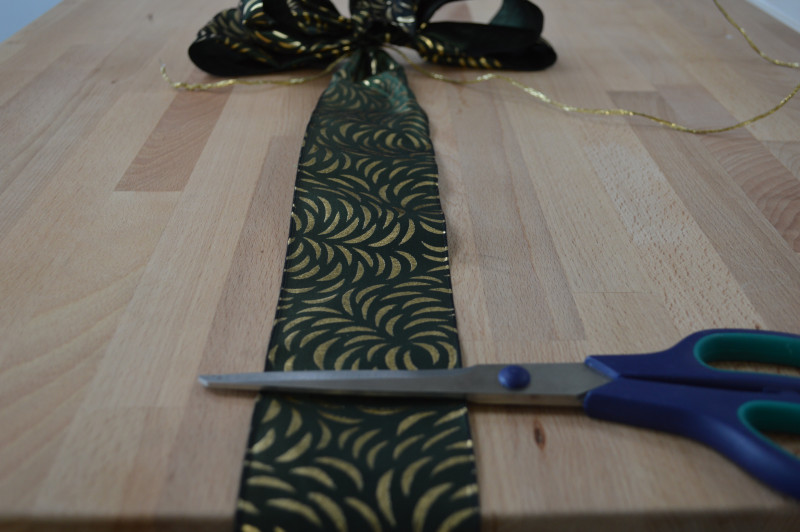
Instead, trim the tail end of your bow to length you’d like it to be. This will be the first tail for the bow. I trimmed my bow to where the scissors are laying in the photo. You can cut the ribbon so the edge is squared off or at an angle. I went with an angle.
Now, with that extra piece of ribbon left from trimming the first tail, slide it through the center loop of your bow, making sure the right side of the bow is facing out and showing.

Pull the ribbon through until the edge is about as long as loops of your bow.
From here, you need to take your wire again and feed both ends through the center loop and around to the back again. Flip your bow over and twist the wire closed tightly to help secure this new piece of ribbon we just slid through the center loop.

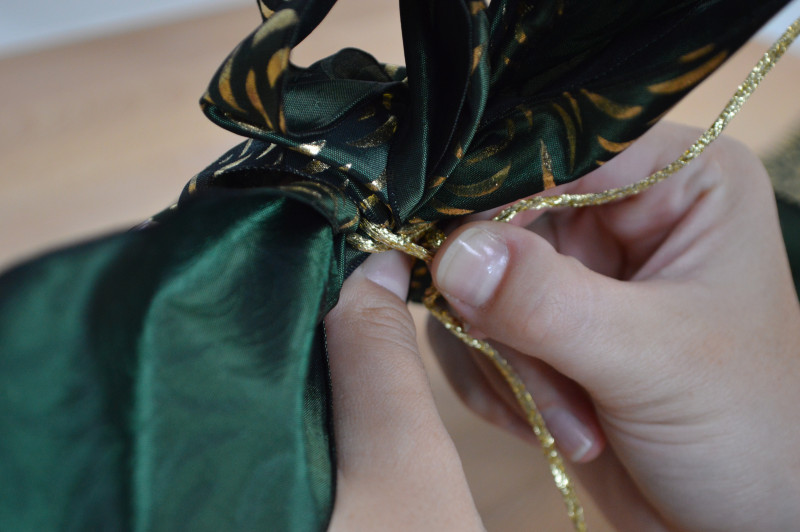

Once your wire is tight and secure, trim the ends with your scissors and flatten the trimmed wires against the underside of the bow.

After, turn your bow back over and adjust the length of the newly added second tail piece to make sure the small tail at the top is the same length as the bow’s loops. Then, take your scissors again and trim the end of the second tail to match the length of the first one.
Lastly, adjust your bow’s loops into a circular shape if you’d like and fluff the loops’ shapes a bit to look fuller and bigger. I decided that this bow looked nicer with the straight ends instead of the circular shape, but you could do either!

And now it’s done!
What kinds of things would you like to decorate with these types of bows? There are plenty of holidays and occasions besides Christmas to use a bow for, so experiment and go wild! You could even make strips of fabric to use for making a bow like this, too! Like a dress, a coat maybe? What do you think would look best with it? The options are limitless.
Save
Save
Save
Save
Save
Save
Save
Save
Save