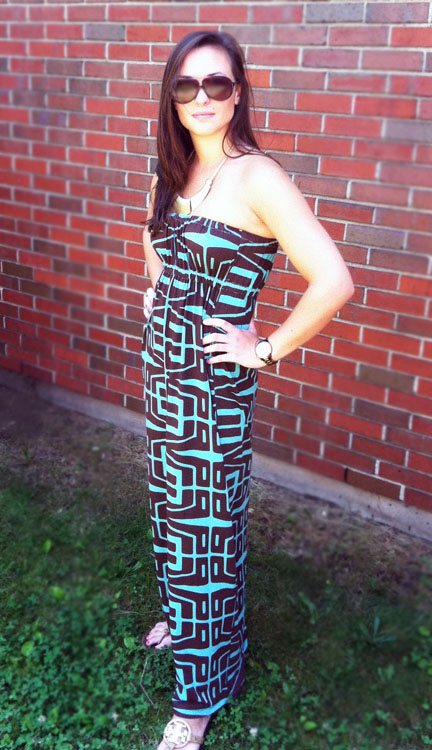
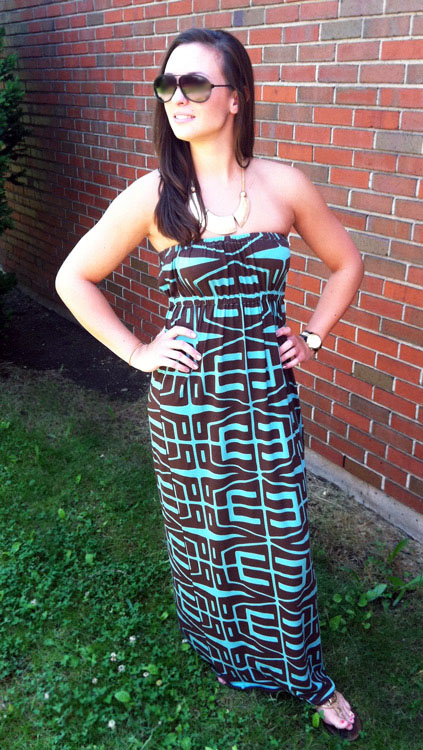
Maxi dresses and skirts are everywhere this summer. If you own a measuring tape you can whip up this strapless maxi dress in an evening—no pattern necessary. Just follow these simple steps:
Supplies:
- Fabric: Jersey knits (shown in the photos here), lightweight cottons, and lightweight silks work best. Just make sure your fabric isn’t too sheer, or else you’ll have to line it.
- Elastic: Width of elastic is your preference, but keep it under one inch for best results. I like 3/4″ wide myself. Get enough to go around the top of your bustline and just under your bustline if you’re doing an empire waist, or around your waist.
- Thread and bias tape (or anything that can serve as a casing for the elastic, like ribbon or strip of fabric)
Steps:
• Measure yourself around at your widest part, be it your hips, bust or waist. You want your dress to have some ease and movement at all points. Let’s use 36″ as an example.
• Think about how much volume you want your dress to have. By volume, I mean do you want loose or tight gathers around the bust area? Slender column or peasant dress? Just remember to allow ample movement when you’re walking, so don’t go too slender of a column.
• Multiply your number by anywhere from 1.75 to 2.5 to get the total circumference of your dress with gathers. For example, 36″ x 1.75 = 63″. Now divide that number in half to determine how wide to cut each panel. In this example we are using here, cut two panels that are 32″ each (round up in the case of fractions).
• Now determine how long you need to cut each panel. Measure from the top of the bustline to the floor, then add 2 inches for the top and three inches for the hem. That sounds like a lot but better to have more fabric than less. For example, if your top-of-bustline to floor measurement is 50″, your panel cut length is 55″ (50″ + 2″ + 3″ = 55″). Each panel in our example will be 32″ wide by 55″ long.
• Cut your two panels on the lengthwise grain, paying attention to your fabric’s design if it has one. For example, with this maxi dress I made the fabric’s ethnic design reads in columns. So I made sure to center the front and back panels along these columns.
• Stitch front and back panels together, right sides together. Try on: See how it fits around your widest part. If you like the fit, go ahead and finish your seams.
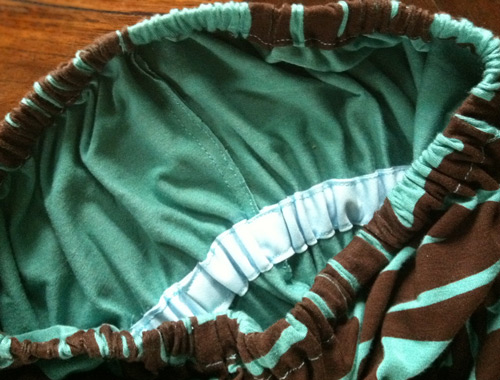
• Top casing: How much you turn down and press the top edge will depend on the width of your elastic. For example, if your elastic is 3/4″ wide, turn down one inch and press; turn this down again another inch and press.
• Stitch close to the turned edge to form a casing, leaving a two-inch opening. Insert the elastic (cut a piece of elastic the length of which fits snugly around the top of your bustline) into the casing and pin the ends of the elastic together with a safety pin. Try on for fit; then overlap the ends of the elastic and securely stitch them together. Stitch the opening of the casing closed.
• Add a casing, empire waist or at the waistline. (Both are treated exactly the same.) Try on the dress again now that the top casing with elastic is in place. Mark with chalk or pins where you want to place the empire or waist casing. Take off dress and use a basting stitch to mark where the casing will be stitched. Place bias tape (wide enough for your elastic) atop or along the basting stitches and stitch close to the edges of the bias tape, leaving an opening to insert the elastic. Insert the elastic (cut a piece of elastic the length of which fits snugly under your lower bustline for an empire waist or around your waist) into the casing and pin the ends of the elastic together with a safety pin. Try on for fit; then overlap the ends of the elastic and securely stitch them together. Stitch the opening of the casing closed.
• Hem: Maxi hems take a lot of abuse, so sew a hem that isn’t likely to come undone the moment you accidentally step on your dress or skirt. For the jersey maxi I made here I just sewed a simple narrow hem. If you like a wider hem, press the hem edge under 1/4″ , then turn up again anywhere from 1.5″ to 3″ and press, depending on how much hem you have available. Machine stitch in place for durability.
• Try on finished dress and admire!

It may seem like a lot of steps but this dress goes together fast—it’s basically a modification of that elastic-waist skirt you made when you were first learning to sew. Have you made a maxi dress for the summer? Did you use a pattern or wing it like I did here? Do tell….


13 comments
I love this dress. Ive made a few already but not with an empire waist…love it! Thanks!
I llike it…but I would need straps so I could wear it to work. I wonder…..hmmmmm maybe I could sew straps to the top… I will have to think about it…but it is fun to make quick items
Im gonna have to give this tutorial a go! I have a very similar print jersey in a similar colour, which I bought because it was pretty, instead of thinking about pattern matching issues with a large linear print. A simple dress like this would be perfect precisely because it is so simple.
Awesome tutorial! I’ve been wanting to make a woven maxi– thanks for the inspiration!
Great tutorial! I don’t usually sew with jersey – but I will try this time and make quick beach dresses for my daughters )
Great looking dress, and looks wonderful on the model! Great tutorial!
[…] 2. Maxi dress (no pattern, just a rectangle with elastic casings) a la what Meg just sewed. […]
The dress and tutorial are great.
Beautiful. Would you mind telling me what kind of needle and thread you used and if it’s just a regular straight stitch on the jersey?
Carole, I used a ballpoint needles specifically for knit fabrics plus regular Guttermann poly thread. I used a regular straight stitch on this–none of the seams take much stress so that stitch worked fine. I have to admit I don’t get too fussy with my knit sewing, and I especially didn’t with this dress.
The dress is really cute. I can’t wait to try to make one of these.
very pretty dress on a very pretty model.
Thanks, Robin!