Autumn is here, and that means it’s time to break out the pea coats! Known for their sturdy outside and a silky satin inside, the ever-trendy double-breasted pea coat is a beloved staple of the fashion world. The look is usually topped off with a set of buttons, and they give off a mature yet fierce look for all who wear them.
Muted colors go great with this style, and you can decorate them with embellished buttons or more reserved ones–both look will look fantastic! This particular pea coat was made using a pattern from Butterick, Pattern #B5685. Its design sports a high waist, an over-sized collar, 3 different lengths to work with, pockets, and a 4-button closure. It’s best made with fabrics like lightweight woolens, lightweight tweeds, and poplins. We made ours with wool coating!
Here’s a full list of the materials used to make this jacket:
Materials List
2 3/4 YDs of Marc Jacobs Double Cloth Black Wool Coating
2 YDs of Ivory Stretch Polyester Satin
Dritz 250 Long White Ball Pins
10 Black 250m Gutermann Sew All Thread (for sewing and top-stitching the coating)
20 White 500m Gutermann Sew All Thread (for sewing lining)
White/Black Plastic Button – 40L/25mm
Butterick Pattern #B5685: Misses’ Double-Breasted Jacket and Coat
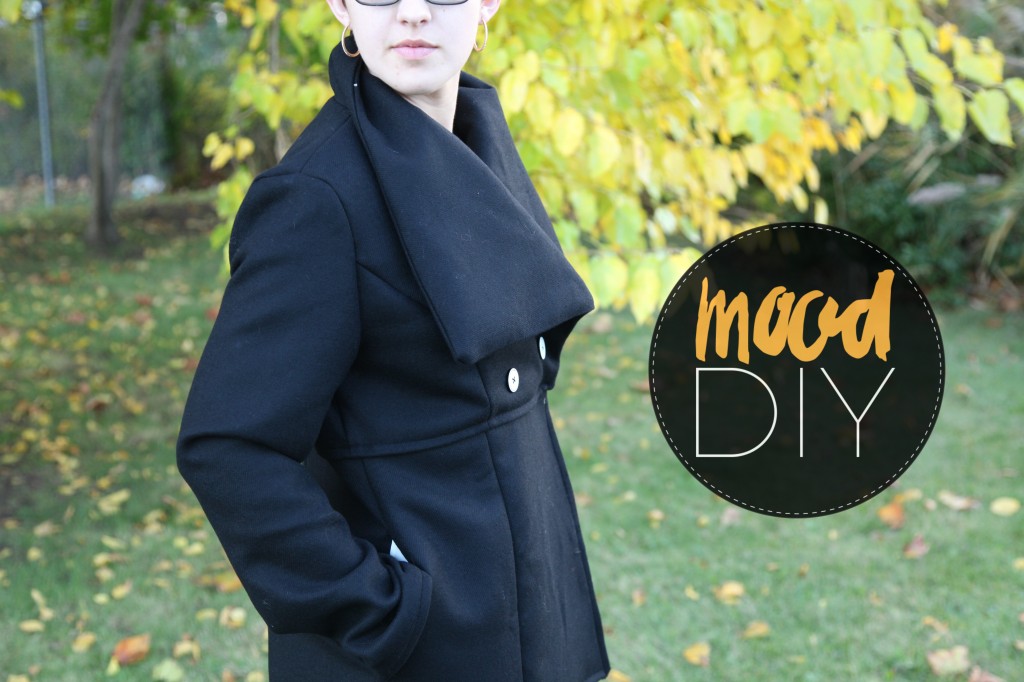
The fabrics used to make this coat include a double cloth black wool coating by March Jacobs for the main fabric and an ivory stretch poly-satin for the lining. We chose this wool coating because pea coats tend to be made with a nice, thick fabric, and we wanted to replicate that. A thicker fabric is the sensible route for coats like this, and it’s so worth it when the garment is completed; the quality really shows, both in construction and style! Pea coats are also winter garment and should be constructed as such if you intend to wear it for the colder seasons (though there’s no harm in going with a lighter fabric when it’s warmer!). This wool coating has a soft exterior, a tough, tight weave, and a slight one-way stretch. The subtle diagonal is very easy on the eyes, too.
The poly-satin lining has a gorgeous sheen, and it’s so soft to the touch. The coat fits nice and loose without being over-sized (save for that collar!) and it’s incredibly comfortable to wear. The extra room provided by the pattern allows for easy layering for completing an entire ensemble, and perhaps the best part is the stretch of the lining—it doesn’t feel constricting when you wear it!

This wool coating turned out great for this jacket! The contrast between the coating and the satin lining looks astonishing.

The sharp angle of the collar is striking as well, and it will give a nice squared shape to your top silhouette. The buttons work together with the collar’s design to pull this off.
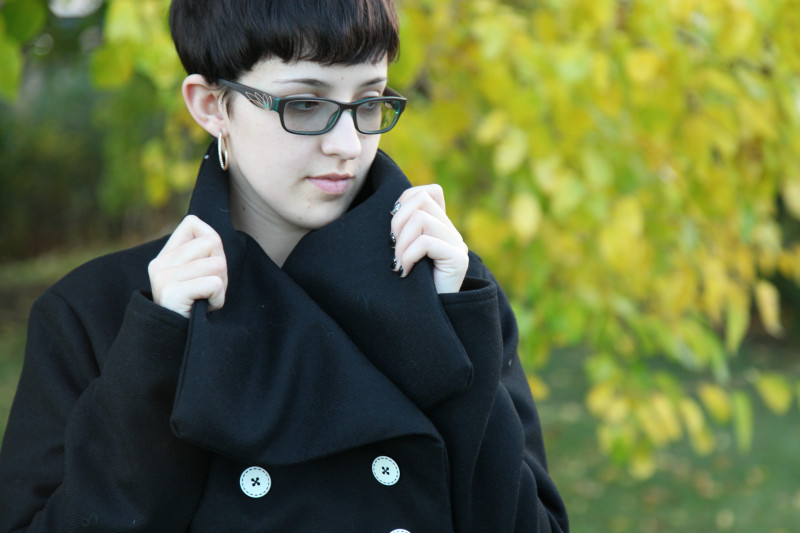
You can flip the collar up while still maintaining its shape, too!

And the princess cut of the bodice frames nicely. With the addition of the longer sleeves, this coat is pretty irresistible!
If you’re looking to add a little something to your design of this jacket, considering using faux fur trim around the sleeve cuffs or the wide collar! You could use any kind of large buttons on the front too, or maybe even add a hood! There are plenty of ways to spice this look up!
There are a few things to keep in mind when constructing a coat or garment with thicker fabrics and lots of layers like this one:
One is to invest in denim sewing machine needles. Thicker fabric is more work for your sewing machine, and when you have to work with as many layers as a pattern like this calls for, it can be very easy to break a needle if it’s not well-suited for thicker fabrics (regular universal needles have a higher chance of snapping!) We recommend these:
Style 2026 100/16 Singer Pins & Needles
Another tip is to definitely make use of your tailor’s chalk. If you’re working with any lighter-colored fabrics, go with the blue chalk, and make the time to mark all of the spots the pattern tells you to. The pattern can be overwhelming if you’re below mid-level sewing skills, but having the markings make the pattern much clearer and the garment puts together fairly easily because of them!
A word of caution for the poly-satin: this may be obvious, but the satin is pretty slippery. It will slide around under your presser foot, so go the extra mile and pin a little more. Keep that satin from sliding around! Especially with the pockets and the sleeve linings, add a few more pins to help keep the pattern pieces stable as you sew. You’ll thank yourself later!
Lastly, when you’re sewing a lot of layers together (like when attaching the collar to the bodice or the bodice to the lower half of the jacket), DON’T RUSH; SEW SLOWLY. Use the sewing machine wheel manually to go over areas that are piled high with layers or bumps, too! This can save you from breaking a needle! Take your time and work carefully. This goes for any level seamstress.
And there you have it! We look forward to seeing your versions of this design and comments about how it went! Let us know: Have you made a pea coat before? Do you have any extra tips to share for making them?
3 comments
This is a delightful coat. Thank you for the tips and suggestions.
I love this, but the pattern is out of print? Can I get from Mood?
Thanks for the double breasted pea coat. I do think that a double breasted pea coat is good for anyone who wants to bear a pea coat…….. I mean a pea coat means double breasted pea coat only.