
Designed specifically to showcase the 4-ply silk crepe and coordinating silk chiffon, this gown is fairly quick and simple to sew. There are a couple of seam finishes that you can use– we used French seams, but seam binding or a serger will probably work better with less bulk. This silhouette is the perfect thing to make you feel stunning and powerful at your next formal occasion. Try a fun pastel for a more day-time wedding look, or a sophisticated darker shade to bring this pattern into autumn.

The crepe will fray quickly if you don’t finish the seams. The armholes and neck binding are done by stitching in the ditch, there are baby hems on both the gown and the attached capelet, and the appliques are sewn on last.

Fabrics & materials used:
- 3-6 yards Black Silk Wide 4-ply Crepe (see cutting instructions for details)
- 2 yards Black Silk Wide Chiffon
- 2 yards Raven Hand Dyed Silk Ribbon (for binding)
- 24″ Invisible Zipper
- 4 Gunmetal Light Blue Beaded Rhinestone Appliques
- Gutermann Silk Thread
- MDF057 – The Solandra Gown Sewing Pattern (free download below!)
All seam allowances are 1/2″ unless otherwise stated. See chart below for sizing specifications. Note, this specific pattern is available up to a size 30.
You will need the following tools:
- an iron
- tailor’s ham
- rotary cutter and mat
- microtex sewing machine needles
- zipper sewing machine foot
And the following measurements:
- shoulder width
- bust
- underbust
- waist
- hip
- neck to waist
- shoulder to apex
- apex to waist
- apex to apex
- shoulder to floor
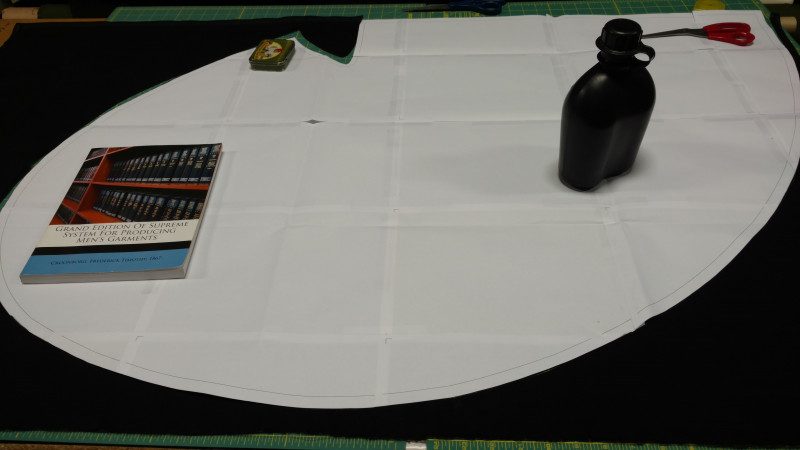
Cutting
Check your measurements against the pattern measurements. This dress should fit at the shoulders and hips, but be loose enough to drape through the chest and waist. If you’re uncertain about anything, do a mockup out of cheaper material before you cut your silk.
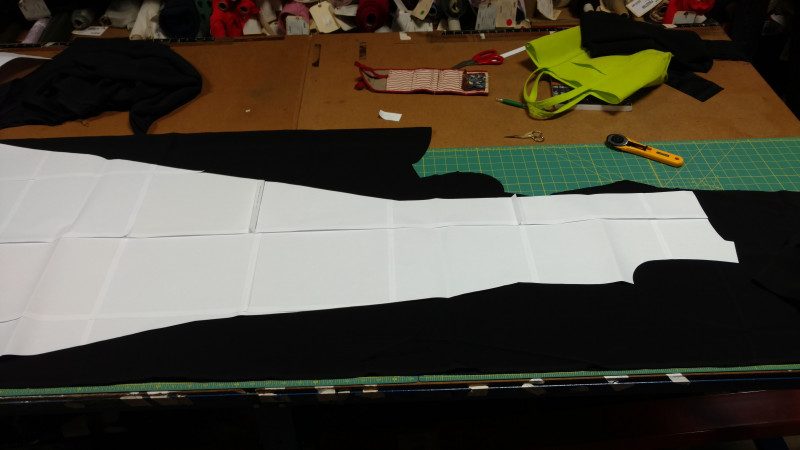 If you are under a size 8 in the bust, you should be able to fit the back pieces along side the front piece as shown here. I did have to do a tiny bit of piecing to the seam allowance along the back zipper. The back hem on the sample size was 1″ over the width of the fabric folded in half. Larger sizes will need to move the back further down so it doesn’t overlap with the front (4 yards), and may need to cut out the two backs separately (5-6 yards depending on height).
A drapey fabric like chiffon needs special attention paid to grainlines when cutting. Getting the material laid out flat and straight will make sure your pattern is lined up with the grain of the fabric, and using a rotary cutter and mat makes sure it stays lined up while you cut it.
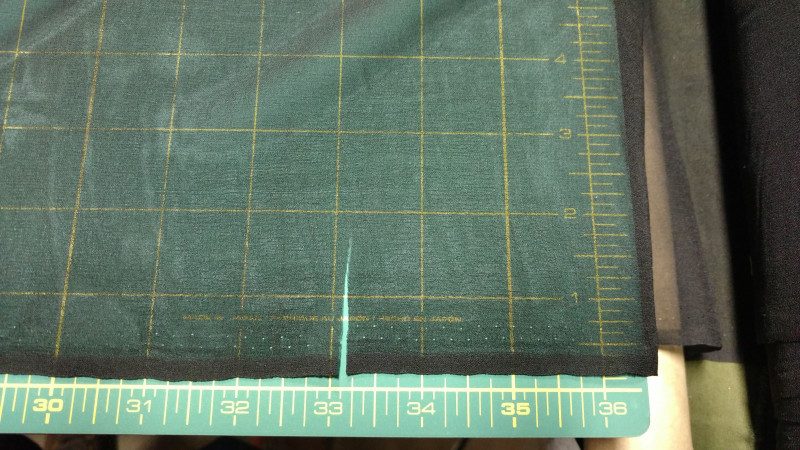 Straighten the edge of your chiffon by cutting 1 1/2″ to 2″ as straight as you can.
 Then tear it across from the selvedge to selvedge, keeping the same tension on both sides. The faster you go, the more even it will be.
 If threads do get bunched, just tug the fabric gently to unbunch it. Now you have a straight edge to use as a guide.
 Use weights to keep your fabric and pattern in place while you cut. Anything can be a fabric weight, but cats are not recommended since they can’t be counted on to stay still.
Darts
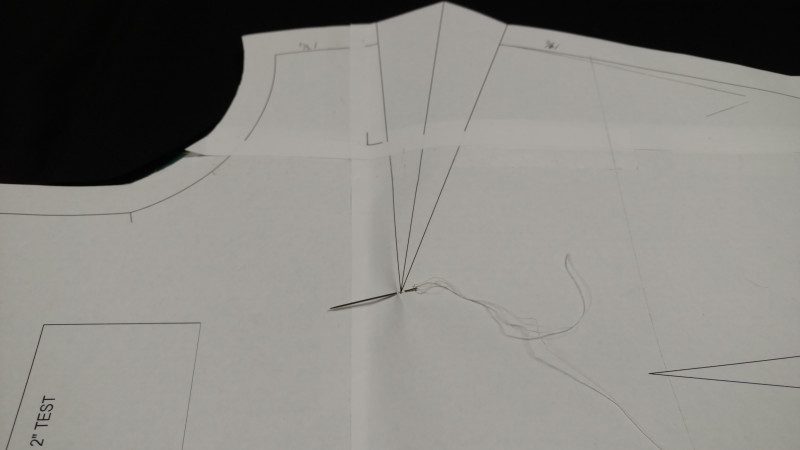 Mark the bust darts on the front using tailor’s tacks. Using contrast thread, take a stitch through the end of the dart, leaving a few inches of tail.
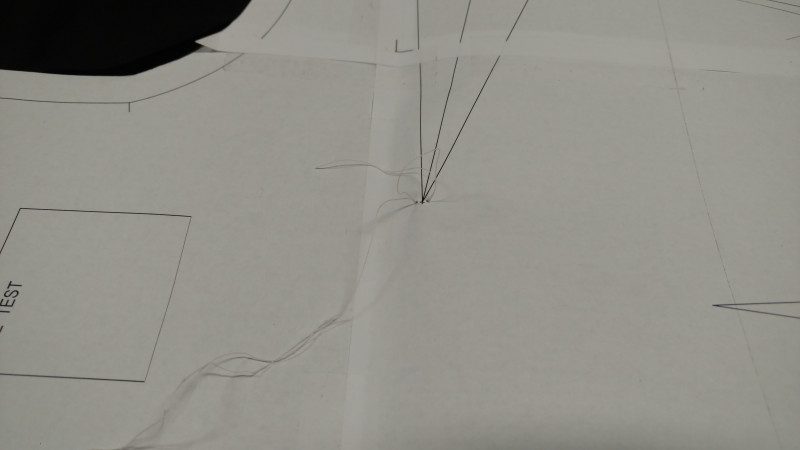 Then stitch through the point again, leaving a loop a bit shorter than the tail. Cut the thread so that the tails are about the same length.
  Repeat for the points where the dart intersects with the side seam.
 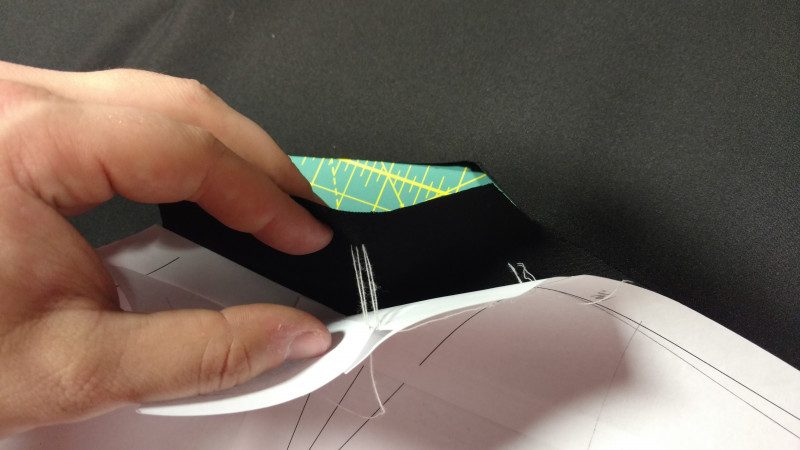 Carefully pull the pattern off without dislodging the thread, letting the thread loop make a small hole in the paper.
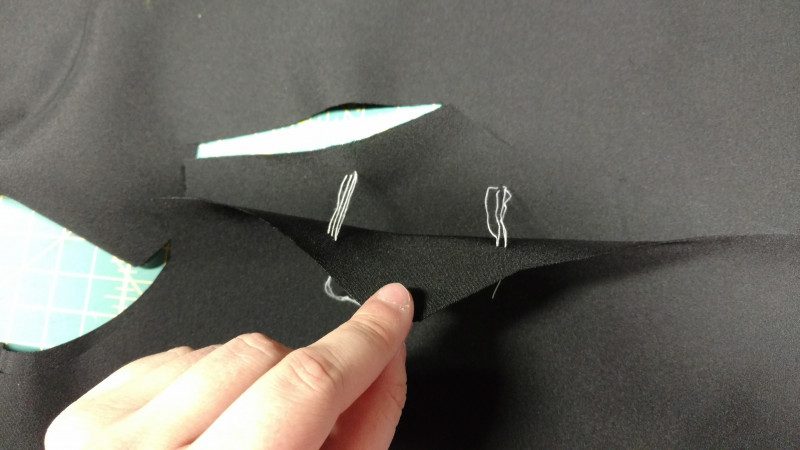
Carefully pull one side of the front until it catches on the loop, then cut the threads so that they are visible on both darts.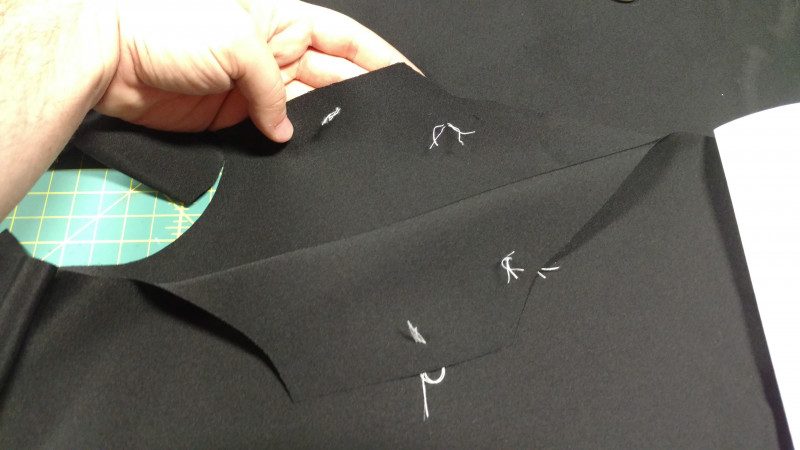
 Match the thread markings when pinning the darts.
 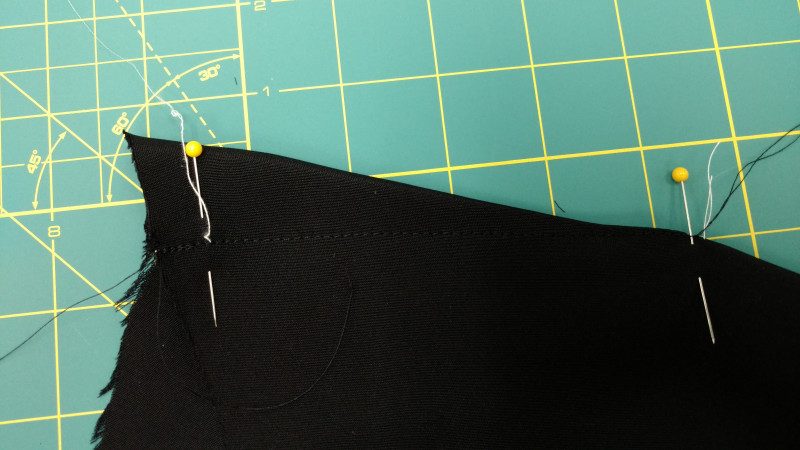 Starting at the side seam, taper the dart to the end and leave a tail instead of reversing to lock the end of the seam.
 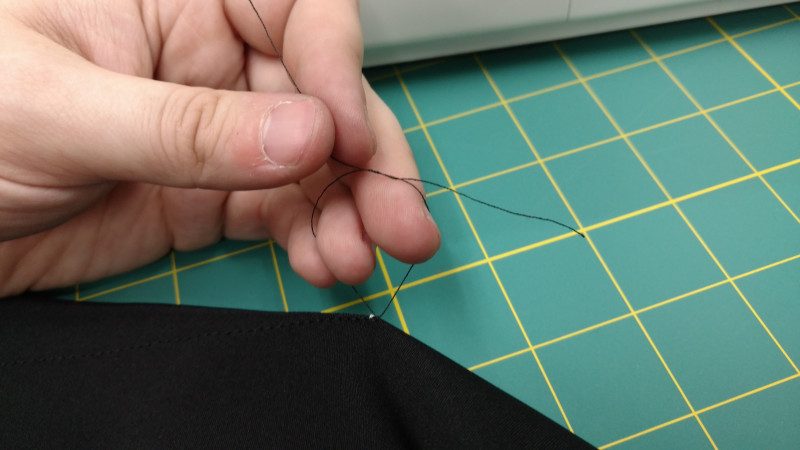 Separate the threads of the tail and tie them in a square knot.
Center Back Seam
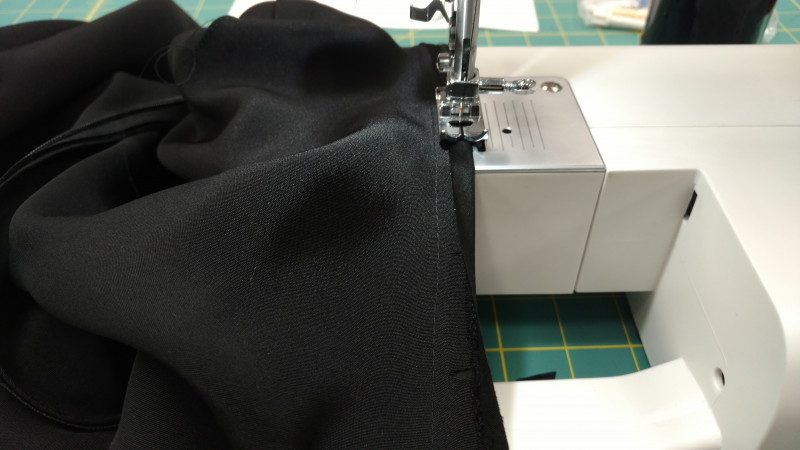
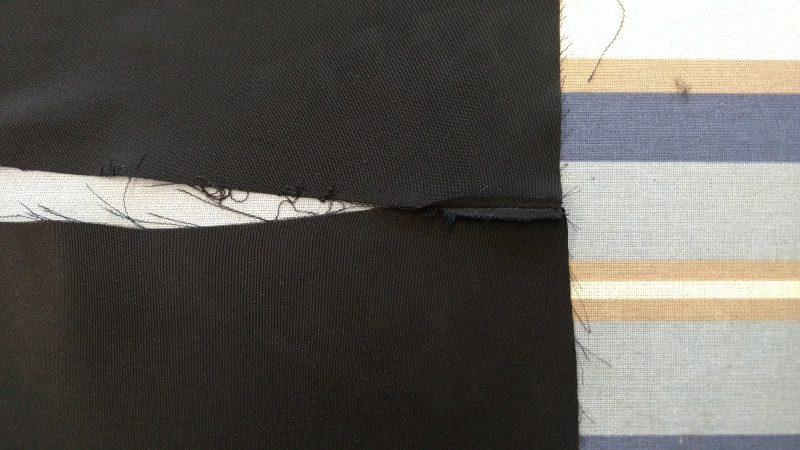 Pin back pieces right sides together. Using just under 1/4″ seam allowance, sew 1 1/2″ at the top of the center back seam, and from the hem up to the corner at the hip line. Press open and trim any fraying.
 Fold seam so that pieces are right sides together, and sew with just over 1/4″ seam allowance to enclose the raw edges in a French seam.
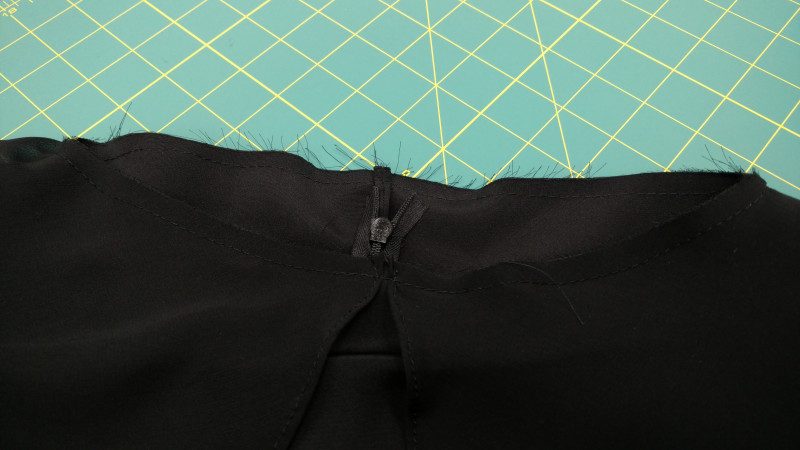
Zipper
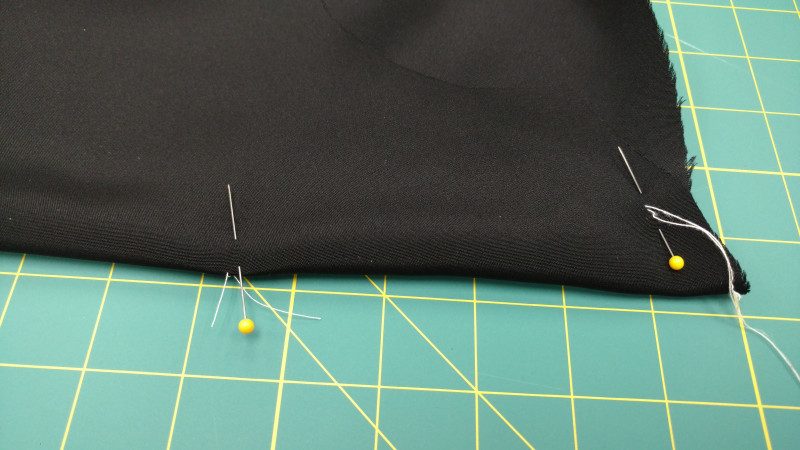
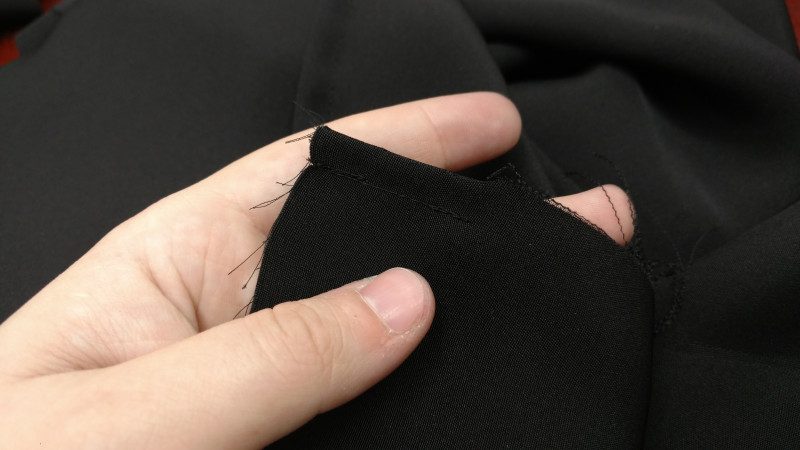
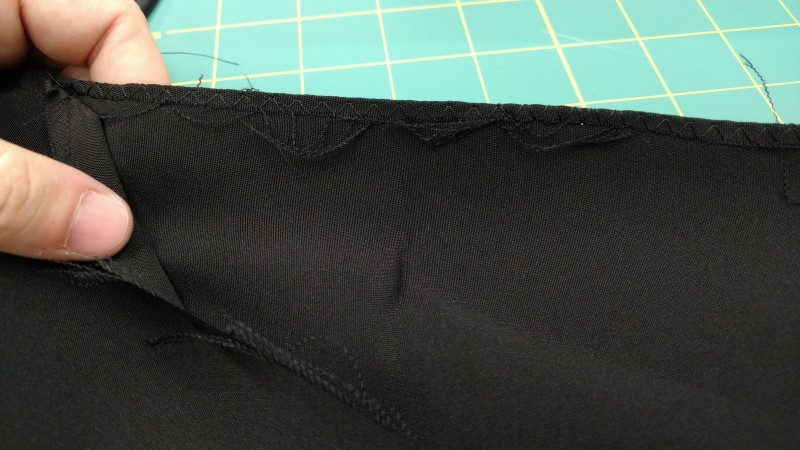 Zigzag the center back edges, folding under 1/4″ as you go. Trim any fraying threads.
 With the back right side up, pin one side of zipper to seam allowance as shown. Sew it down with a zipper foot.
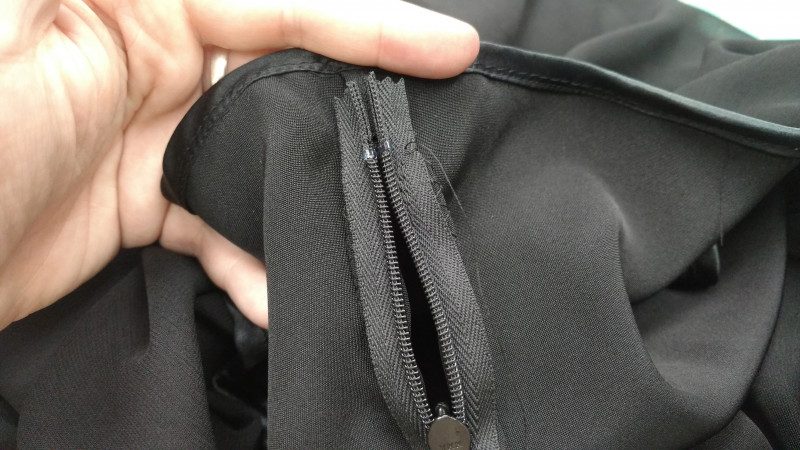
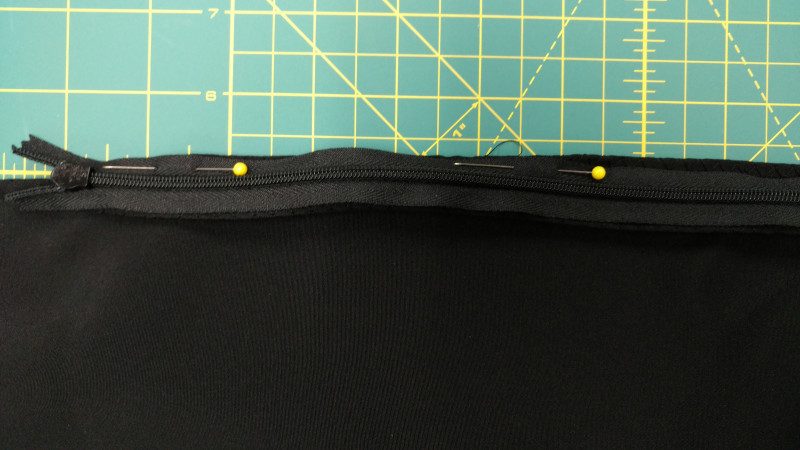 Close the zipper (to make sure the sides are lined up), and pin the other side. Unzip it before sewing. There will be a gap at the top and the bottom of the zipper that you’ll need to hand-sew. You can do it now, or wait until later.
Seams
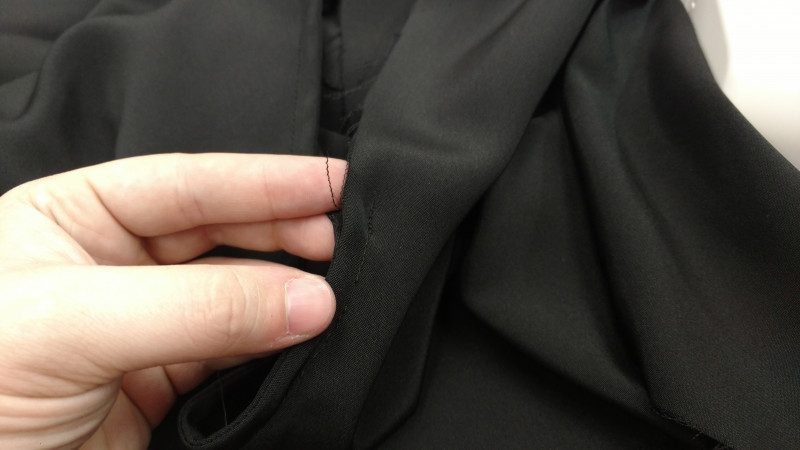
Pin the front and back wrong sides together at shoulders and along side seams, matching the waistline. Sew with just under 1/4″ seam allowance, press open and trim frayed threads. Then turn wrong side out and pin seams right sides together, and sew again with just over 1/4″ seam allowance. Press seam allowance toward back, so you’re not trying to fold the end of the dart.
Armhole binding
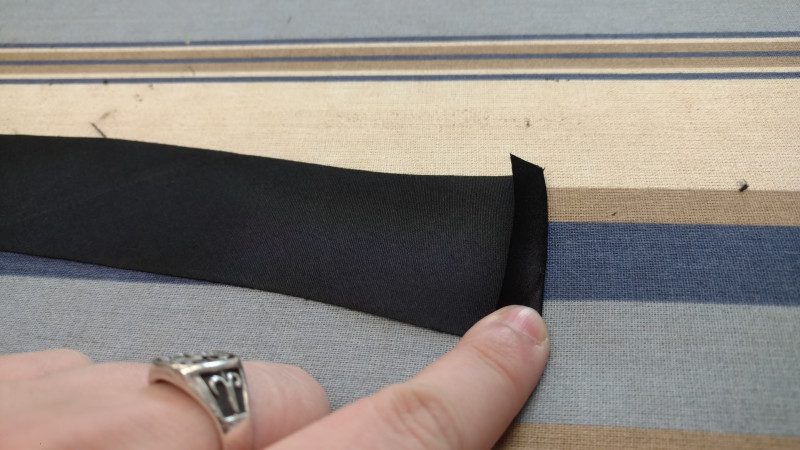 With the satin side face down, press under 1/2″ at the end of your bias binding. Pin around armhole, pulling it to fit smoothly.
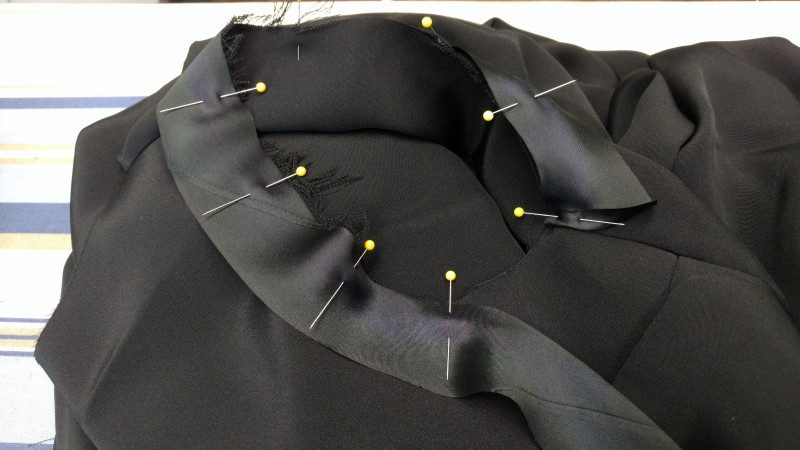 Sew it down at 1/2″ seam allowance, then trim the seam allowance to 1/4″ and press. (I clipped the seam allowance instead of trimming it, and regretted it.)
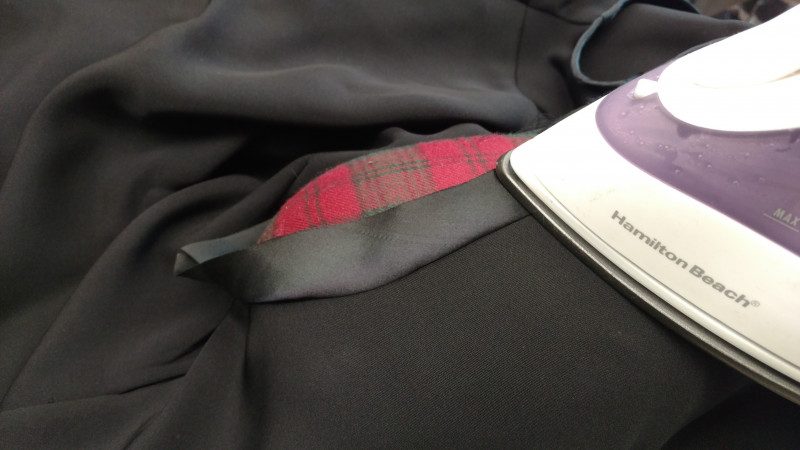
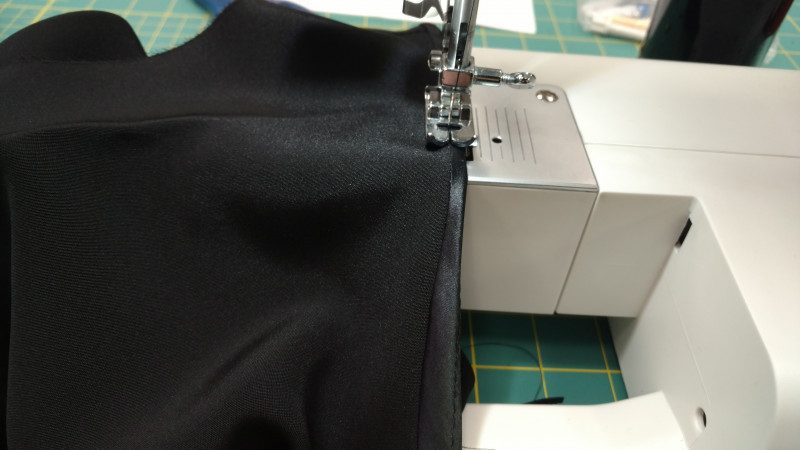
 Baste bias binding, folding 1/4″ under as you go. It will look like this:
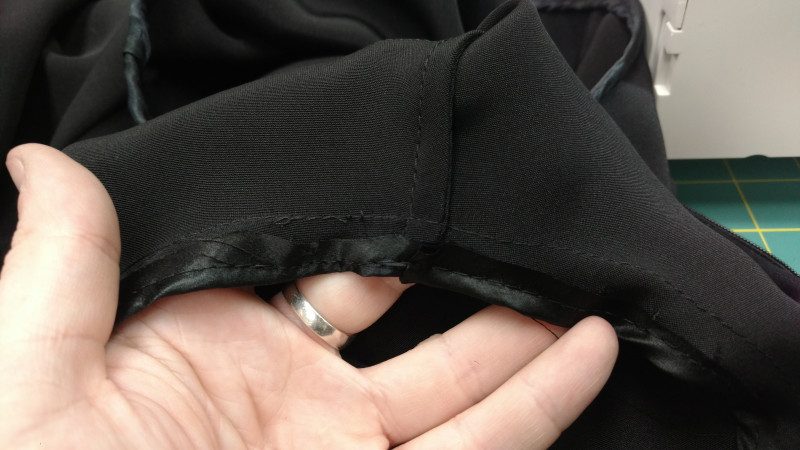
 Fold basted edge under so that 1/4″ of the binding shows, and stitch in the ditch.
Hems
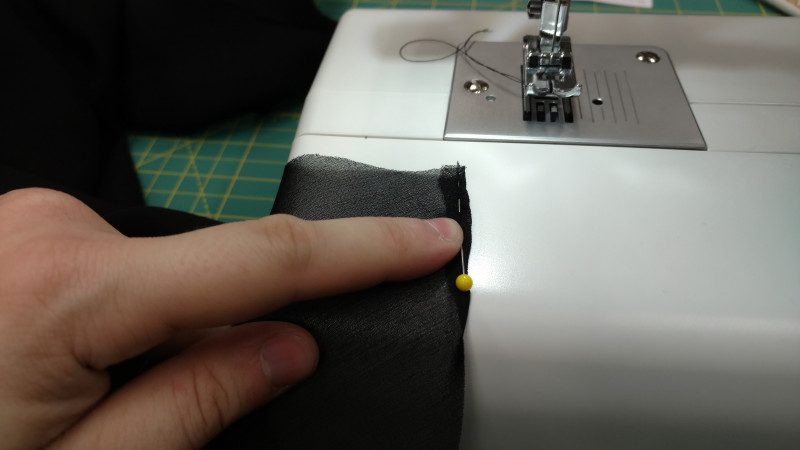 Fold over 3/8″ and pin as shown so it stays folded while you get it under the presser foot.
 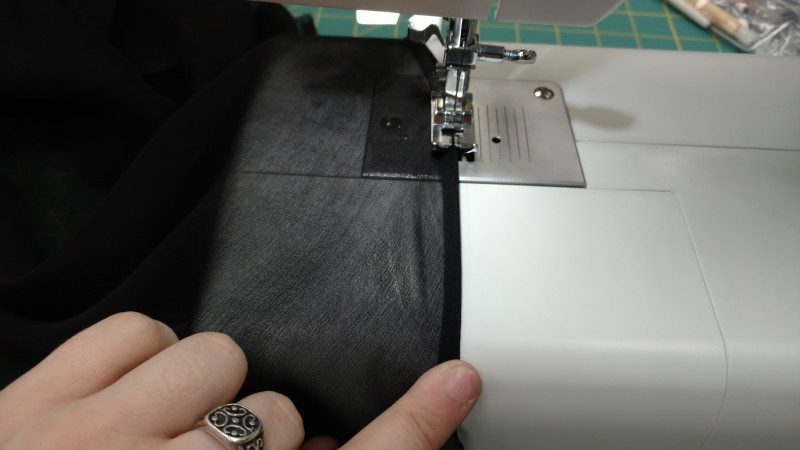 Stitch as close to the fold as you can, folding the edge as you go. It may stretch– that’s okay.
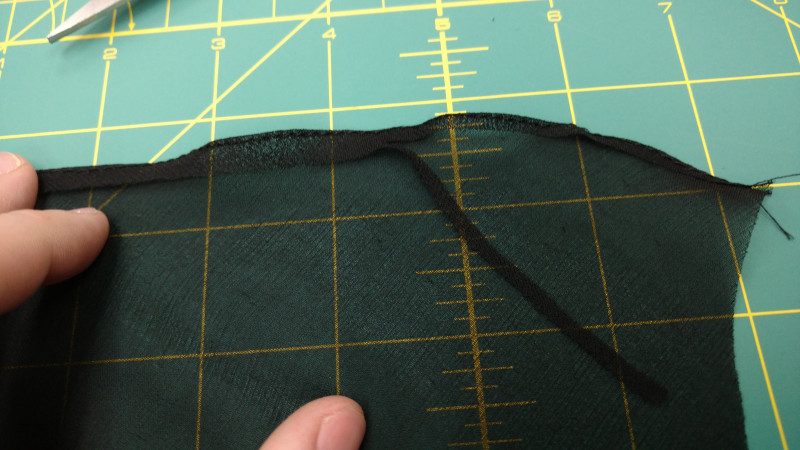 Trim off 1/8″-1/4″ Don’t rush– you don’t want the scissors to cut more than intended.
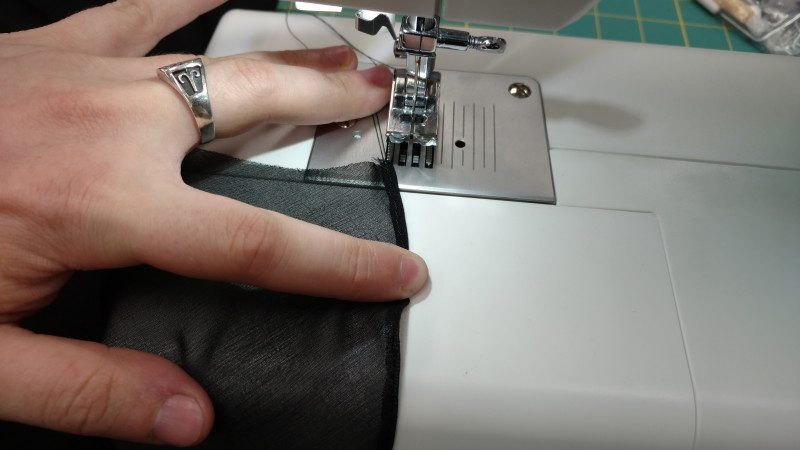 Fold again, using thread tail to guide it under the presser foot.
 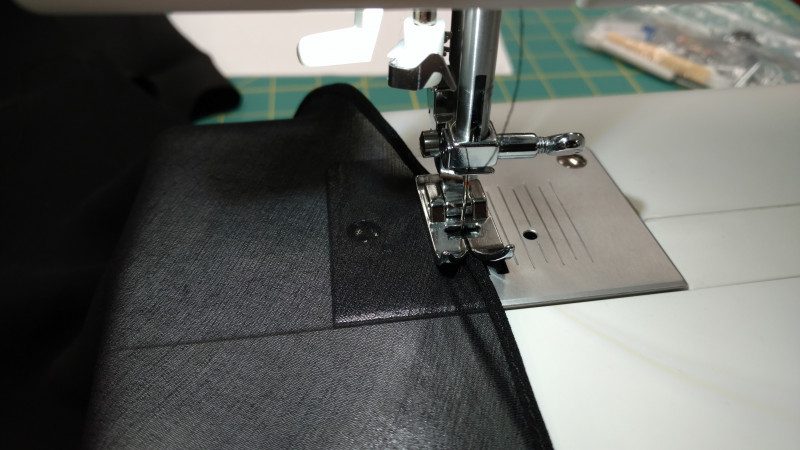 Stitch again, as close to the first fold as you can get.
Do this on both the capelet and the gown hem. The chiffon is best sewn with a microtex needle, but the crepe is thick enough for a standard needle.
Neckline
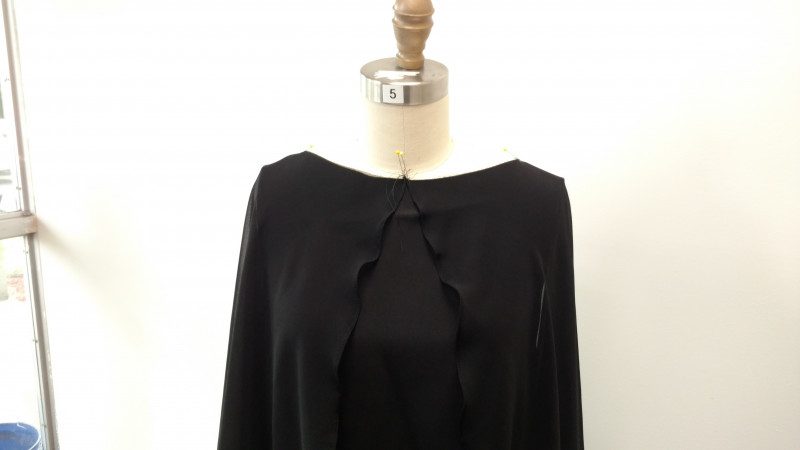 This is a good time to try it on, to make sure everything is on track. Pin the capelet onto the neck edge, matching the corners at the shoulder and overlapping slightly at the front.
 Baste the neckline.
 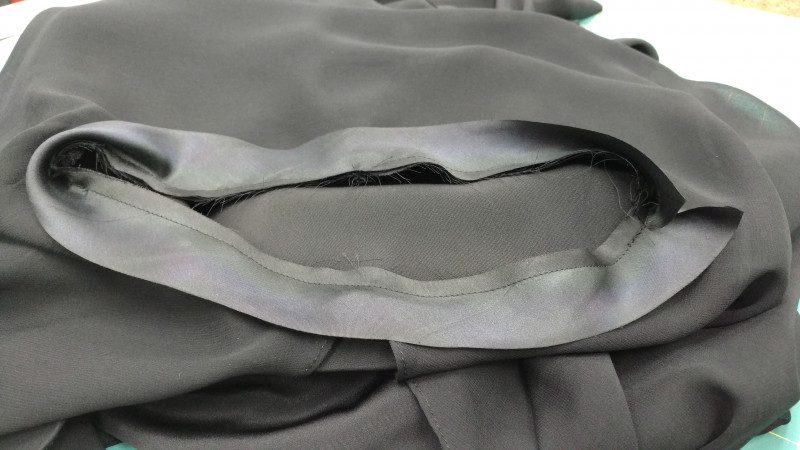 Bind the neckline as you did the armholes, but leave 3/8″ of binding visible. Join the ends at one shoulder.
Appliques
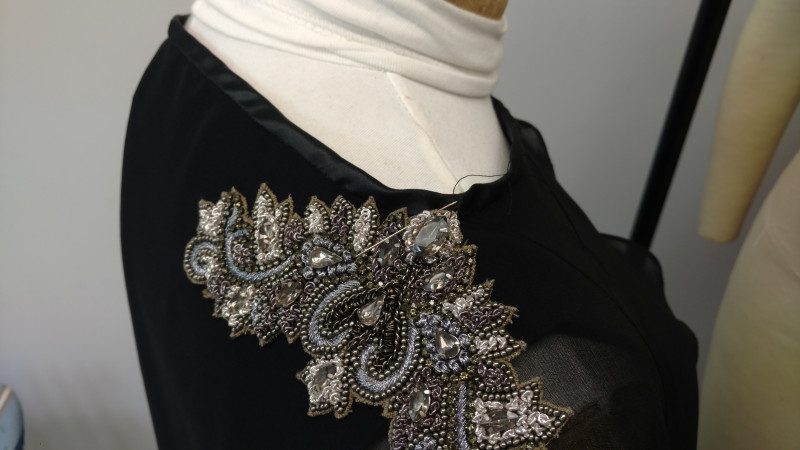 Pin the appliques in place while gown is on, then sew them down by hand. Sew through both the chiffon and the crepe, and don’t sew past where the crepe ends– the chiffon won’t be able to support the weight.
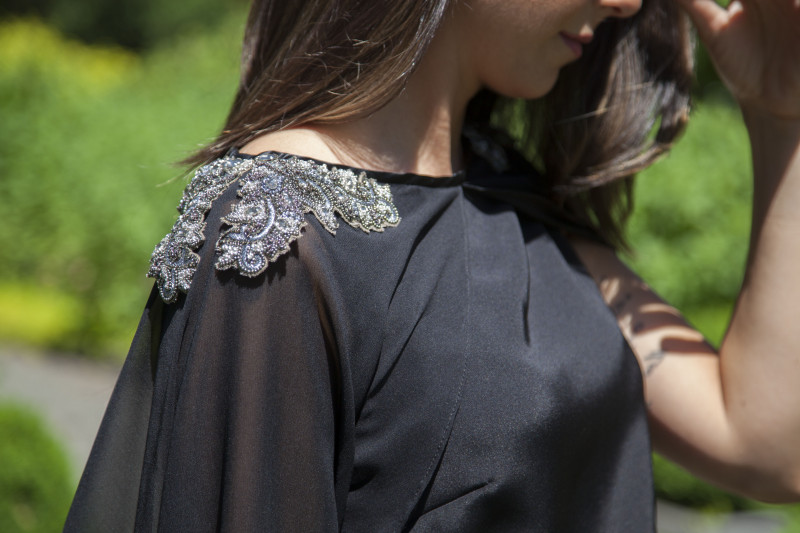
We used black and silver, but it would be equally stunning in a dark red or bright teal, or with different appliques. If you decide to put trim along the hem, the hem circumference on size 8 worked out to 208 inches, or just under 6 yards.


1 comment
Cats can not be counted on to stay still! You threw me LOL!