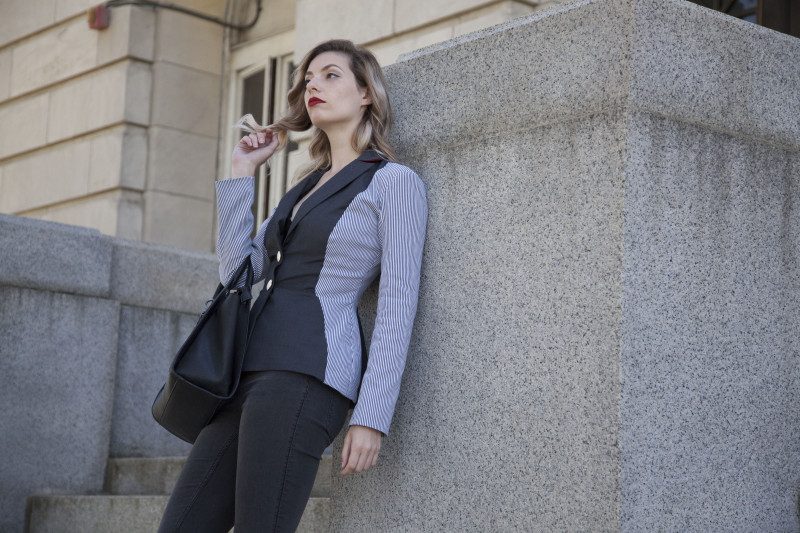
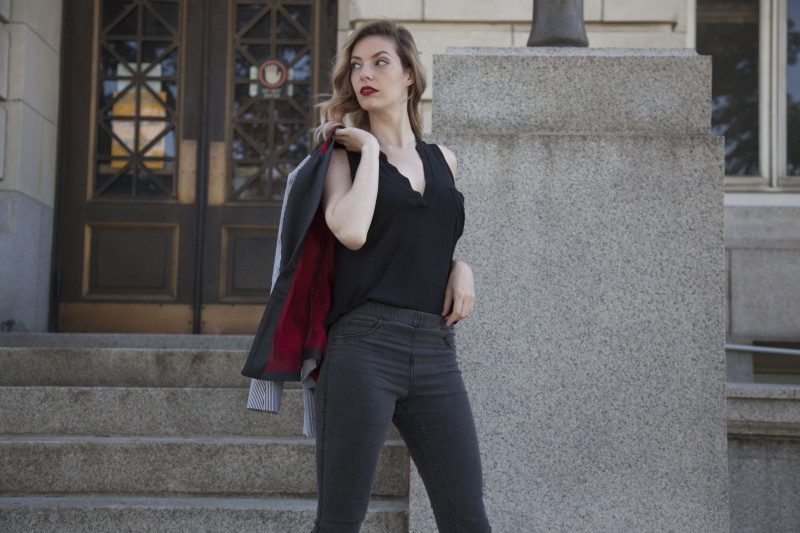
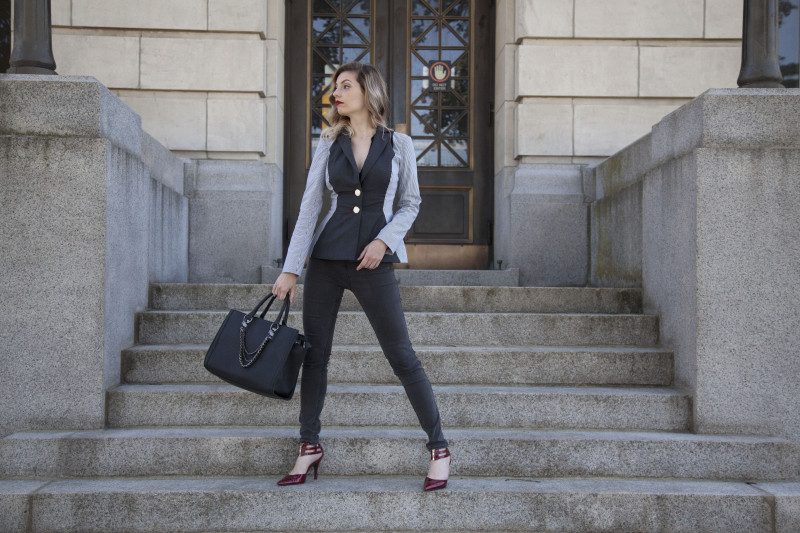
 Tailoring thrives on precision, and this impeccable blazer oozes with it. With smooth lines and flattering curved seams, this can be made up in one material for a more conservative look, but the contrasting front and back panels can give an effect ranging from coolly satisfying to playful and flashy depending on what colors and textures you use. A muslin mock-up is a must, since a bad fit misses the point of making one’s own blazer.
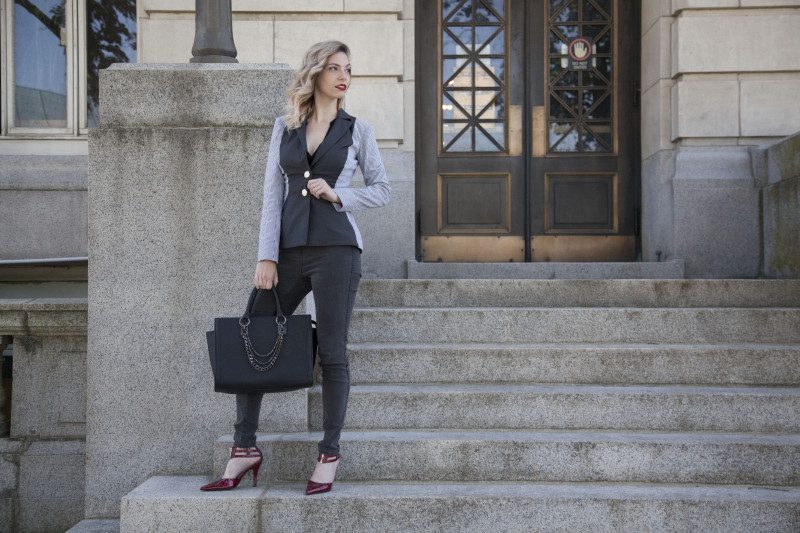
Fabrics & materials used:
- 2 yards muslin for mock-up
- 1 yard Charcoal Super 150 Wool Suiting
- 1 yard Black, Gray, and White Striped Stretch Cotton Woven
- 1 yard interfacing
- 1 yard non-stretch cotton twill for undercollar
- 2 yards cupro lining
- 2 buttons
- thread to match both fashion layer and lining
- MDF057 – The Rosemary Blazer (free download below!)
- shoulder pads (optional, should measure your shoulder length by roughly half your armscye circumference)

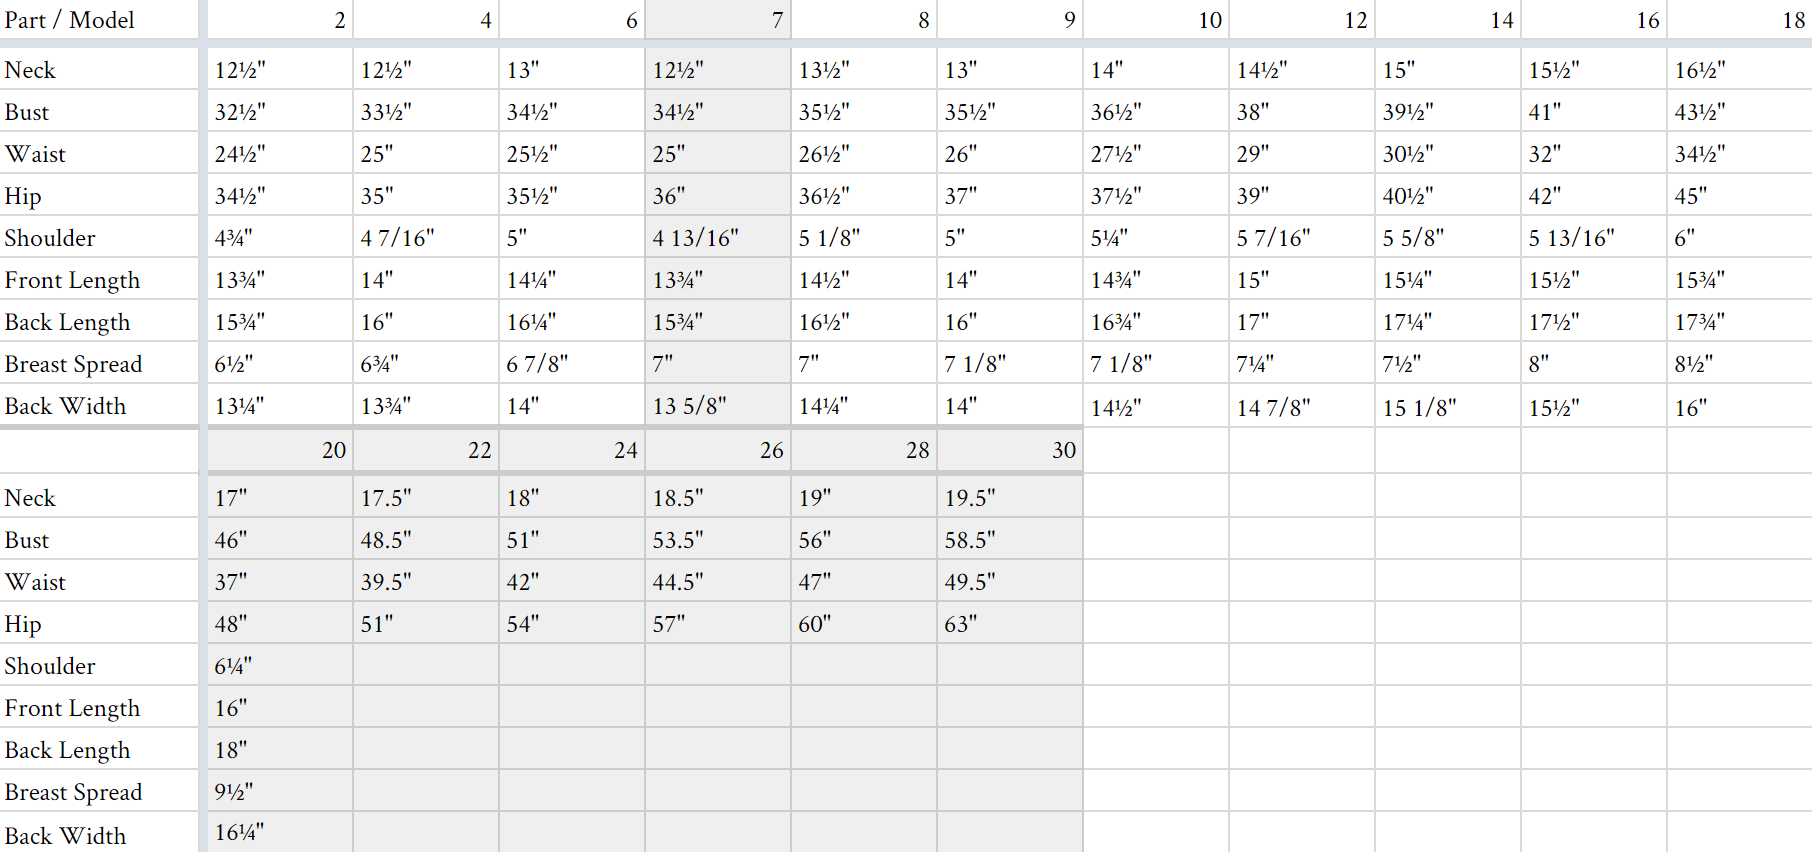
All seam allowances are 1/2″ unless otherwise stated. See chart below for sizing specifications. Note, this specific pattern is available up to a size 28.
You will need the following tools:
- an iron with steam setting, and a cotton scrap at least 10″ by 10″ to use as a press-cloth (preferably white or undyed)
- a ruler
- tailor’s ham and sleeve form
- rotary cutter and mat
And the following measurements:
- bust
- underbust
- waist
- hip
- armscye
- shoulder width
- shoulder length
- shoulder to apex
- apex to apex
- apex to waist
- neck to waist
- neck to hip
- sleeve length
Muslin Mockup
Check your measurements against the pattern measurements, and cut your main body pieces (sleeves, front, back, side front and side back) out of muslin and follow the basic construction directions. Check for fit problems, paying attention to armhole, shoulders, bust positioning, and torso length. Make alterations as needed and transfer alterations to paper pattern.
Cutting Out
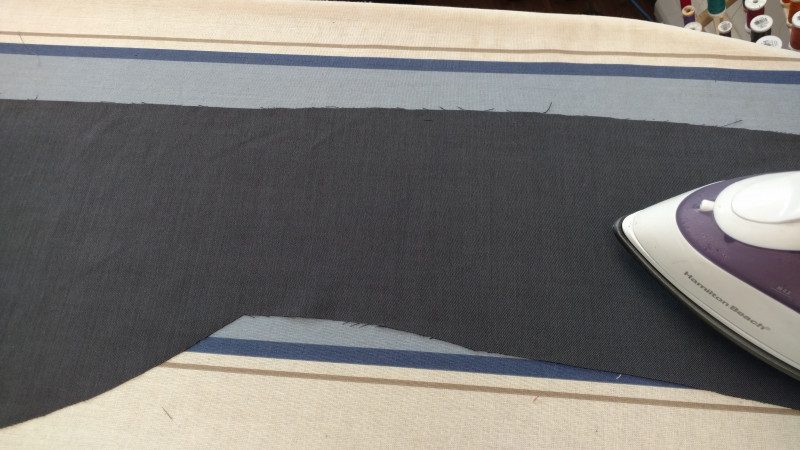
Fold your suiting in half, selvedge to selvedge. Use your ruler to check the grain lines– the line on the pattern should be the same distance from the selvedge for its entire length. Cut out your front, back, and front facings.
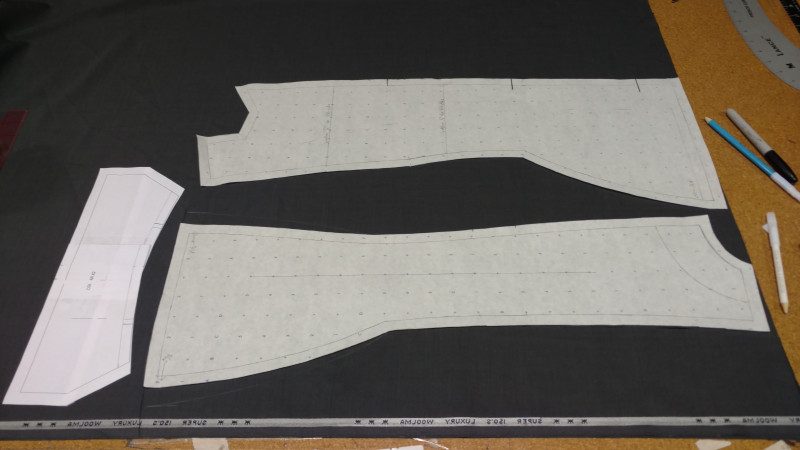
Cut the front and back out of two layers of suiting. The collar is shown for layout purposes, but you only need to cut one. The chalk lines are alterations to the pattern after doing the mockup. I cut the facings after the fronts were cut, using the same pattern piece.
Fold collar pattern in half along center back and place on folded edge of fabric to ensure both sides are mirrored. If the fabric does not have a one-directional pattern you can flip pieces for less waste, but be careful to keep things on grain.
You can also cut the collar from scrap once the larger pieces are cut out.
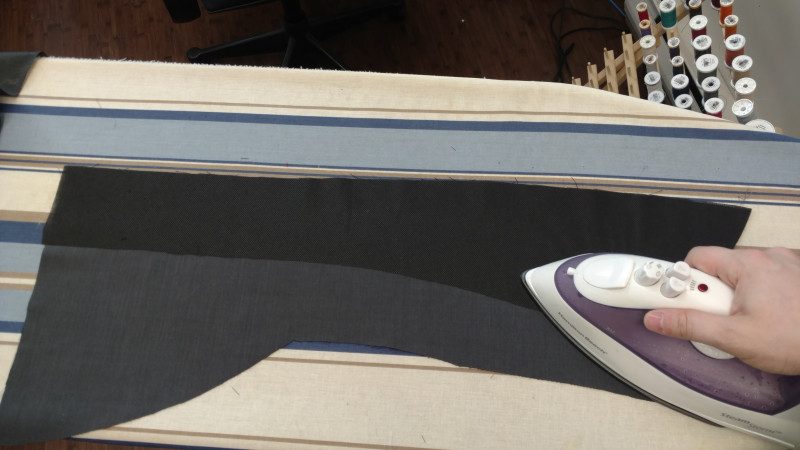
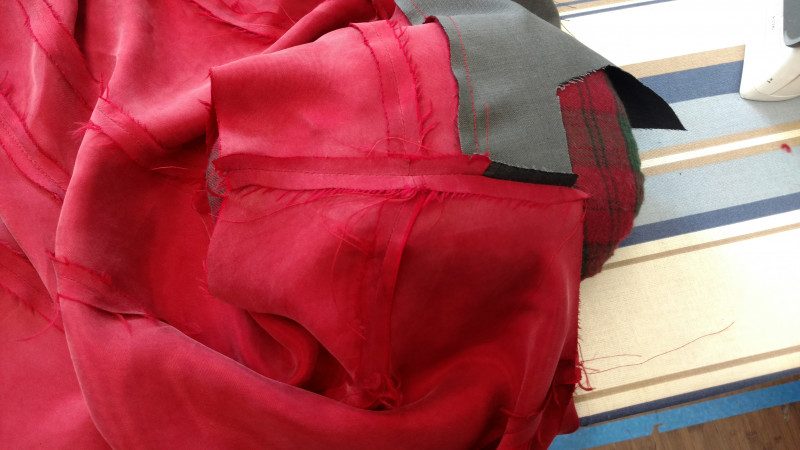
Cut the side fronts, side backs, and sleeves out of striped suiting. If your pattern paper is sufficiently see-through, you may be able to match the grainline on the pattern to the stripes on the suiting.
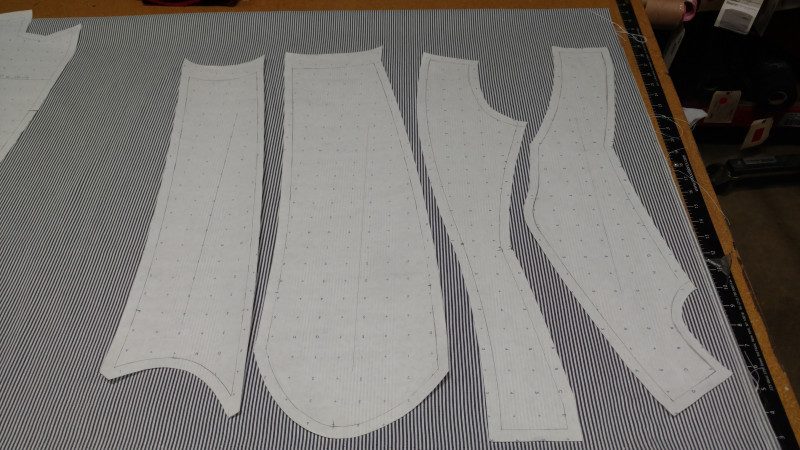
Woven stripes are on the grainline of the fabric, which can make layout easier.
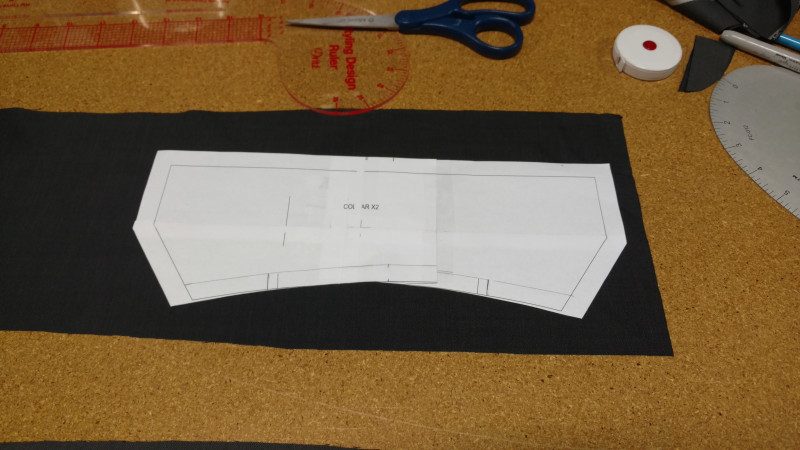
Cut the undercollar out of cotton twill.

Cut one collar out of cotton twill. This will be the undercollar.
Cut the back, side-fronts, side-backs, sleeves, and front linings out of lining fabric. Trim 1″ off the bottom edge of each piece except for the front linings. This is to keep the hem of the lining from showing below the garment hem.
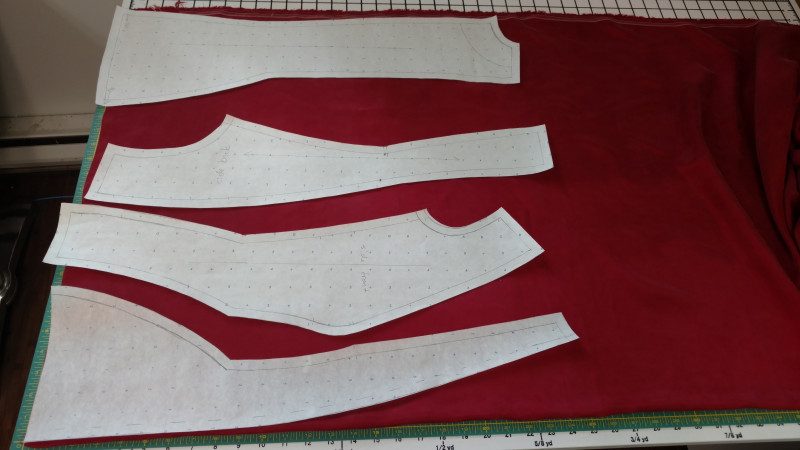
Sleeves are not shown. Lining fabric tends to shift easily, so I suggest using a rotary cutter and self-healing mat for the best accuracy.
Sleeves are not shown. Lining fabric tends to shift easily, so I suggest using a rotary cutter and self-healing mat to cut it.Cut one collar and two front facings out of interfacing or hair canvas. If you are using fusible material, make sure the front facings are mirror twins, not identical. If you are using woven interfacing or hair canvas, make sure that it is on grain.
Cut the front facing and undercollar out of interfacing. This is non-woven fusible, folded in half. (I moved the collar down onto the fold before cutting it.) The extra bits are the front and back hem facings.
Prep work
Give each piece a go-over with the iron before working with it.
Pieces can get rumpled easily when you’re not working with them.
Press front interfacing onto front fashion layer pieces, and collar interfacing onto undercollar.
The facing needs to be able to flow over the lapel, so the structure gets added to the front of the coat rather than stiffening the facing.
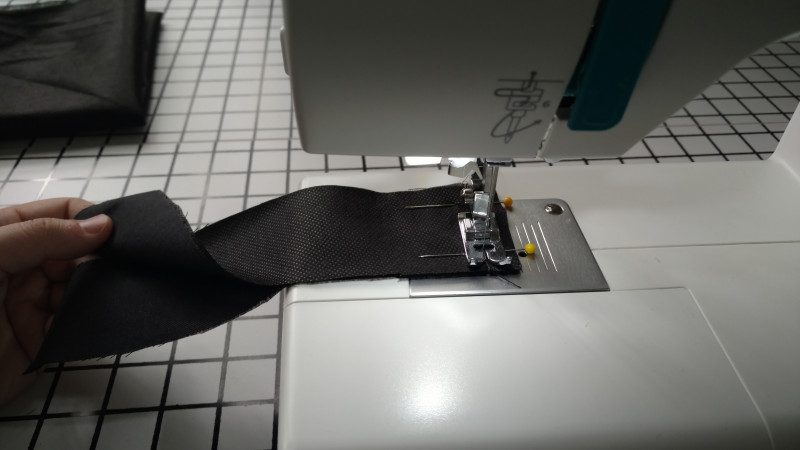
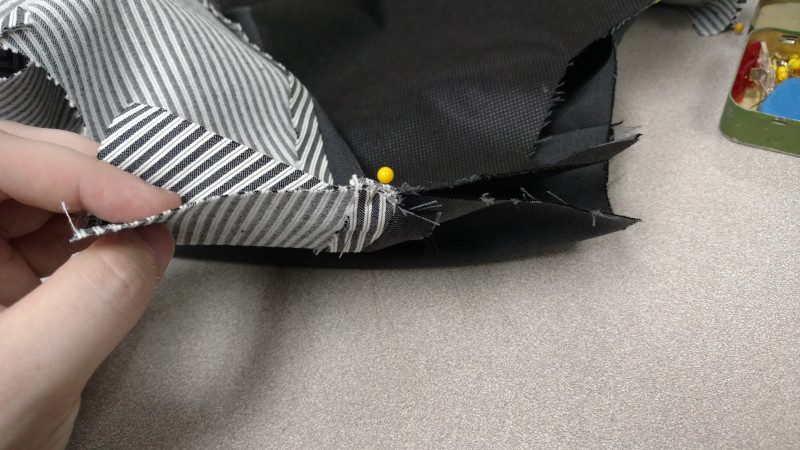
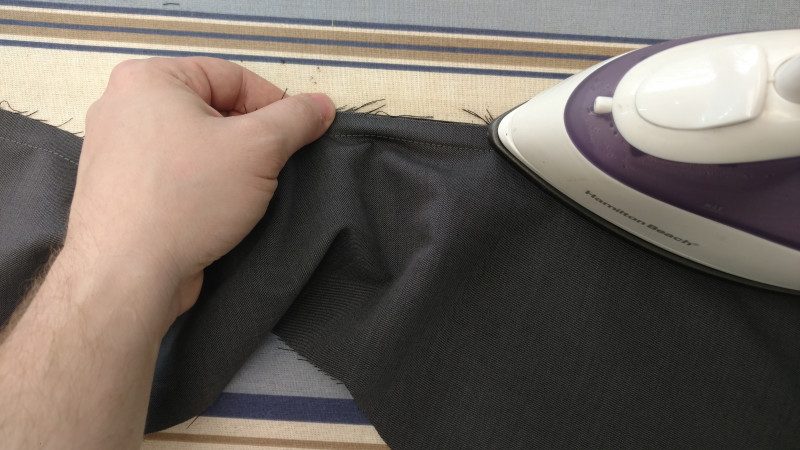
Stretch the neck edge and outer edge of the collar facing and undercollar using the iron and a bit of brute force. Working on the wrong side of the fabric will prevent mistakes. Baste along the roll line on the undercollar.
Hold the iron in place firmly and drag it away from the hand holding the other end of the collar.
The ripples along the top and bottom will help it roll smoothly.
These stitches will stay in, so either match the thread or use something that contrasts nicely.
Pull the ends of the thread gently to tighten the roll line just enough to cause ripples at the edges, then tie them off neatly on the wrong side. It should not look gathered and bunchy.
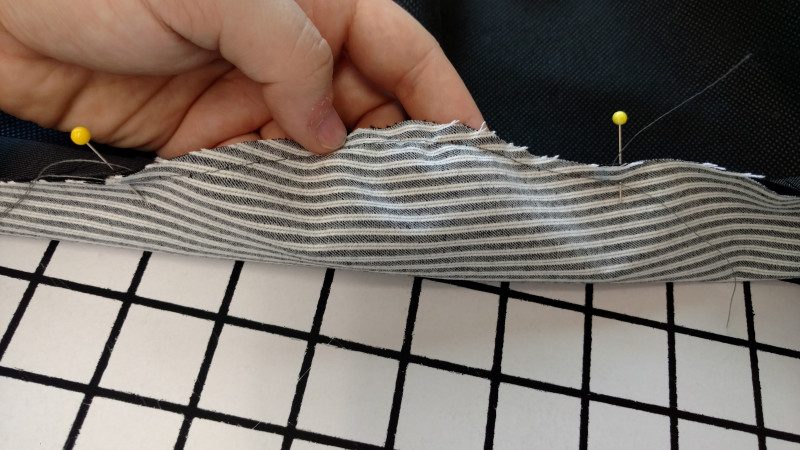
Baste convex curves on sleeve head and body pieces. This will help the curved seams lay smoothly when pinning and sewing.
Basting convex curves will allow you to gather the seam allowance to fit.
Hem facings (first method)
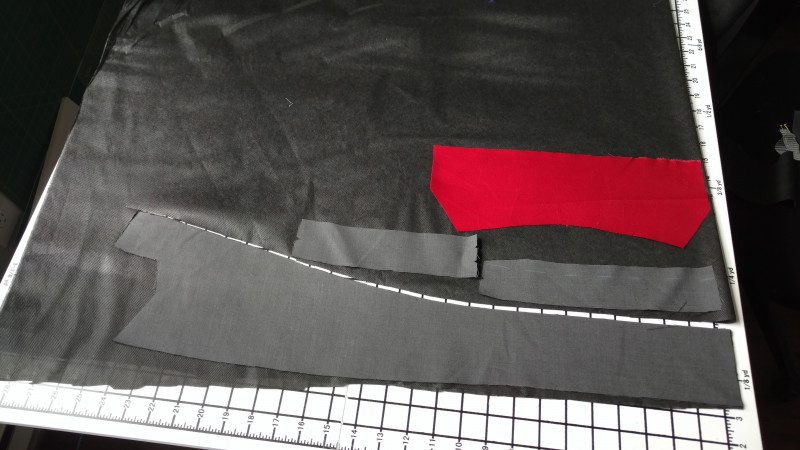
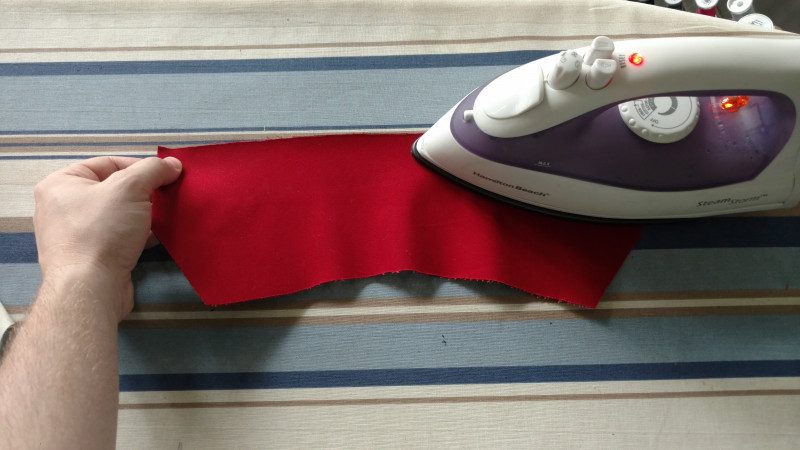
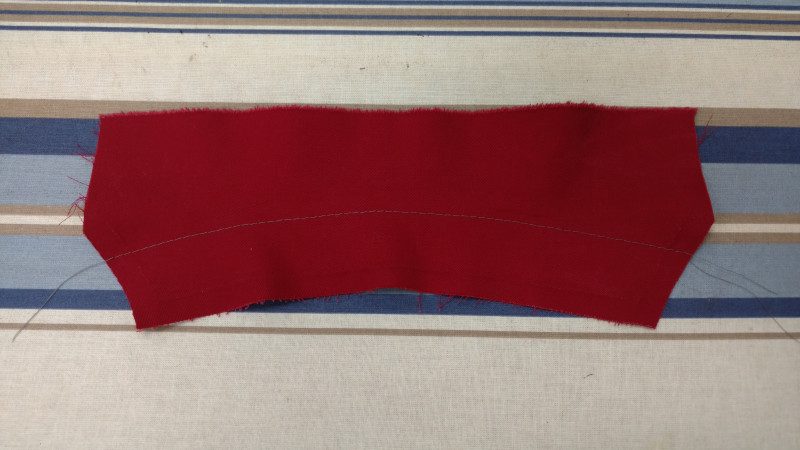
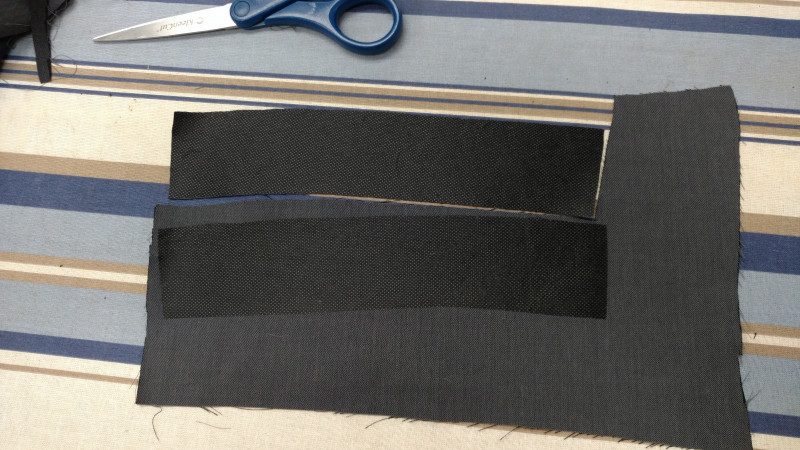
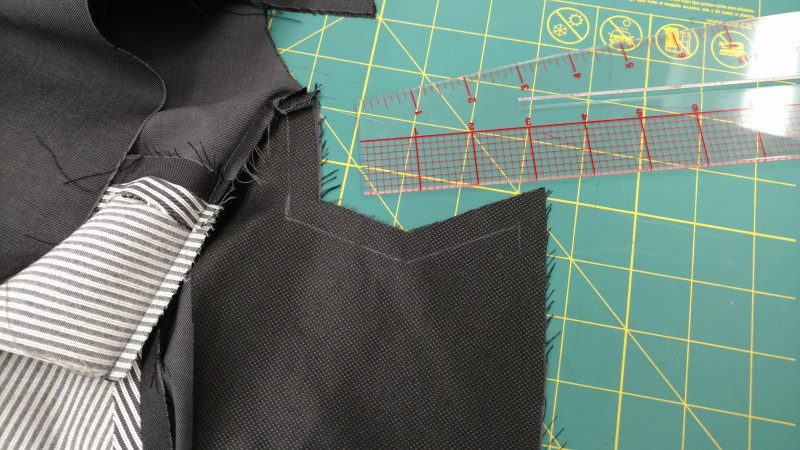
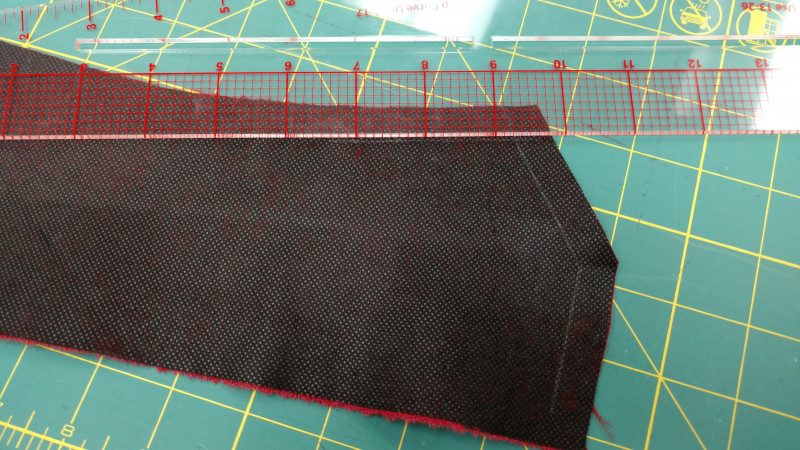
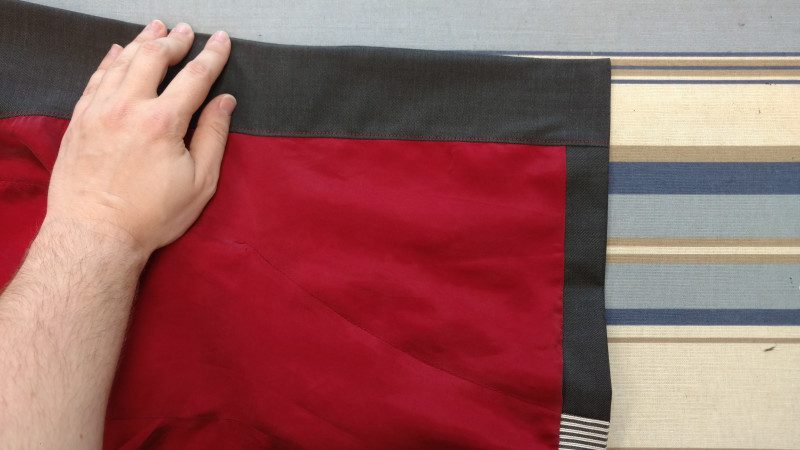
Trace the bottom edge of each body piece and 2″ up on scraps of each suiting material.
The pattern piece laid over a scrap left over from cutting the front and back pieces.
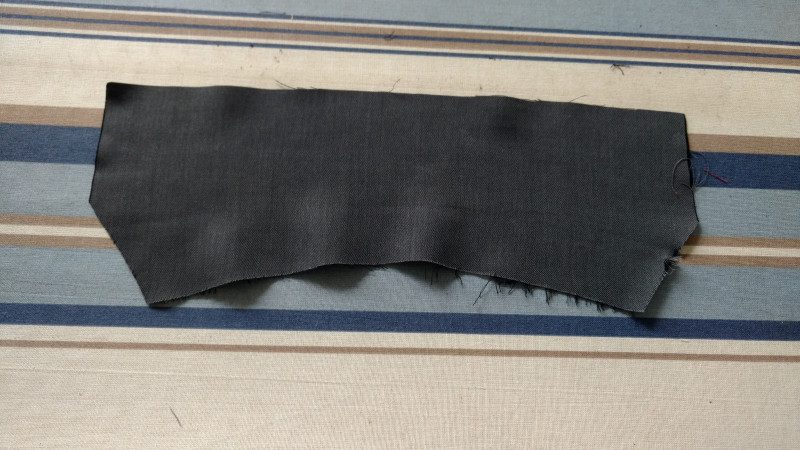
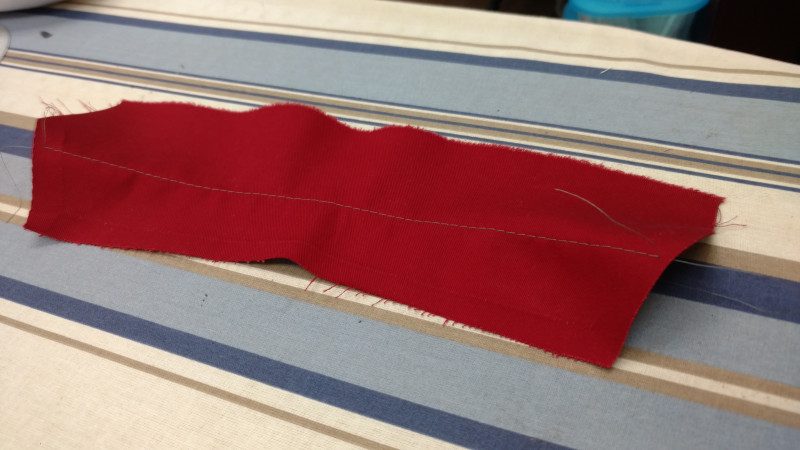
Use a ruler to mark and cut a 2″ strip for each hem facing. If you’re tight on fabric, it’s okay to have the top edge be uneven as long as it doesn’t vary by more than 1/2″. Mark with notches or chalk on the wrong side so they don’t get mixed up.
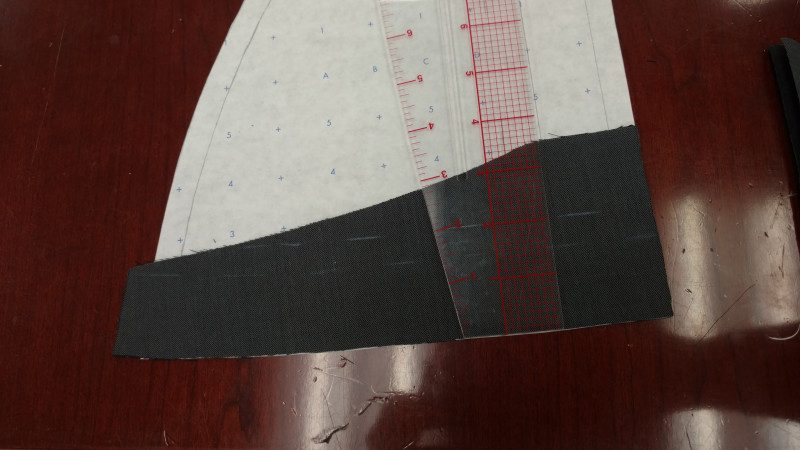
Use the ruler to mark a slightly curved 2″ strip. It’s okay if bits are missing, as long as nothing goes past the seam allowance.
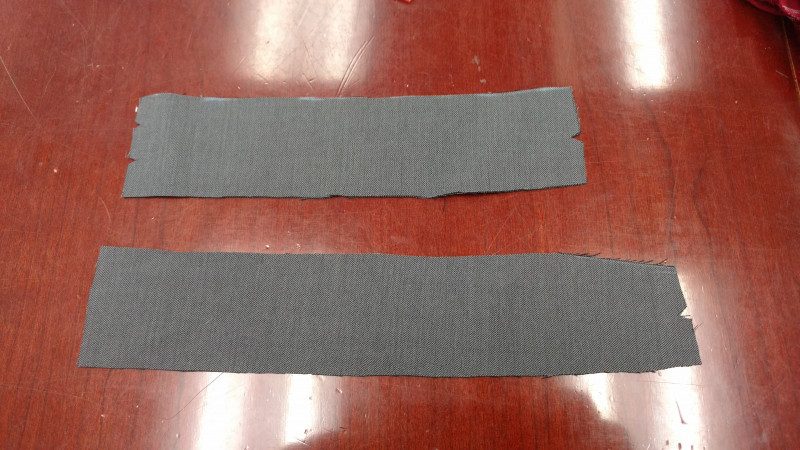
Two notches for the center back seam, one notch for attaching to the sides. You can also use chalk to write what each piece is on the reverse of the fabric.
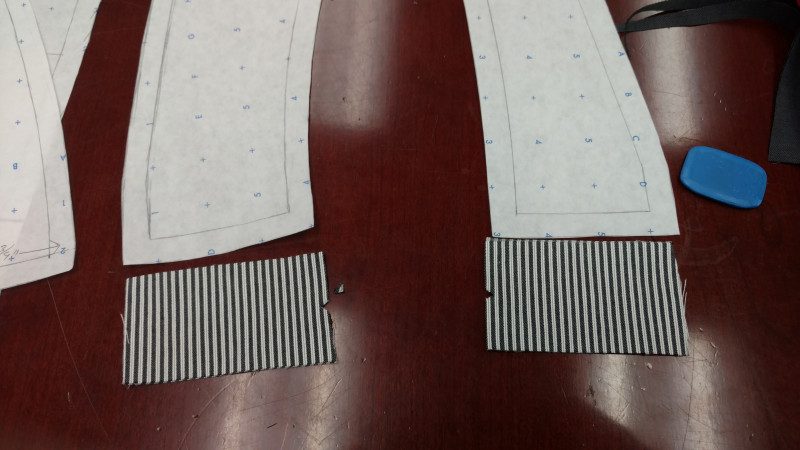
Do the same with the side pieces. The notch is to match the ones on the back and front pieces, while the plain is for the side seams.
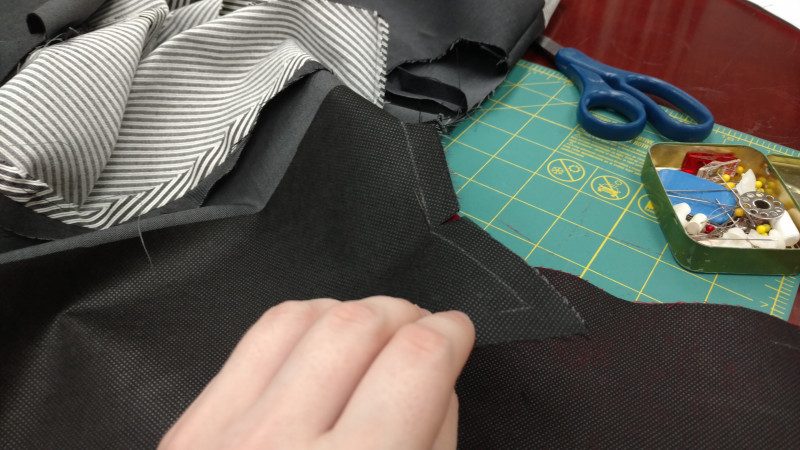
Cut front and back facings out of interfacing, and press together.
Use the iron to attach fusible interfacing to the wrong side of the facings. Medium to heavy weight suiting doesn’t need interfacing.
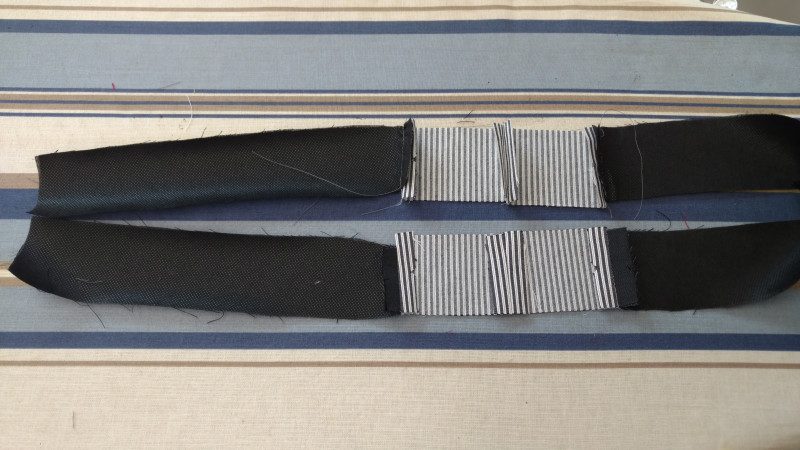
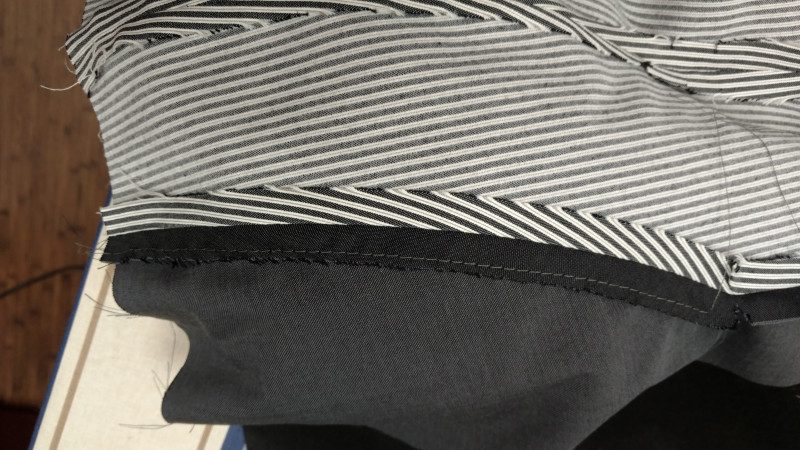
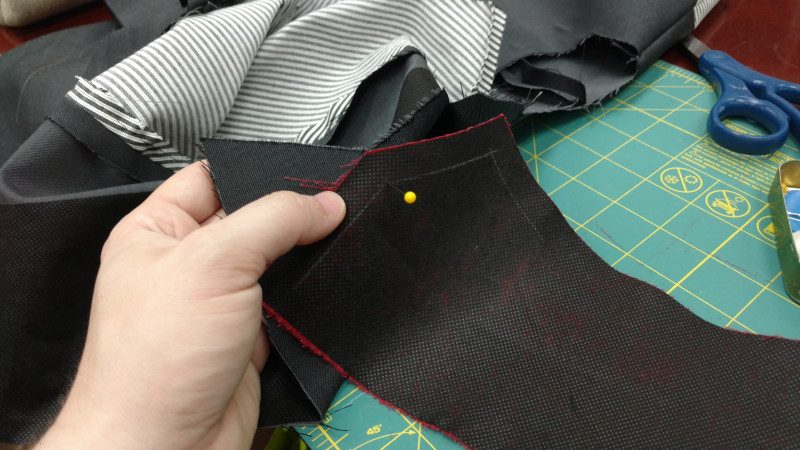
Sew the strips end to end, starting at center back and working your way toward the front to avoid accidents. The tops can be a little uneven as long as the bottom edge is smooth.
Right sides together, with interfacing on the outside.

Center backs together, then sew on the side-backs, then the side-fronts, then the fronts.
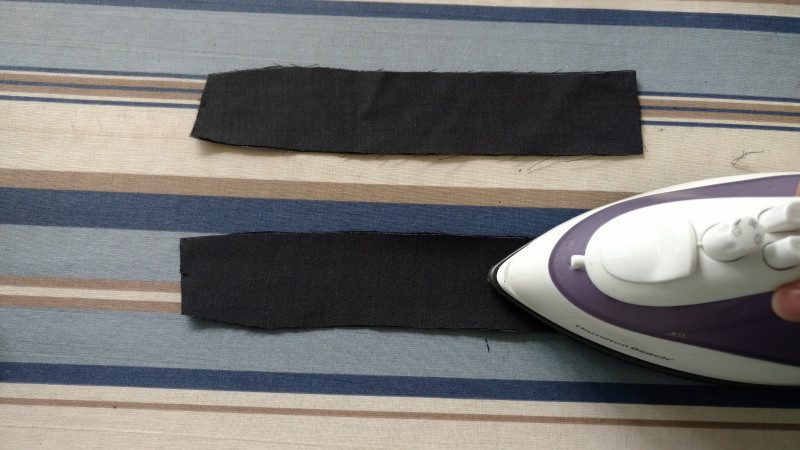
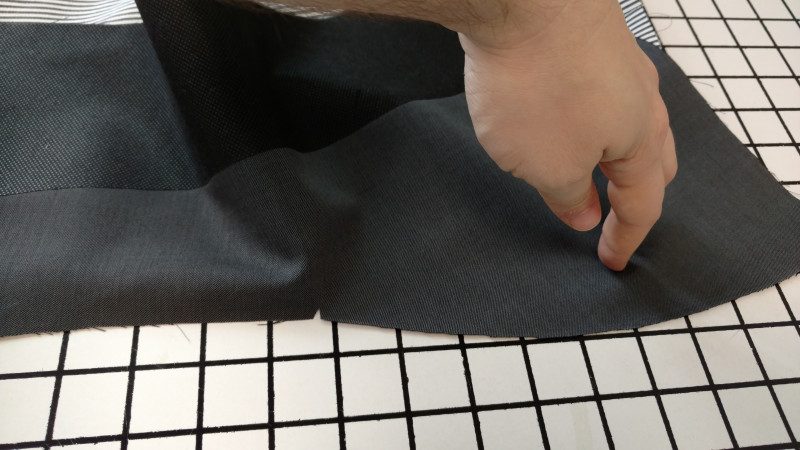
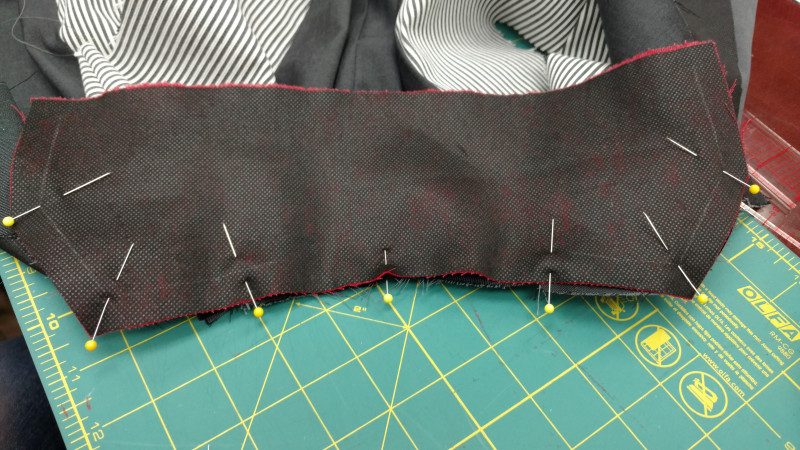
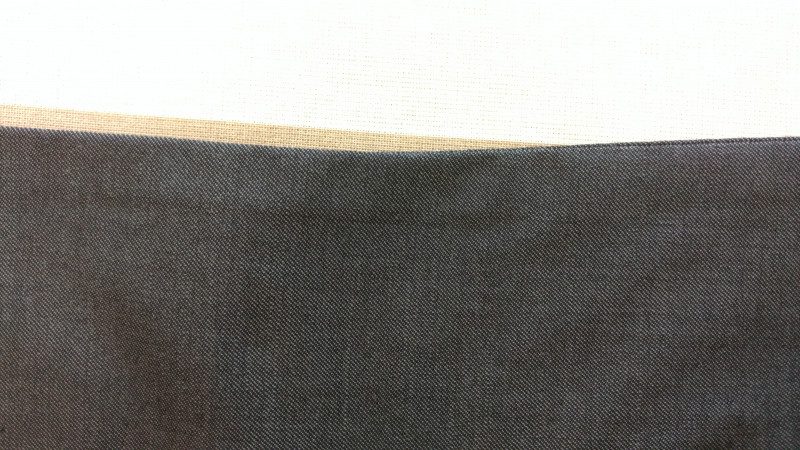
Press open the seam allowances.
Always press your seams. Doesn’t the bottom half look so much nicer than the top half?
Hem facings (second method, suitable if both suiting materials are lightweight)
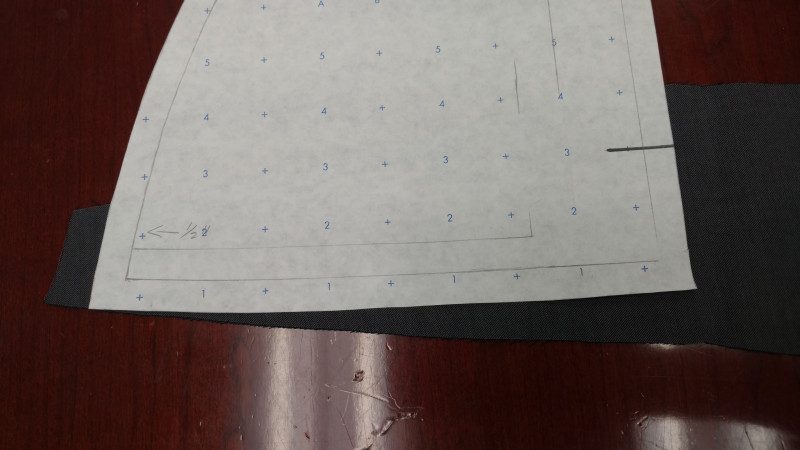
Using each of your body pieces (front, back, side front, side back), trace the bottom edge and 2″ up on your interfacing. Use a ruler to mark and cut a 2″ strip for each hem facing. Press them onto the wrong side of your suiting scraps and cut out.
If you cut out the interfacing first, you can use it as a template.
Sew together as per first method.
Basic Construction
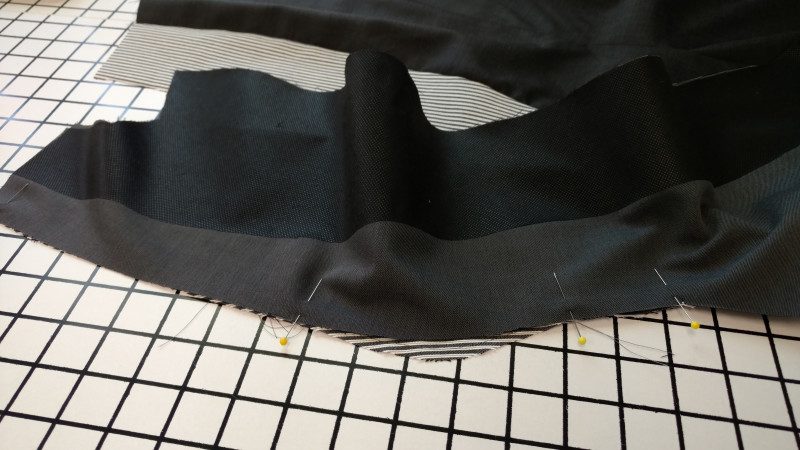
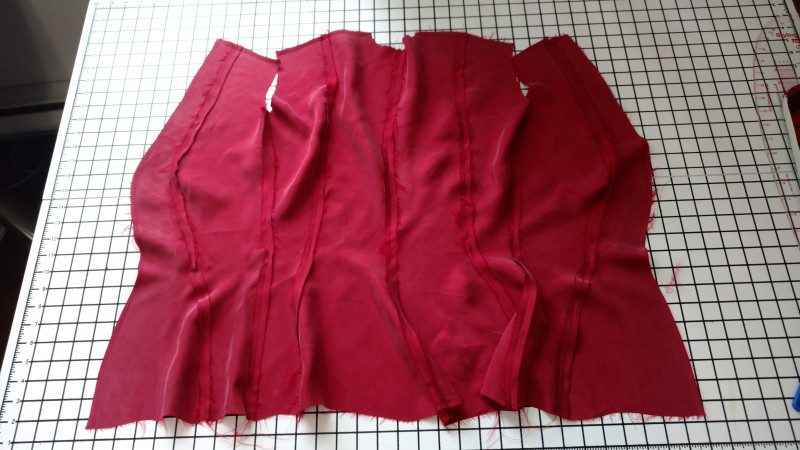
Sew body together, starting with the center back seam and working your way toward the front. Gather and stretch curves so that they lie smoothly.
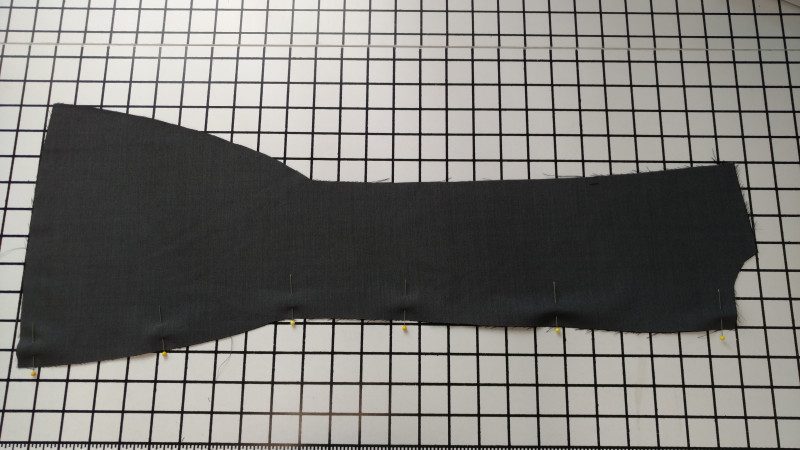
Center back seam, pinned. Press the pieces before sewing them, and baste the curved seams in the hip area.
For a curved seam to work, the seam allowance on one side will be longer than the seam itself, and the other side’s seam allowance will often be shorter.
Gathering the longer seam allowance down slightly won’t form folds beyond the seam.
But it will allow the two sides to sew together smoothly.
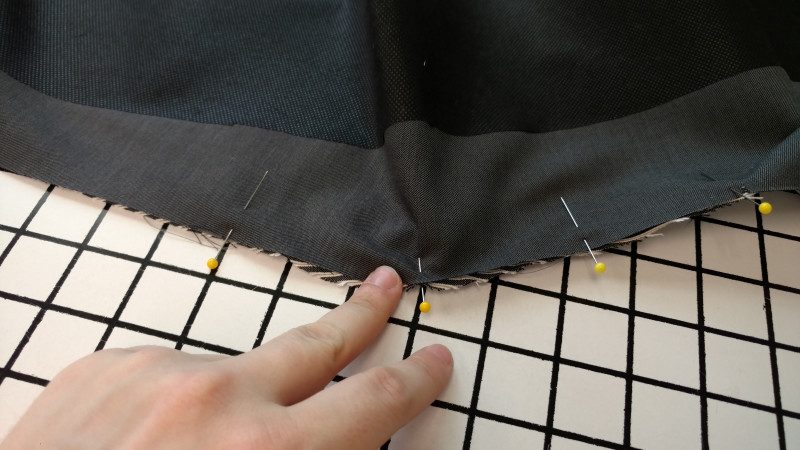
Press all seams, using a tailor’s ham on curved areas.

The tailor’s ham supports the curve of the blazer while it is pressed.
Gather the basting on convex curves to shrink the seam allowance, which will make it lie flat while you press it.
The basting thread is gathered slightly when pressing the seam. This shrinks the fabric where it is basted.
Pin this seam on the model when you do the mock-up.
Sew the shoulder seams last, matching the side-front and side back seams. Press them open afterwards.You don’t need to finish these seams unless your fabric is particularly fray-prone, since the raw edges will be covered by the lining.
When you’re pressing your seam allowance, try to avoid clipping corners and curves if possible– you can use a steam iron and a bit of force to stretch the seam allowance, but cutting cloth weakens it, especially at stress points like the waistline. If you do have to clip a corner, always leave as much unclipped as possible. You can always cut more later if you need to.
Stretching seam allowance instead of clipping it makes for a stronger seam at stress points like the waistline.
If clipping is unavoidable, try to keep the cuts small.
Gathering controls the extra fullness in the seam allowance on convex curves, making notches unnecessary.
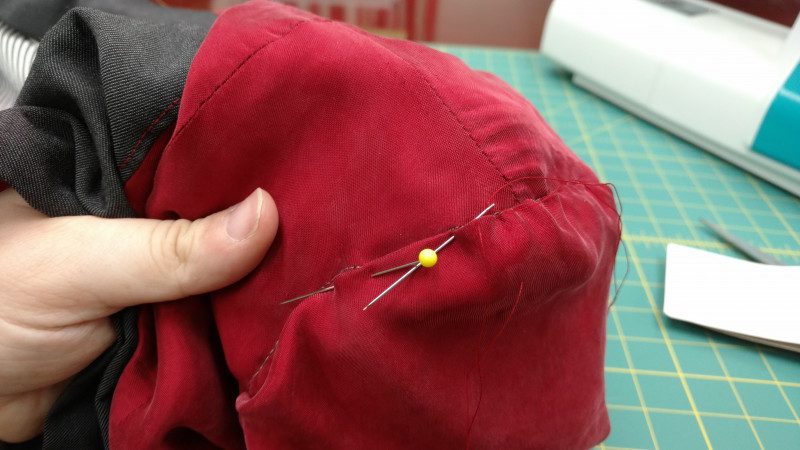
Sew the shoulder seams, matching the side-front and side-back seams. Press them open when you are done.
Pin the seams first to make sure they match. It’s fine if there’s a little bit of extra fabric on the ends, as long as it’s less than 1/2″.
This is a good time to try it on, to double-check the fit of the chest, waist, hips, and shoulders. Taking a bit of time to gloat is also important, especially when making something complicated.
Collar and Neck edge
Mark 1/2″ seam allowance along the front of the neck edge and the collar.
Extend the lines so you define the corners.
If your chalk isn’t sharp enough to get an accurate line, hold the ruler at 1/16″ smaller than the measurement you need to mark.
Clip the corners on the neck edge, but don’t cut through your marked seam allowance line.
This area isn’t a stress point the way the waistline is, so clipping isn’t as much of an issue.
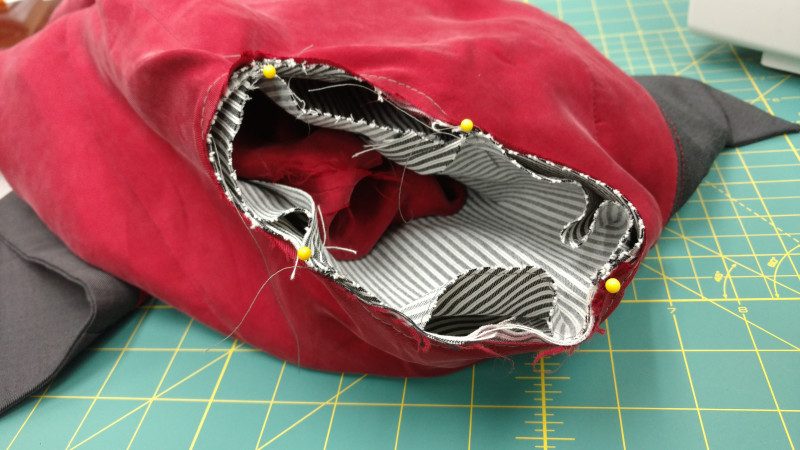
Pin through the corresponding points to match the inner two corners on the collar and neck edge. Go in at one point and out at the other, just below the end of the corner clips. Don’t worry about it not lying smoothly– it will once it is sewn.
The pin goes in at one point and out at the other to make sure they’re lined up.
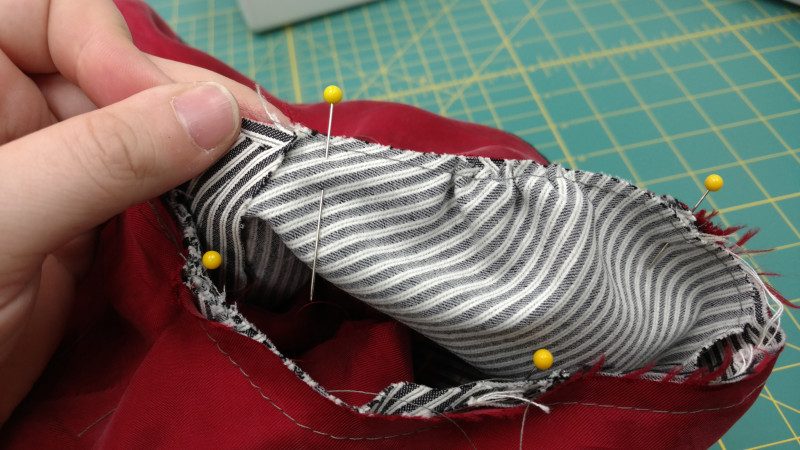
Pin the rest of the neckline, gathering neck edge and stretching collar as needed.
Pin the rest of the collar, easing everything to fit.
Sew seam, pivoting at the corners. To pivot, stop sewing with the needle down at the corner, raise the presser foot, and rotate the fabric around to re-align it. You will need to move the extra fabric out of the way on the coat side of the seam when you do this, so sew this seam with the collar facing down.
Lining
Like many lining materials, cupro has a lot of drape. It can be tricky to work with because it shifts easily. Cutting it with a rotary cutter and mat will keep the fabric from shifting out of alignment, and basting around each piece will help stabilize it while you are sewing. The basting stitches will also help gather the curved seam allowances where necessary.
Your lining pieces should be 1″ shorter than their corresponding outer pieces, so that the lining hem doesn’t poke out past the hem of the garment.
Sew the body pieces together along the center back seam, side-back, side, and side-front seams, in that order. Use 3/8″ seam allowance instead of 1/2″ so the lining will be slightly bigger than the fashion layer. Press open all seam allowances.
Assemble the vertical seams and press them open. Pinning and basting is crucial with lining material like cupro, which will do its best to shift out of position while you’re working with it.
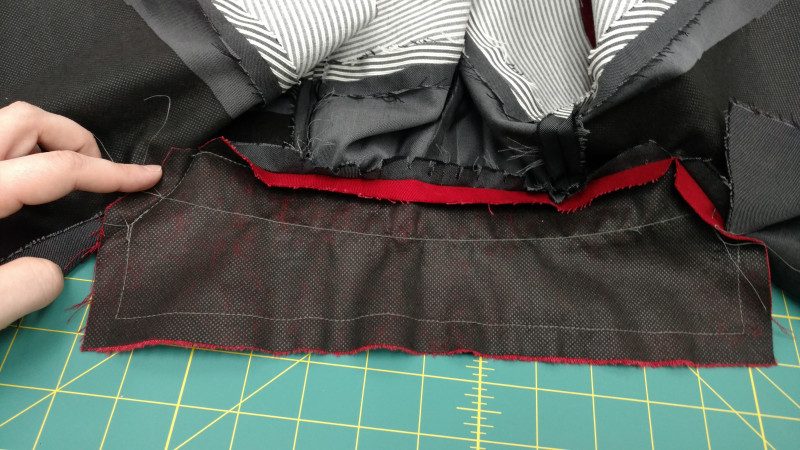
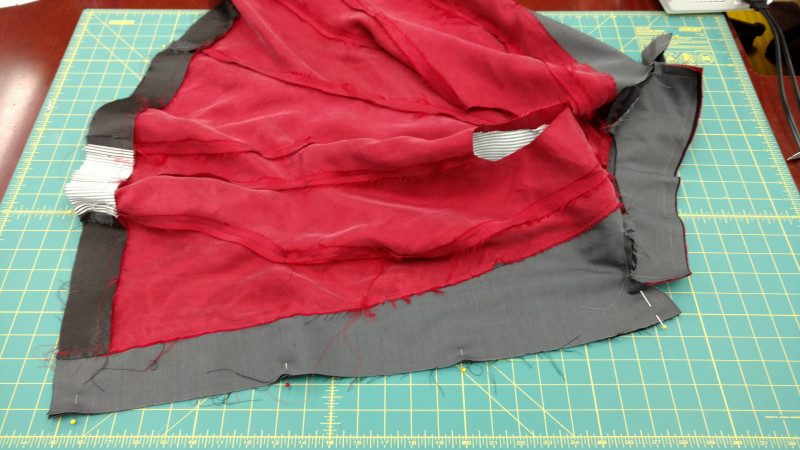
Trim the front hem facing so that it is 1/8″ shorter than the bottom edge of the front lining. Pin the concave edge of the hem facings to bottom edge of lining, matching the seams and gathering the lining as needed.
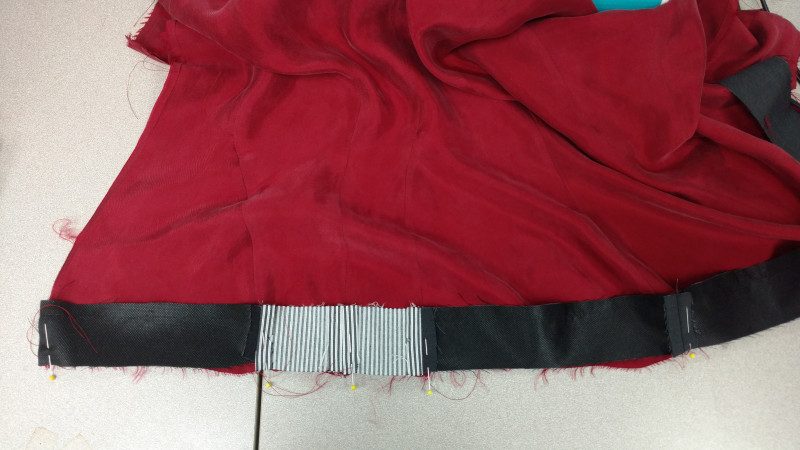
The shorter side of the hem facing gets attached to the lining. The lining will need to be gathered slightly to fit.
Sew it on, and press the seam toward the lining.
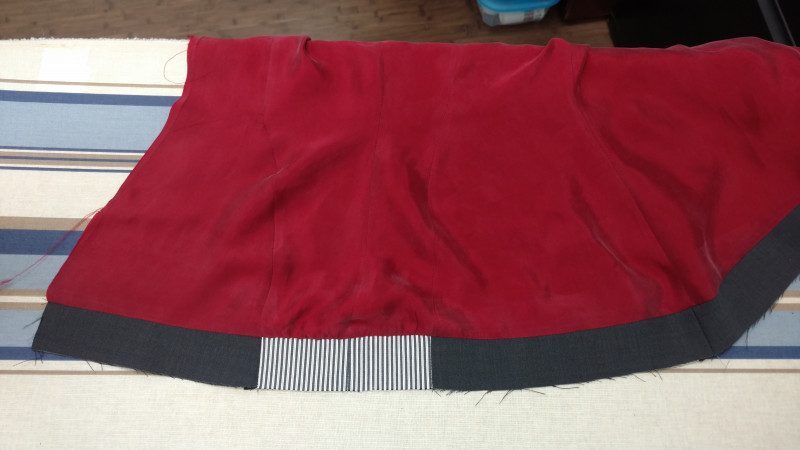
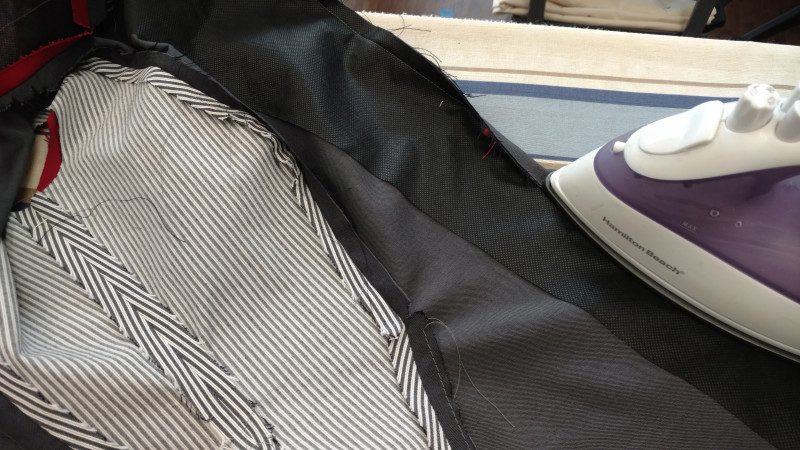
Press the lining so it is folded over the hem facing.
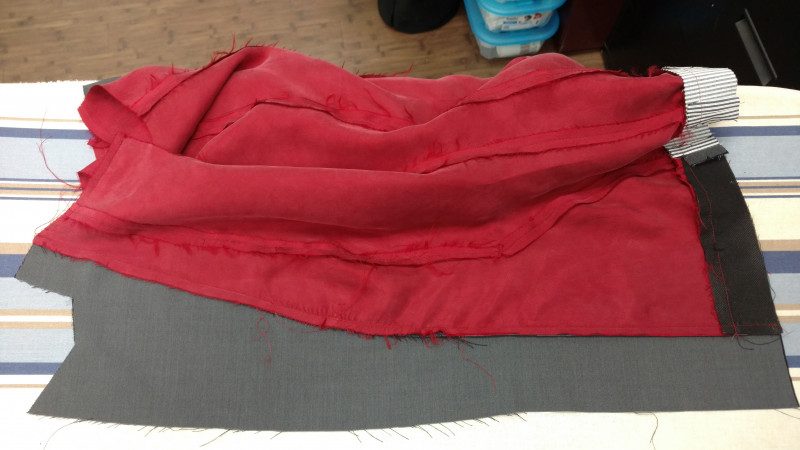
Pin front facing, gathering the curve of the lining so it fits.

Start by pinning the ends.
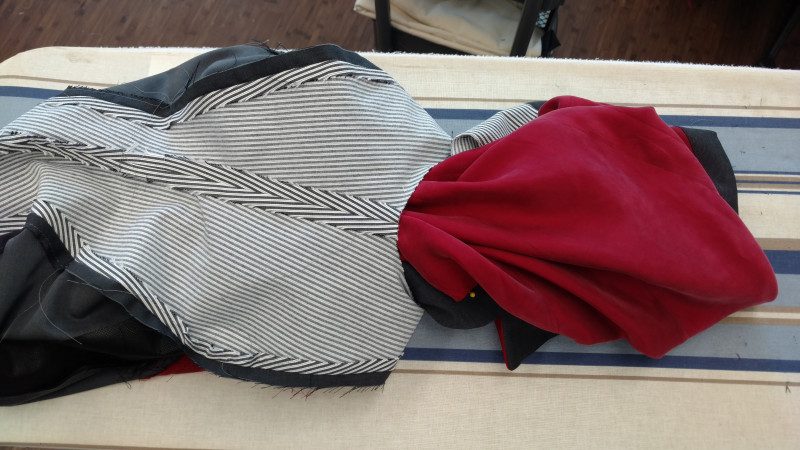
Sew seam, and press toward the facing. Topstitch 1/8″ in from the edge to keep the facing in place.
The topstitching will keep the seam lying flat.
Sew shoulder seams, matching the side-front and side-back seams. It’s okay if there’s a little extra fabric at the ends. Press open the seam.
The uneven ends will be hidden in the seam allowance at the armscye and neck edge.
Mark the seam allowance on neck edge and collar facing, and sew on the collar the same way as for the undercollar. Trim the seam allowance at the corner of the collar so it matches that of the neckline and press it open.
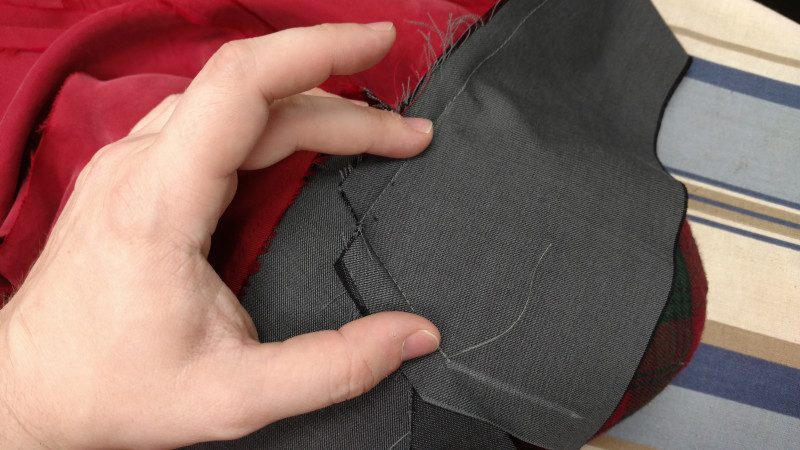
The neck edge corner makes a good template for notching the corner of the collar, since the angle is the same.
Neatly pressed, with matching edges.
Front edge
Sew collar and collar facing together.
You’re basically extending the neck edge seam on both collar and collar facing, but sewing them together instead of sewing them to the neckline.
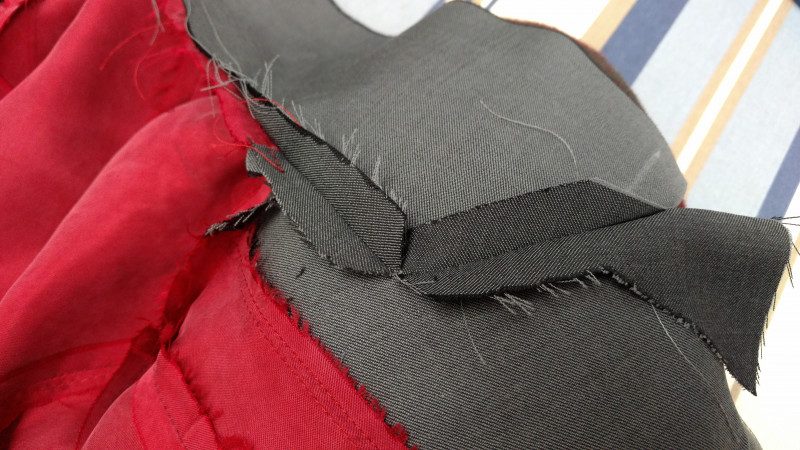
Press seam allowance, making a fold at each corner.
Folding corners instead of clipping them gives them a better shape, but is tricky to do with corners that are not right angles.
Sew carefully around front edge and hem, matching seams and corners.
Start at the neck edge, go around the lapels, down the front, across the hem, and back up the other side to the neck edge.
Press seam allowance toward the fashion layer on the front edge, folding the corners at the front hem. Clip the top of the lapels, since the corners are too small to fold without becoming bulky, and make a small clip where the front edge curves above the button. Press the seam toward the lining along the bottom hem.
Pressing the seam allowance now will define the edge once it is turned right side out, and save you some fussing later.
Now, turn the entire blazer right side out through the armscyes. Use a pencil, knitting needle, or other blunt poking tool to finish turning the lapels.
Turning things right side out always seems like a magic trick– weird, slightly nerve-wracking, and satisfying once it’s over with.
Press edges. The hem facings and partway up the front should be rolled under slightly so they don’t show from the right side. Do the opposite on the lapels and the collar.
Pressing the seam allowance before turning the blazer right side out makes this step much easier and tidier.
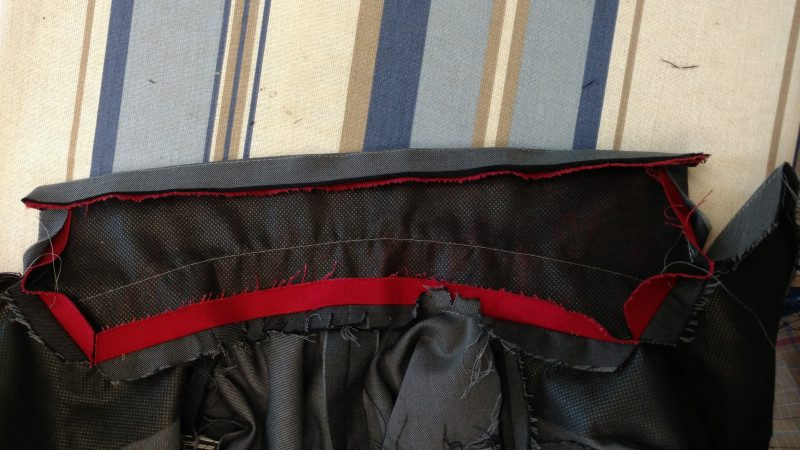
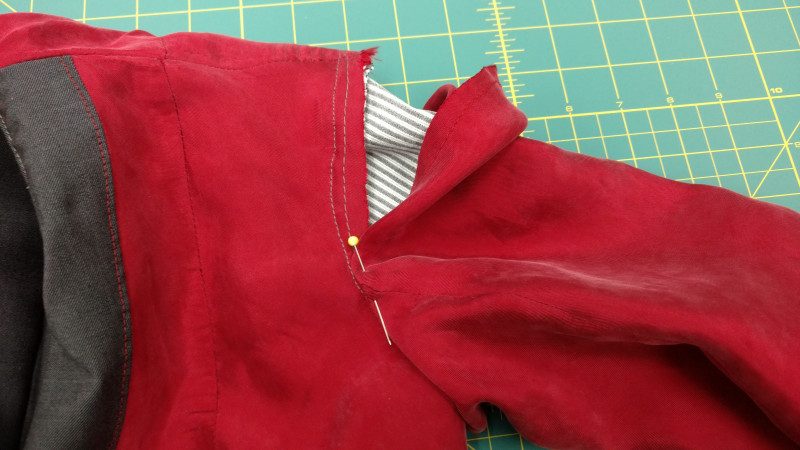
The top button goes at the spot where the facing starts to peek out.
Line up neck edge seams and pin in place, then stitch in the ditch along neck edge.

Stitching in the ditch will keep the neck edge seams on the lining and fashion layer aligned.
Put in shoulder pads, if desired, by tacking them to the shoulder seam allowance and along the armscye.
Baste lining and fashion layer together at armscye. If you’re using shoulder pads, you may want to do this by hand for better control.
Give everything a final press, and if you’d like, topstitch the edges with either matching or contrast thread. I left them plain here.
Sleeves
Optional: Cut 2″ strip of interfacing using bottom of sleeve patterns as a template. Press in place.
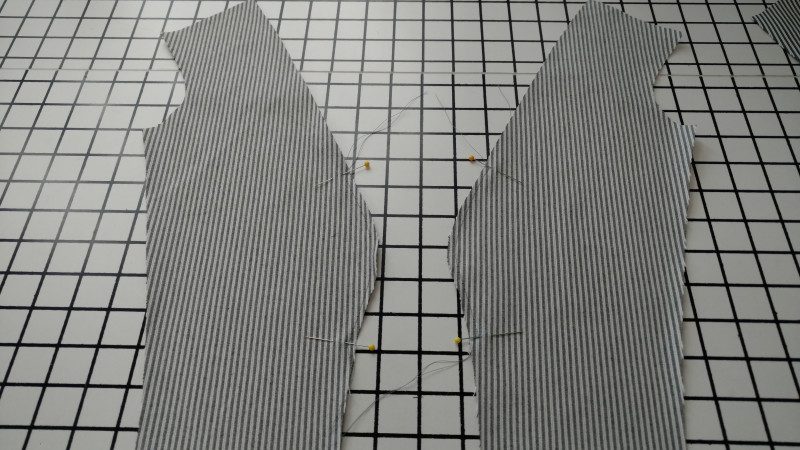
Sew long sides of sleeve and undersleeve together on both the fashion layer and the lining. Use 1/2″ seam allowance on the fashion layer and 1/4″ to 3/8″ on the lining.
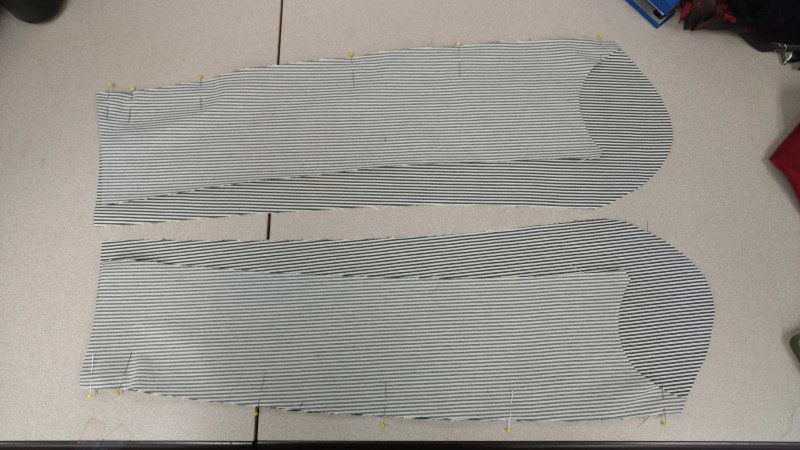
Pinning both sleeves at the same time will help make sure you don’t make two identical sleeves. We’ve all done it.
Press seams open using sleeve form. This is a good time to baste around the top of the sleeve head. Don’t clip the corner at the end– it’ll help the hem fold correctly.
A sleeve form lets you press a tube without creasing it. Very handy.
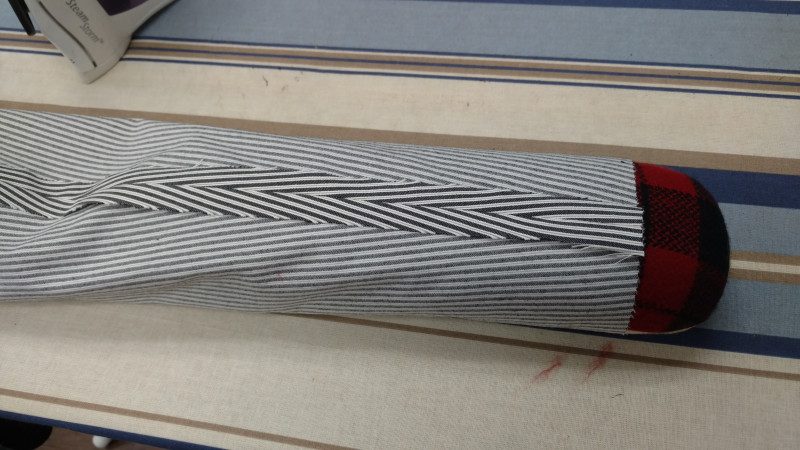
Put the right side out fashion layer inside the inside out lining, and sew the fashion layer and the lining together at wrist end of sleeve, matching the seams and stretching/gathering as needed to fit.
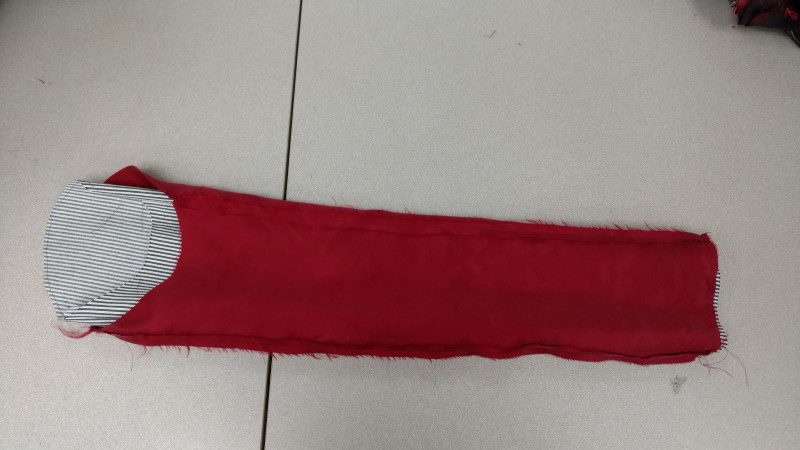
The lining will be shorter and wider at this point.
Press seam toward lining using the sleeve form.
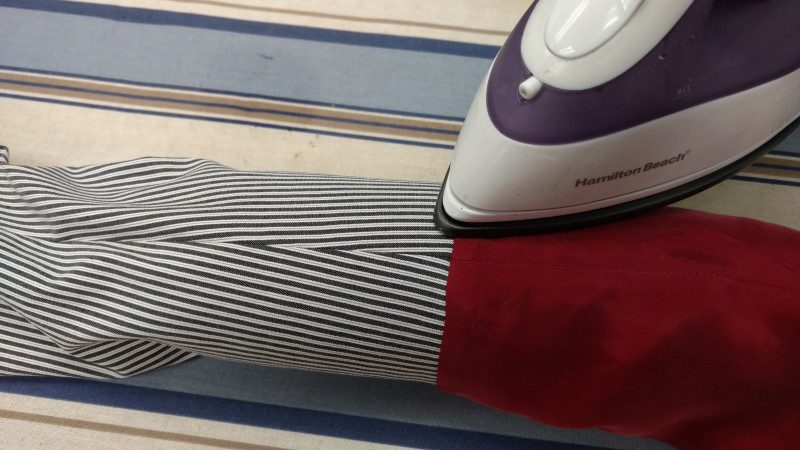
It’s okay if the lining is slightly folded over the seam.
Pull the fashion layer into the lining, leaving 1″ to act as a facing. Press with the sleeve form.
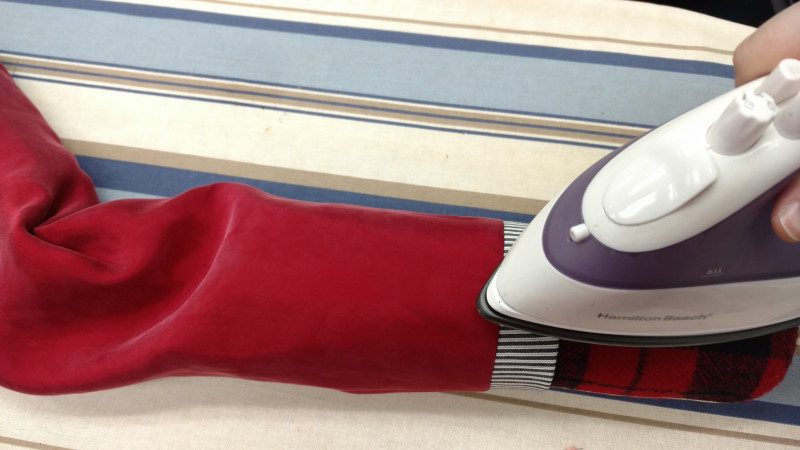
The unclipped corner from earlier will help the hem fold at the right spot.
Pin or baste the lining and fashion layer together about 1-2″ down from the armscye. The lining will be bigger than the fashion layer.
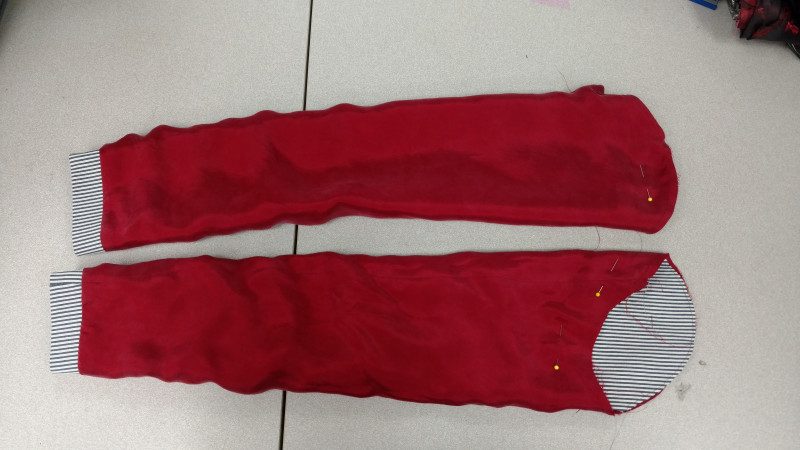
Lining fabric is less durable than shell fabric, so making the lining loose keeps it from wearing out from strain. It also provides some give, which lets the wearer take advantage of the stretch suiting.
Keeping the lining out of the way, match the highest point of the sleeve head with the highest point of the armscye, and the lowest point of the sleeve head with the lowest point of the armscye. The seams will not be aligned.
The bottom of the armscye curve should match the bottom of the sleeve head. The top of the sleeve head will be bigger.
Pull basting stitches to gather sleevehead into armscye, then sew.
These gathers will be hidden in the seam allowance, so make sure they’re evenly distributed.
Turn under 1/2″ around top of sleeve lining, and pin in place over the seam, gathering as needed with basting stitches.
Since the lining is bigger than the sleeve, you will need to gather this quite a bit.
Fell the sleeve lining in place over the seam by hand, making sure stitches don’t show on the right side.
Use plenty of pins. Your stitches can be as much as 1/4″ apart.
Button and Buttonhole
Sew buttons to the wearer’s right side, just below the point where the front facing begins to show along the edge.
For the buttonhole, you can either use a keyhole buttonhole setting on your machine, or do it by hand.
I’d love to see what this looks like in different colour/texture combos!

14 comments
When I downloaded the pattern on June 15 the link gave me the previous pattern which I already had. Has the link to the blazer been corrected yet? There was no LEAVE A COMMENT posted on June 15. Thanks again for your free patterns. I am loving them.
It should be all fixed now! 🙂
Thank you for the pattern! I love the blazer, however when I printed the pattern pages 5 & 6 of the patten were not there.
Sorry about that! It should be all fixed now and you should be able to re-download. 🙂
I can’t download it 🙁 keep getting this message “Error reading the response: SyntaxError: Unexpected token S in JSON at position 0”. It happens with both this pattern and the Kalimeris Moto. All the others I tried work for me! Is there a way to fix it or send me those two patterns? Thanks! 😀
Sorry for the inconvenience! The issue should be fixed now, but please let me know if it still gives you any trouble.
First off I want to say thank you so much for the awesome pattern! It’s my first actual sew from just fabric so I’m still getting the hang of it. This pattern has made it so easy to copy. I decided to not add 2 diff color fabrics and go with just lining and shell fabric. I’m still a huge beginner. This is what I’ve gotten so far in a days work. It’s not for me it’s for my GF hope she likes it when I’m done. Next project will be matching slacks or a shirt. Thank once again you have no idea how much this site has helped me learn and continue to. You guys are awesome! Btw
This looks amazing! Such lovely lines for a blazer. Do you think this would work with a knit like scuba for the whole thing ?
Hi Michele – a scuba knit would look awesome! We actually used one for another of our suiting patterns, The Blackberry, and it looked awesome!
I made up the Rosemary blazer in one colour and teamed with a longer pencil skirt. It looks fantastic very retro 1950s
I live that its size inclusive as well
Everyone loves it, so will be making more
Hi,
Thanks for the free pattern, I actually couldn’t find any other pattern that fits exactly my vision of the perfect blazer! However I am confused about the collar, the picture don’t show really well how to assemble it, also the piece called “the back neck facing” doesn’t appear in any step, any chance you could enlighten me on that too? I would realllly appreciate it, I can’t find any other pattern that I like..
Hello there!
Thanks for visiting the Mood Sewciety Blog! We’re proud to have released over 350 free sewing patterns, and we hope you’re enjoying them.
Behind the scenes we’re a dedicated team of three, and we want to be able to offer top notch support. We have exciting plans for our patterns on the horizon, and as we continue to grow, we’ve decided to focus our sewist support on patterns from the last 2 years. If this pattern hasn’t been recently reduxed or updated, we won’t be able to respond to technical questions on these older posts.
If you come across any pattern errors, rest assured our team is on it – just let us know!
Don’t miss out on our Mood Sewciety Facebook Group – a fantastic space for fellow sewists to connect, share wins, and tackle challenges together.
Thank you for your understanding and happy sewing!
What type/country sizing is this pattern? I’m normally UK 10-12 (6-8 US) but my measurements say I should make a size 14-16 using this pattern and sizing guide. Is it a small-fitting pattern? What is the easement?
Hello Amy, this patten is based on US sizing and it is different from UK sizing. If you are not able to find an accurate conversion, you can send us your measurements and we will gladly help you find the right size! Since this pattern is made for a tailored fit, it does not have much ease and it is important to find the right size.