Bralettes. Perfect for summer, ridiculously expensive and a breeze to make. Making your own allows you to customize the fit, look, and feel of the materials in addition to giving you to option of creating coordinates. With the amount of money you spend on one bralette, you can buy the materials to make the bralette and a vast array of matching underwear to suit your fancy on any given day.
‘Sew’ lets get started!
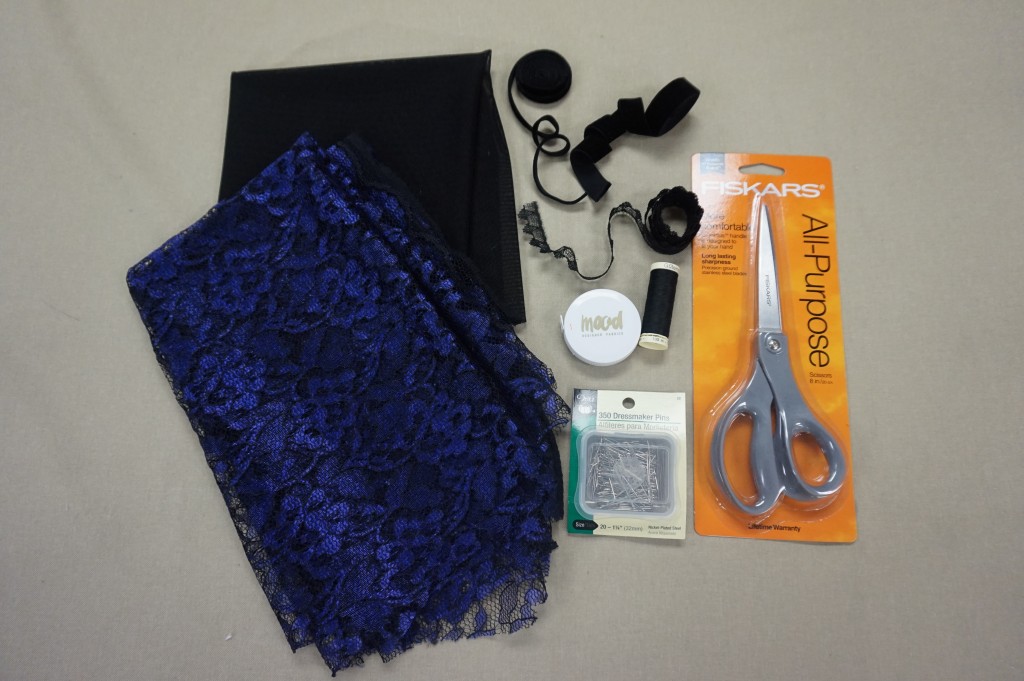
Supplies Needed
Supply List:
- 1/4 yard Lace
- 1/4 yard Power Mesh
- 1 yard 1/4″ Stretch Velvet Ribbon
- 1 yard 5/8″ Stretch Velvet Ribbon
- 1 yard Fine Lace Trim
- Coordinating Thread
- Scissors
- Dressmaker Pins
- Bralette Pattern or this one here or be brazen and create your own!
How to:
Step 1.
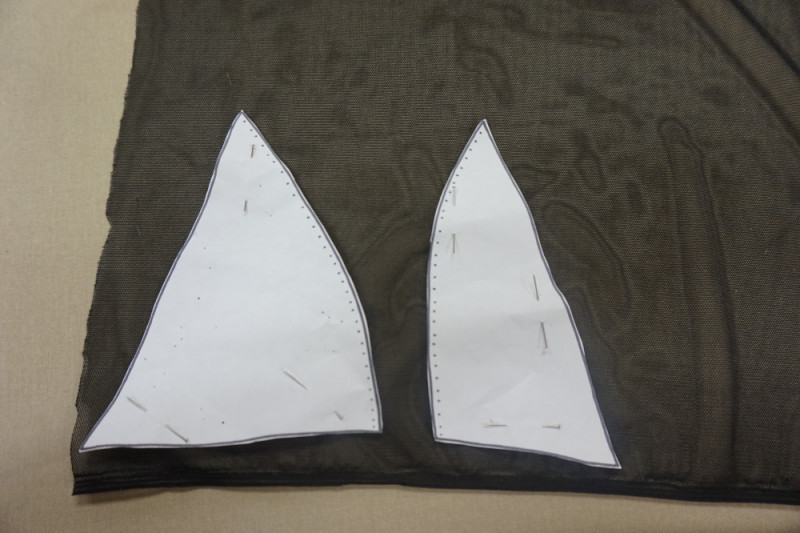
Step 1. After printing your pattern and cutting it out, pin the paper together to try for size. Once you have the correct size pattern pieces, lay them on your fabric and cut two pairs out of the power mesh as well as the lace. You will have a total of 8 pieces. NOTE: Be sure to cut both a left and right cup; this requires pinning 1 pair of patterns right side up to the face of your lace and then pinning the other pair of patterns again face down on the face of your lace . Also if you choose a lace that is not stretchy, cut your pieces on the bias to insure they have optimal stretch. I chose to line the bralette with power mesh for added support.

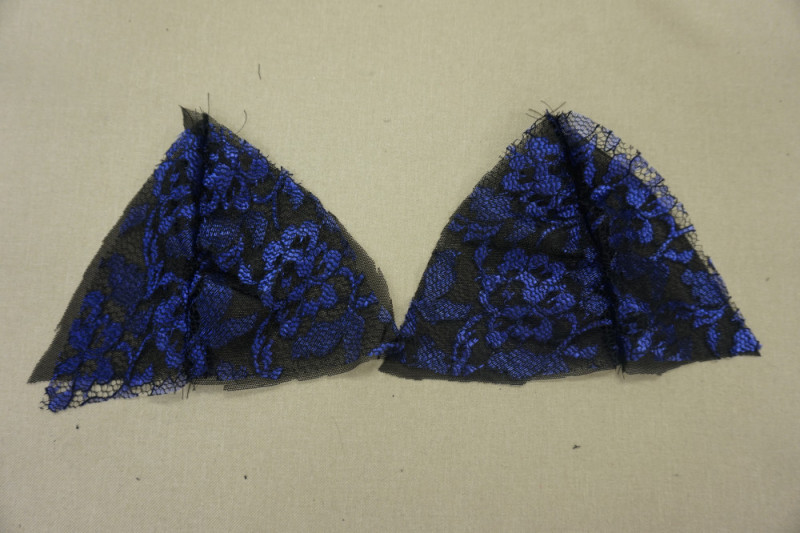
Step 2.
Step 2. I advise that you baste your face and lining pieces together for ease when sewing the cups. Also note that I accidentally cut two left cups my first time around and in my frustration forgot to re-shoot my step!
Step 3.
Step 3. Pin each of your pairs together making sure you have the correct pieces for each side and sew up the center seam.

Step 4.
Step 4. Decide how much trim is need for the edges of your cups. Place two lengths of the fine lace trim right sides together and sew them on the diagonal to create a neat V, press open.

Step 5.
Step 5. Pin the trim around each of your cups and sew.

Step 6.
Step 6. After measuring your under bust and deciding on how much 5/8″ stretch velvet ribbon you need, pin the cups side by side in the center of your waist band. The smaller triangles should be touching in the center and the seam should aline down the center of your breast. I encourage you to hold it to your body for any necessary adjustments.

Step 7.
Step 7. Pin the band right sides together and sew. After deciding how long you need your straps (somewhere around 14″), pin the 1/4″ velvet ribbon to the top of the cup as well as to the back of the band. Each strap should be joined 2.5″ from the center of the back of the band or loop the strap around the band and sew making the straps free moving.

Finished Bralette
Trim all of your fly away threads and enjoy!
1 comment
Here at Mood we offer a variety of scallop-edged laces that you can find here.
For laces in general try here.